

Configuration File Editor
The Configuration File Editor page allows you to edit UCX configuration files.
To display and edit a configuration file, perform the following steps:
- Open the UCx Web-based Configuration Utility
- From the PBX tab, select PBX Tools
- From the left side column, select Configuration File Editor
- Press the Show Filter button
- Enter a partial file name in the File field and press the Filter button (to limit the number of presented files)
- Press a link in the File Name column to open the corresponding configuration file

To end the file editing mode and return to the main page, select the << Back link.
To save changes made to the file, select the Save button.
To reload the configuration (apply configuration changes), select the Reload Configuration button. This operation does not restart the server.

Configuration File Editor Example:
Activate the Built-in mini-HTTP server for Asterisk AMI use
This example shows the editing of the manager.conf file in order to activate the Builtin miniHTTP server that can be used in conjunction with the Asterisk AMI interface. The actual configuration settings to use the interface are managed in the PBX / Settings / Advanced Settings page which are described in Advanced Settings (6.0). However, in order to use the miniHTTP server it must be activated by editing the manager.conf file.
- Navigate to the PBX / PBX Tools page, select Configuration File Editor from the left-hand menu, click on Show Filter (steps 1 through 4 from above)
- Enter manager.conf in the Filter field and click Filter
- Click on manager.conf in the results list.
-
Enter the text webenabled = yes at the bottom of the [general] section of the file.
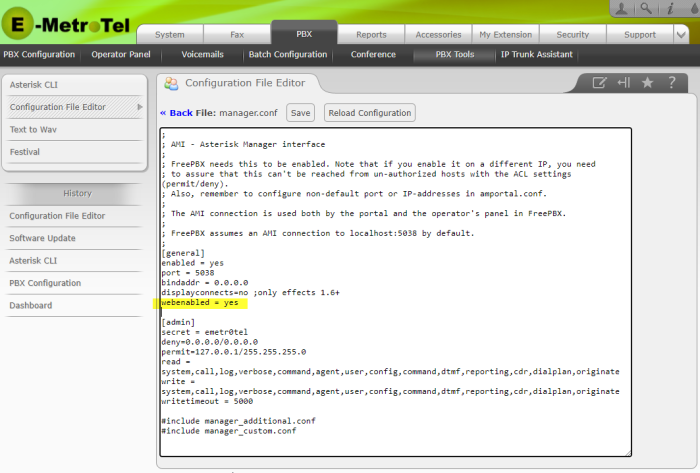
- Click Save
- Click Reload Configuration
