

4.0 Reimaging using the UCX R7 Imager
Section Contents
4.1 Galaxy Mini using the Front Panel RST button and RUN LED
4.2 Galaxy 250 using the Front Panel LCD Display and Menu Keys
4.3 Galaxy Mini, 250, 2930, i5, 450, 1000, 3000 using SSH
4.4 Galaxy 250, 2930, i5, 450, 1000, 3000 using Keyboard and Monitor
4.5 Updates Requiring changes in the appliance BIOS
4.2 Galaxy 250 using the Front Panel LCD Display and Menu Keys
4.3 Galaxy Mini, 250, 2930, i5, 450, 1000, 3000 using SSH
4.4 Galaxy 250, 2930, i5, 450, 1000, 3000 using Keyboard and Monitor
4.5 Updates Requiring changes in the appliance BIOS
4.5.1 Configuring the BIOS Boot Options on Galaxy hardware (when required)
4.5.2 Updating the UCX 250 BIOS (when required)
4.5.2 Updating the UCX 250 BIOS (when required)
4.0 Reimaging UCX 6.0 or UCX 5.0 systems with the UCX Imager Tool
4.1 Galaxy Mini using the Front Panel RST button and RUN LED
4.1.1 UCX Imager Operation Selection
On a Galaxy Mini system the operational modes are selected by the number of short (about a half second) presses of the red RST button on the front panel of the device. The modes are as follows:
| Consecutive Presses | Mode | Use Case |
|---|---|---|
| One | Shutdown | In case you need to abort after booting from the Imaging Tool |
| Three | Reimage to R7 | Updates while retaining non-telephony configuration data |
| Five | Factory Reset | Updates without retaining any data |
4.1.2 UCX Imager and Release 7.0 LED Status Indicators
| PWR LED | RUN LED | ||
|---|---|---|---|
| System State | On | Off | |
| UCX 7.0 Imager Startup | Steady | 1 sec | 1 sec |
| UCX 7.0 Imager Ready | Steady | Flicker | 2 sec |
| UCX 7.0 Imager Processing | Steady | <0.5 sec | <0.5 sec |
| UCX 7.0 Imager Complete | Steady | Steady | |
| UCX 7.0 System Startup | Steady | 1 sec | 1 sec |
| UCX 7.0 System Operational | Steady | Steady | |
4.1.3 Performing the Reimage to R7
After completing the steps identified in Preparing for the Update you are ready to reimage your system to UCX 7.0.
- Power down the UCX 6.0 system by pressing the RST button once for one second
- Wait four 4 beeps to indicate the system has completed shutdown.
- Insert your UCX Imager USB into the Galaxy Mini front USB port.
- Disconnect the power from the system for approximately 10 seconds and then re-connect the power to the system.
- Once the startup process completes, the system will beep once and the RUN LED will go into Flicker mode ;(about two seconds OFF followed by a very short ON).
- After the system has entered Flicker mode, press the RST button for about 0.5 seconds three (3) consecutive times to begin the update.
- The Run LED will go into a rapid Flash mode (about a half second OFF followed by a half second ON) indicating the upgrade is in process.
- The upgrade process will take about 6 to 8 minutes to complete.
- When the upgrade completes, the system will go into shutdown mode and beep 4 times, then the RUN LED will turn off.
- At this point, remove the UCX Imager from the Galaxy Mini USB port.
- Remove the power plug from AC source from the rear of the unit for about ten seconds, and plug it back in.
- The RUN LED will Wink (about one second OFF/ one second ON) until startup is complete, at which point there will be a series of four beeps.
- If you had previously disconnected the ethernet connection to the system you must reconnect it prior to proceeding.
4.2 Galaxy 250 using the Front Panel LCD Display and Menu keys
4.2.1 UCX Imager Operation Selection using the front-panel display
- Insert your UCX Imager USB into one of the USB ports on the Galaxy 250.
- If you may have a potential IP Address conflict (see warning above) then temporarily disconnect the ethernet connector on the conflicting ethernet port of the UCX. Otherwise, proceed to the next step.
- Restart UCX from the Web-based Utility.
- The Galaxy 250 will reboot from the UCX Imager.
-
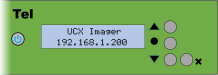
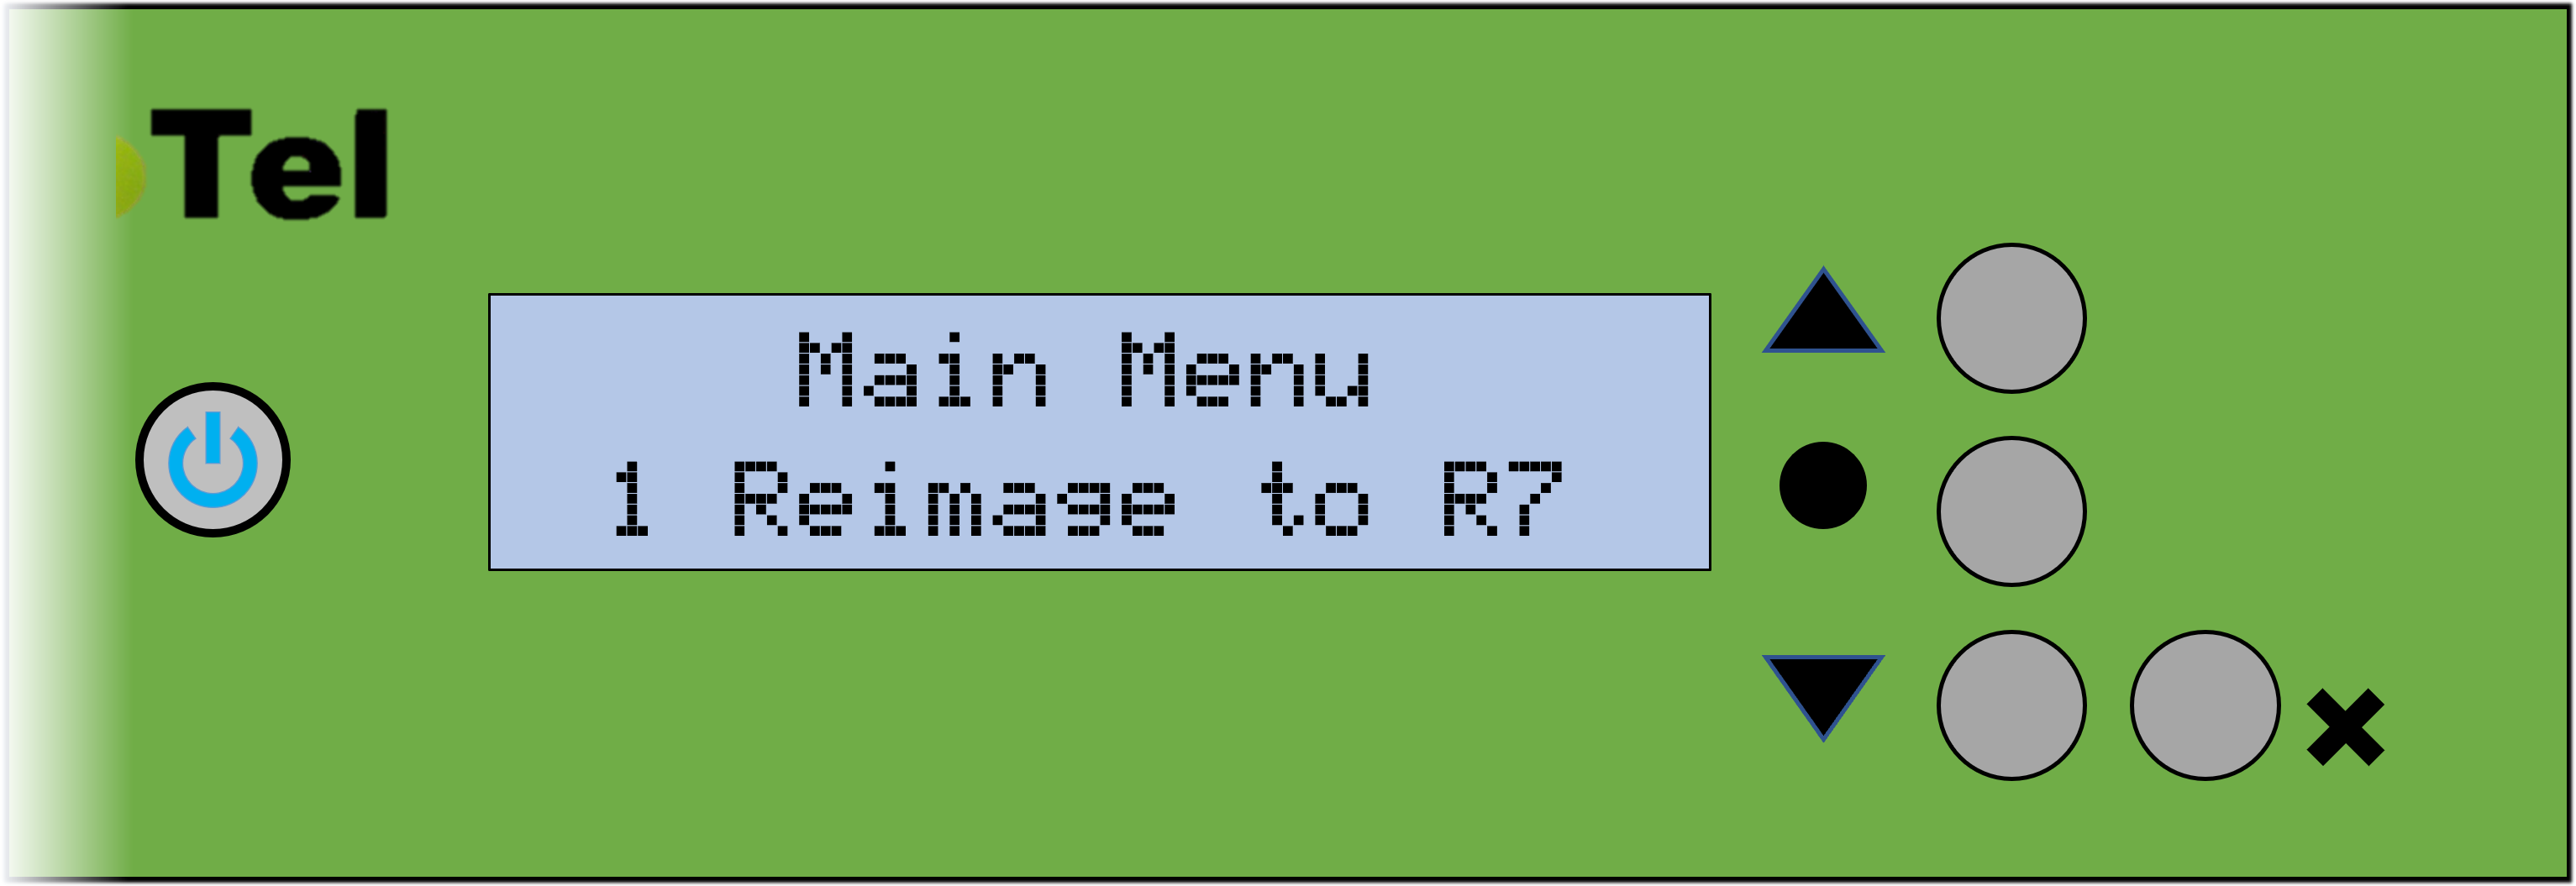
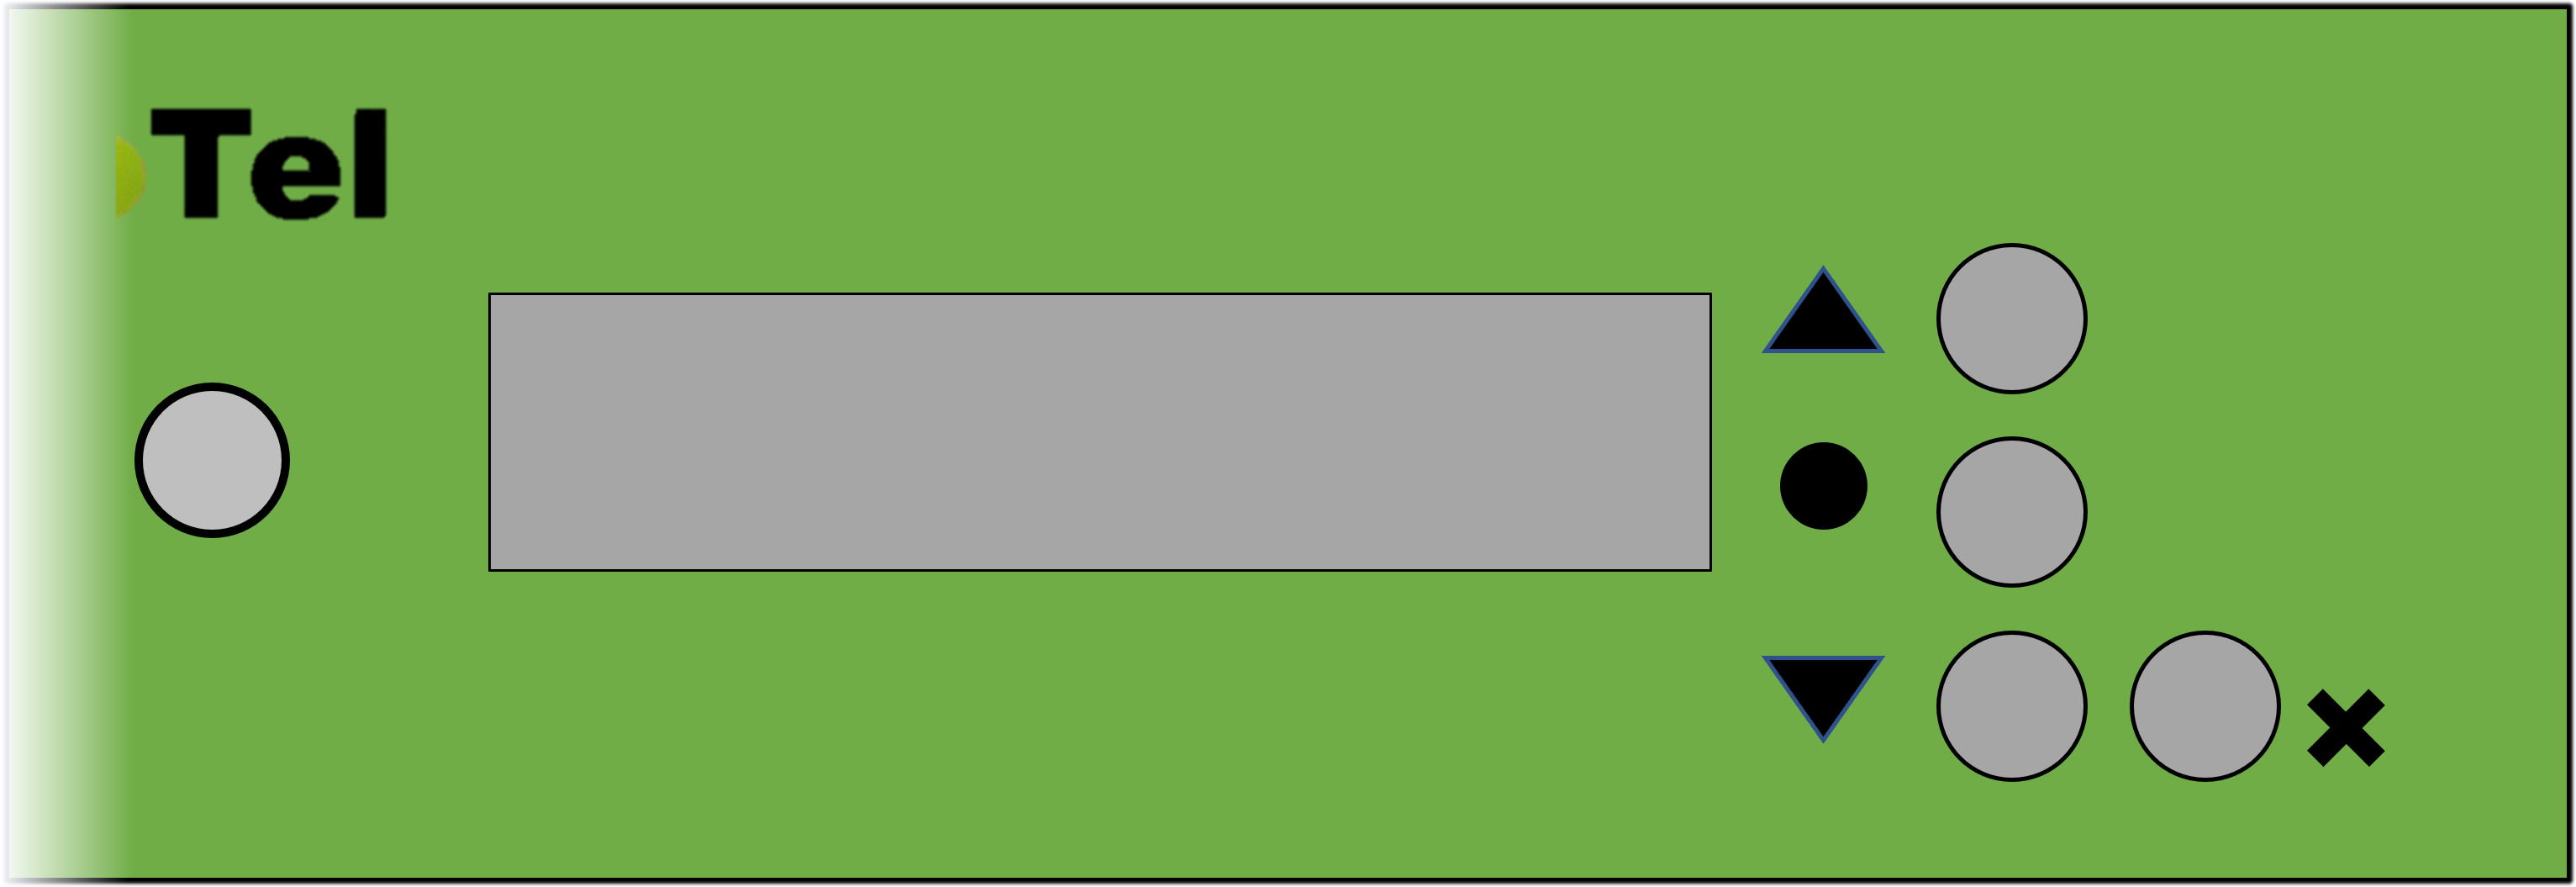
Once the startup process completes, the Galaxy 250 display panel will show the following (assuming default addressing for Ethernet 0):
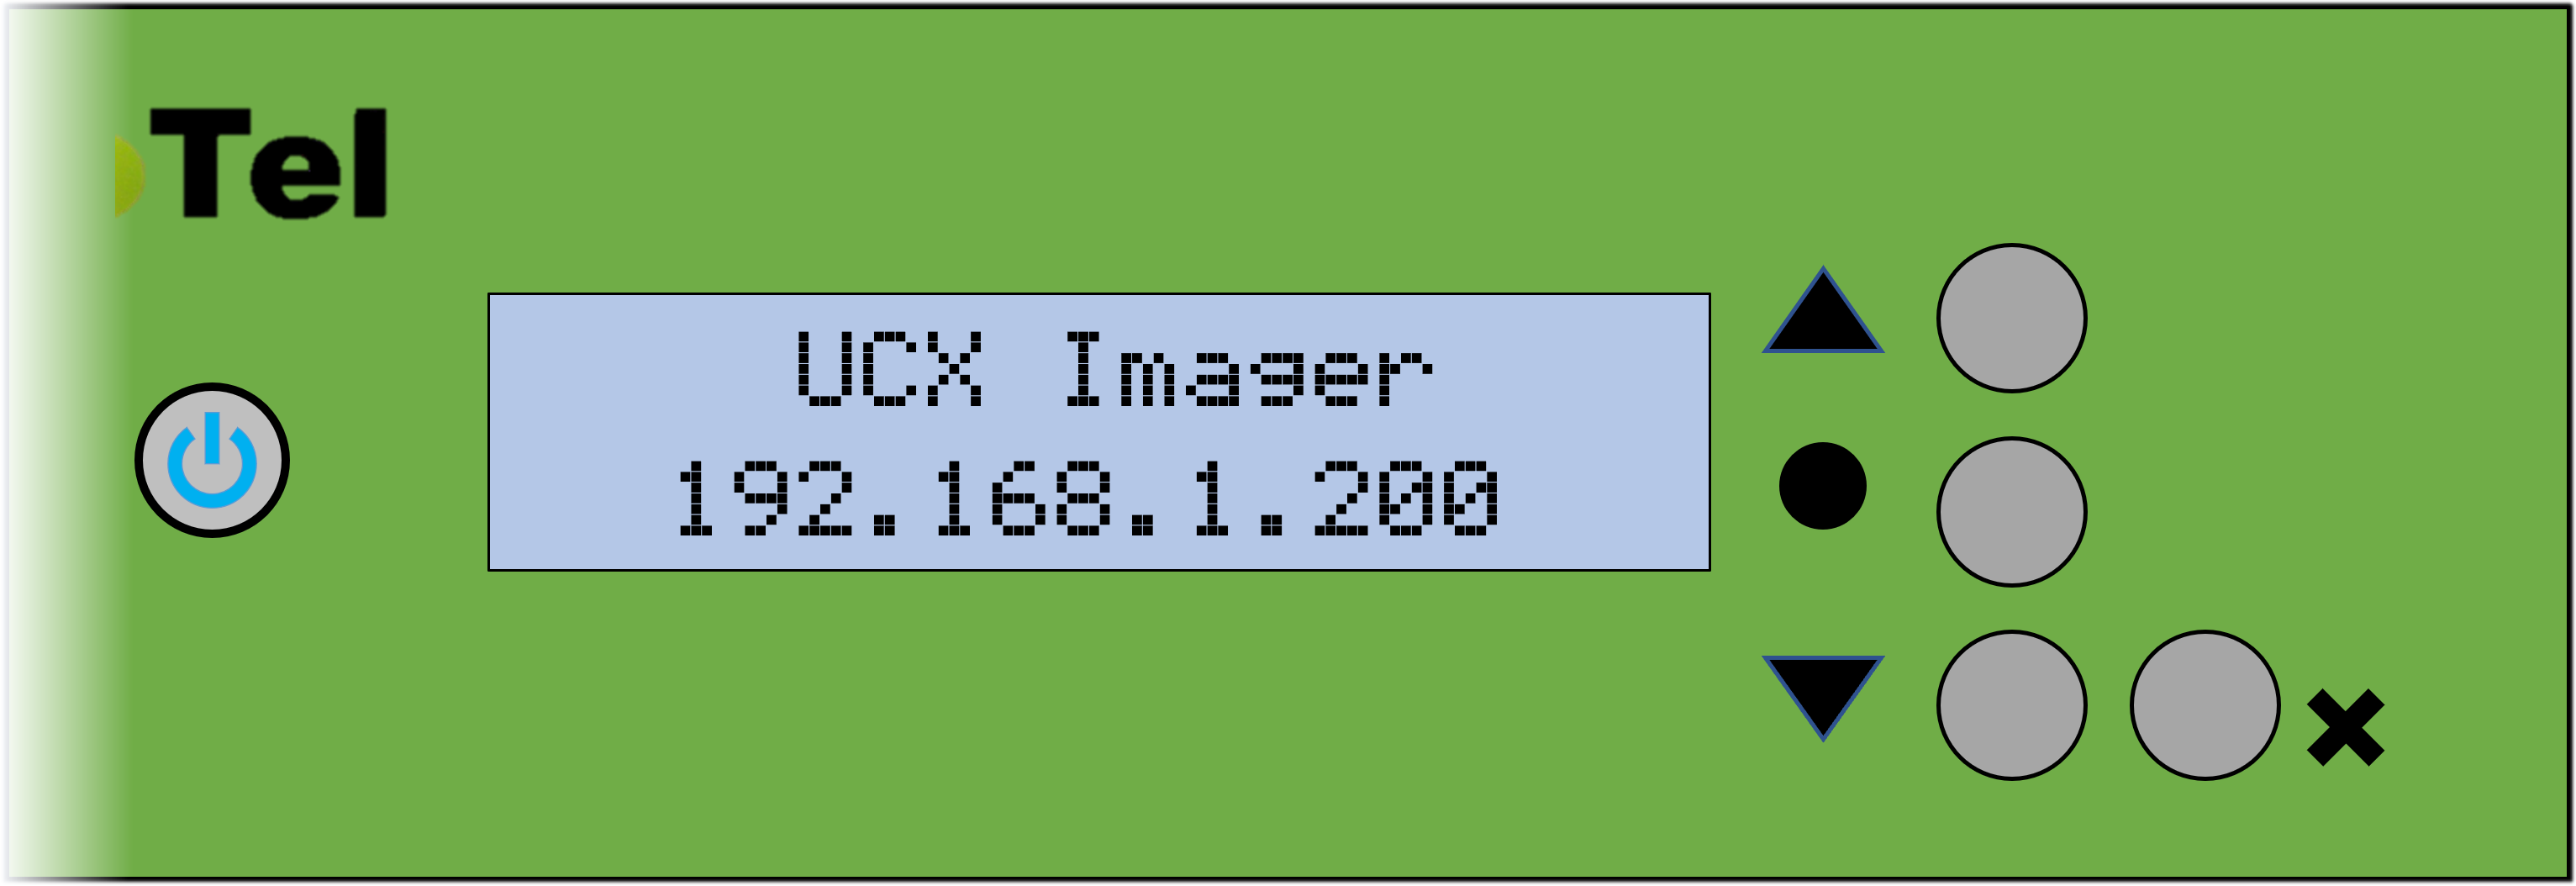
- Press the CENTER button 3 times to start the update process:
-
The first press moves to the top of the main menu:
-
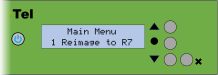
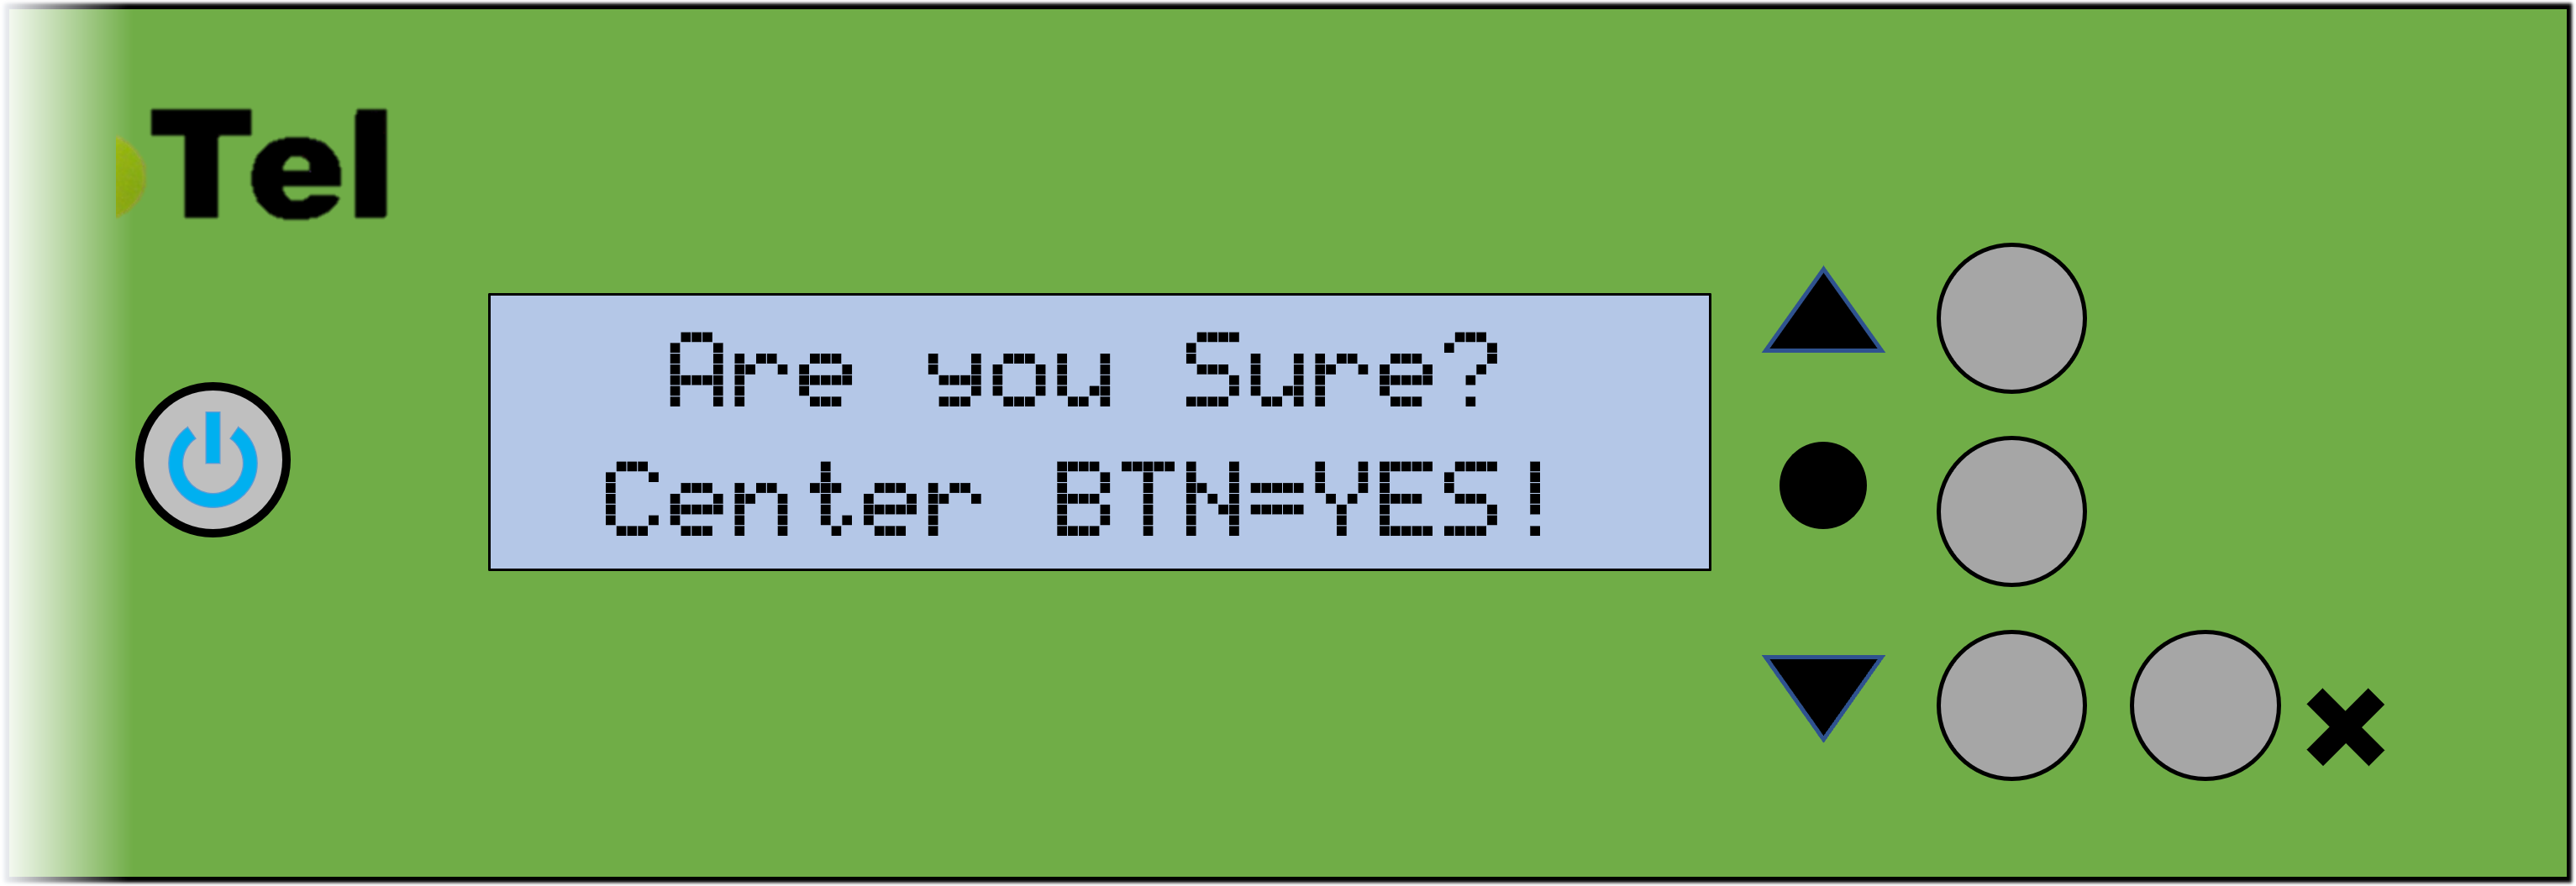
The second press selects the Reimage to R7 option and then requests a confirmation. If the center button is not pressed again within about 3 seconds, the UCX USB Remiager will return the the main screen:
-
The third press confirms theReimage to R7 option and then begins to check if the appropriate image is loaded on the UCX USB Imager:
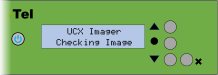

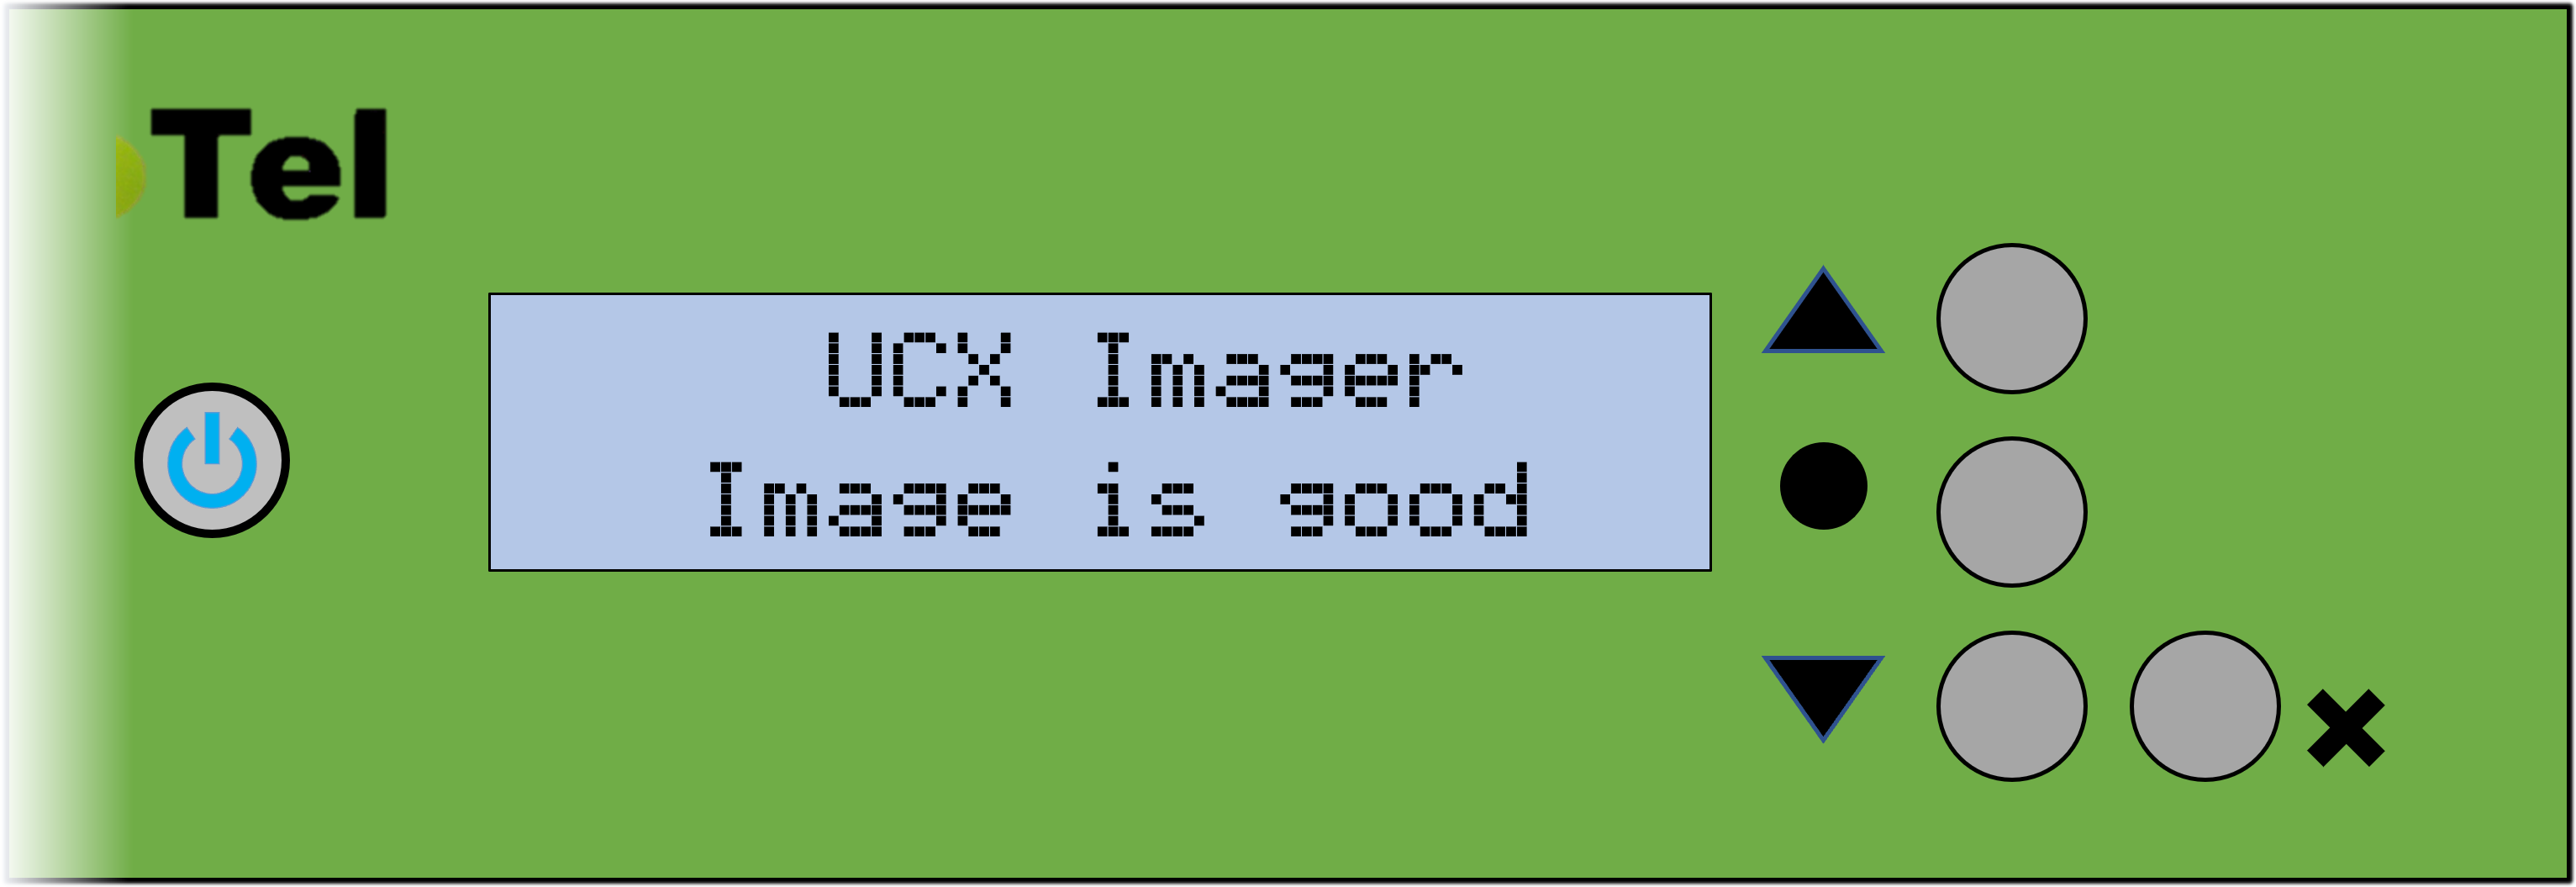
- Once the actual update process begins, you will see the following messages on the Galaxy 250 display panel:
-
Good image is confirmed:

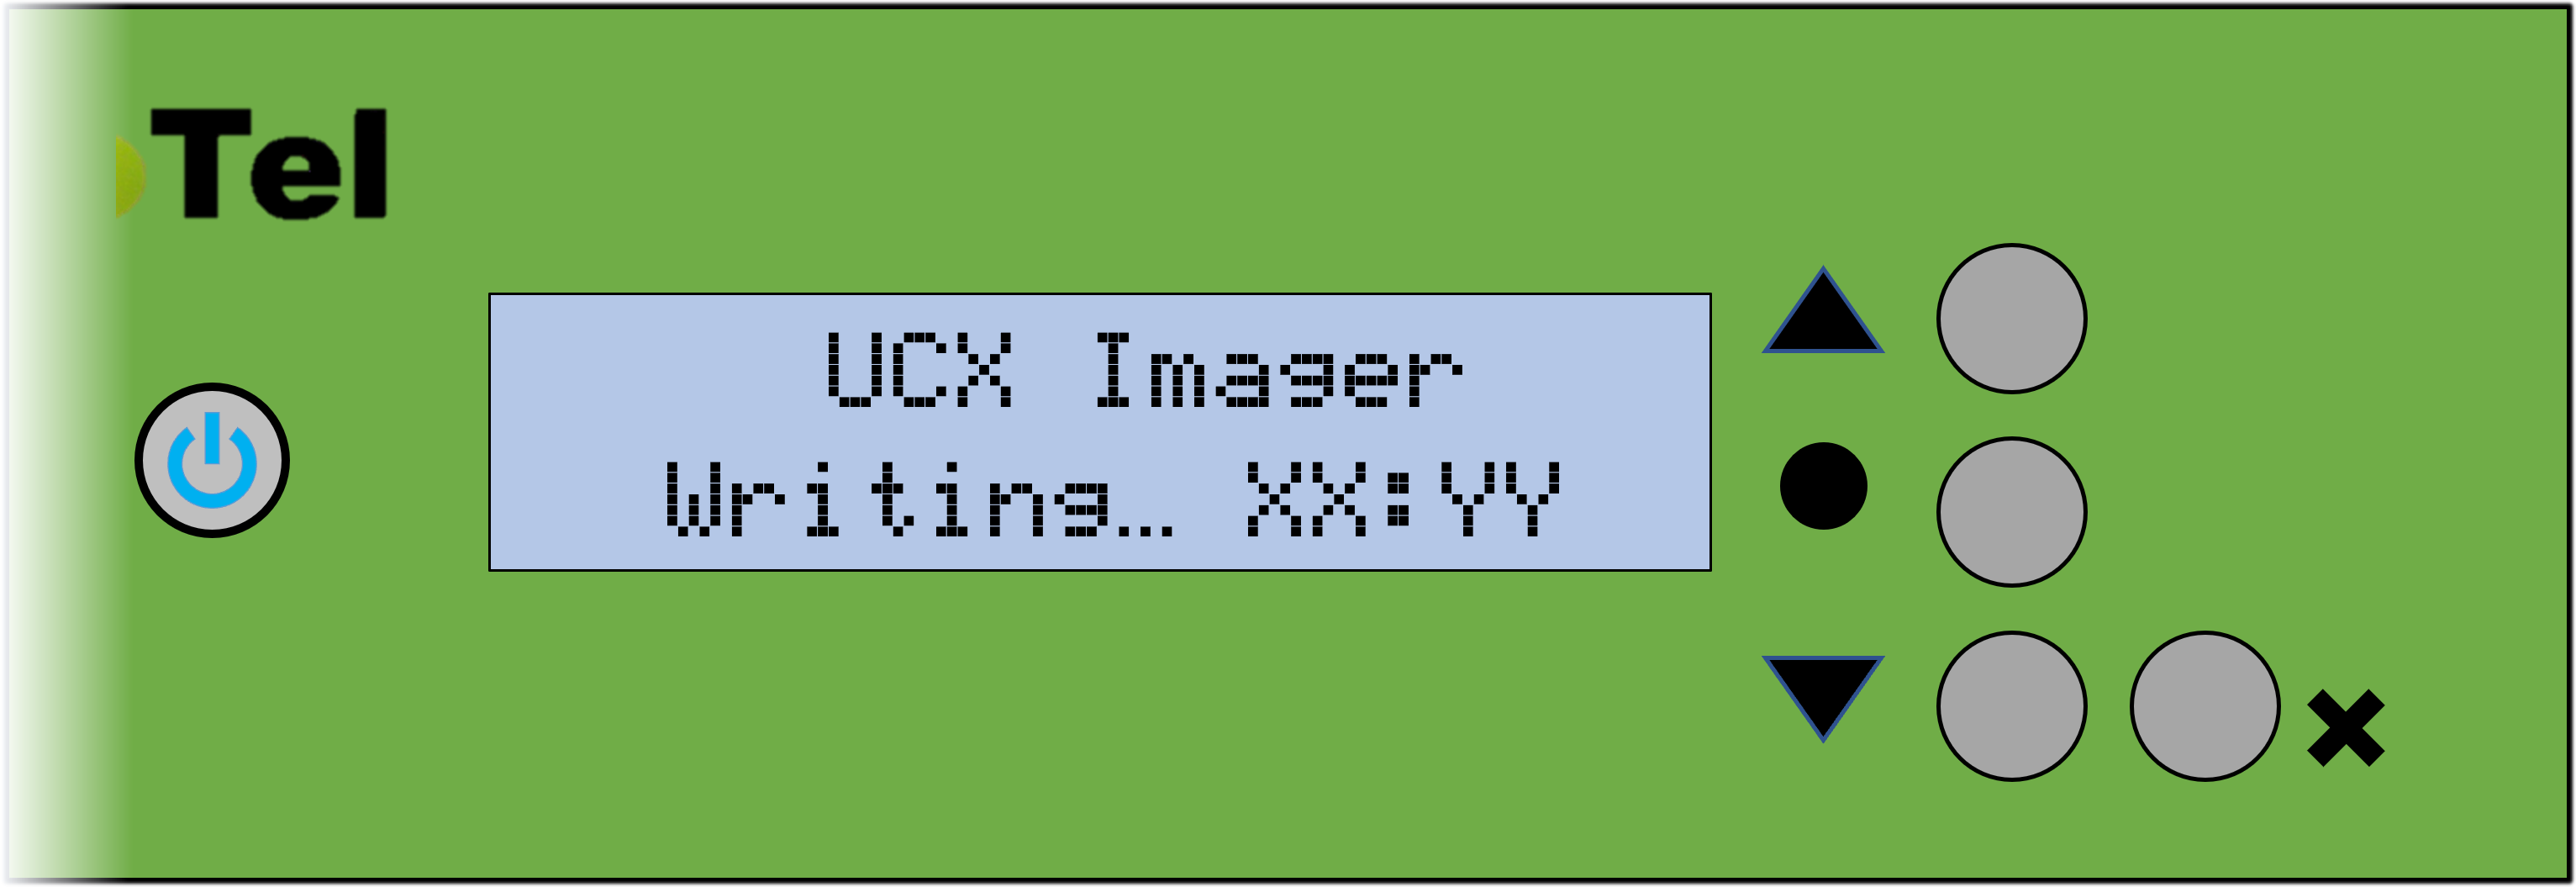
-
Imager is writing data:
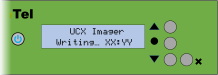
- The update process will take just over six minutes to complete.
-
When the update completes, the system will automatically shutdown.

- At this point, remove the UCX Imager from the Galaxy 250 port.
- If you had previously disconnected the ethernet connection to the system, reconnect it and proceed to power up the UCX again.
4.3 Galaxy Mini, 250, 2930, i5, 450, 1000, 3000 using SSH
4.4.1 UCX Imager Operation Selection using SSH
- Power down the UCX 6.0 Galaxy system
- Insert the UCX Imager into one of the USB ports
- If the UCX Imager tool address of 192.168.1.247 is not accessible via the network or a direct connection to the LAN port, then connect a monitor to the available Video port and a USB keyboard to the USB port as noted in Section 4.4 below
- Re-apply power to the Galaxy system. The system will boot from the UCX Imager
-
If you are connected via the LAN, establish an SSH session to 192.168.1.247 via a tool such as Putty
- At the login as: prompt, enter admin
- At the password prompt, use the standard E-MetroTel default of emetr0tel
-
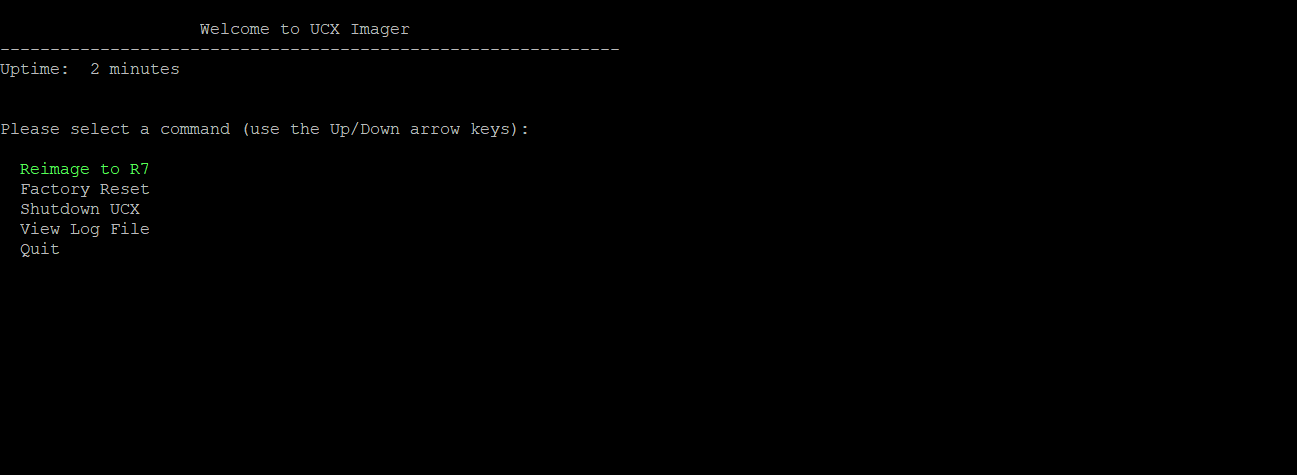
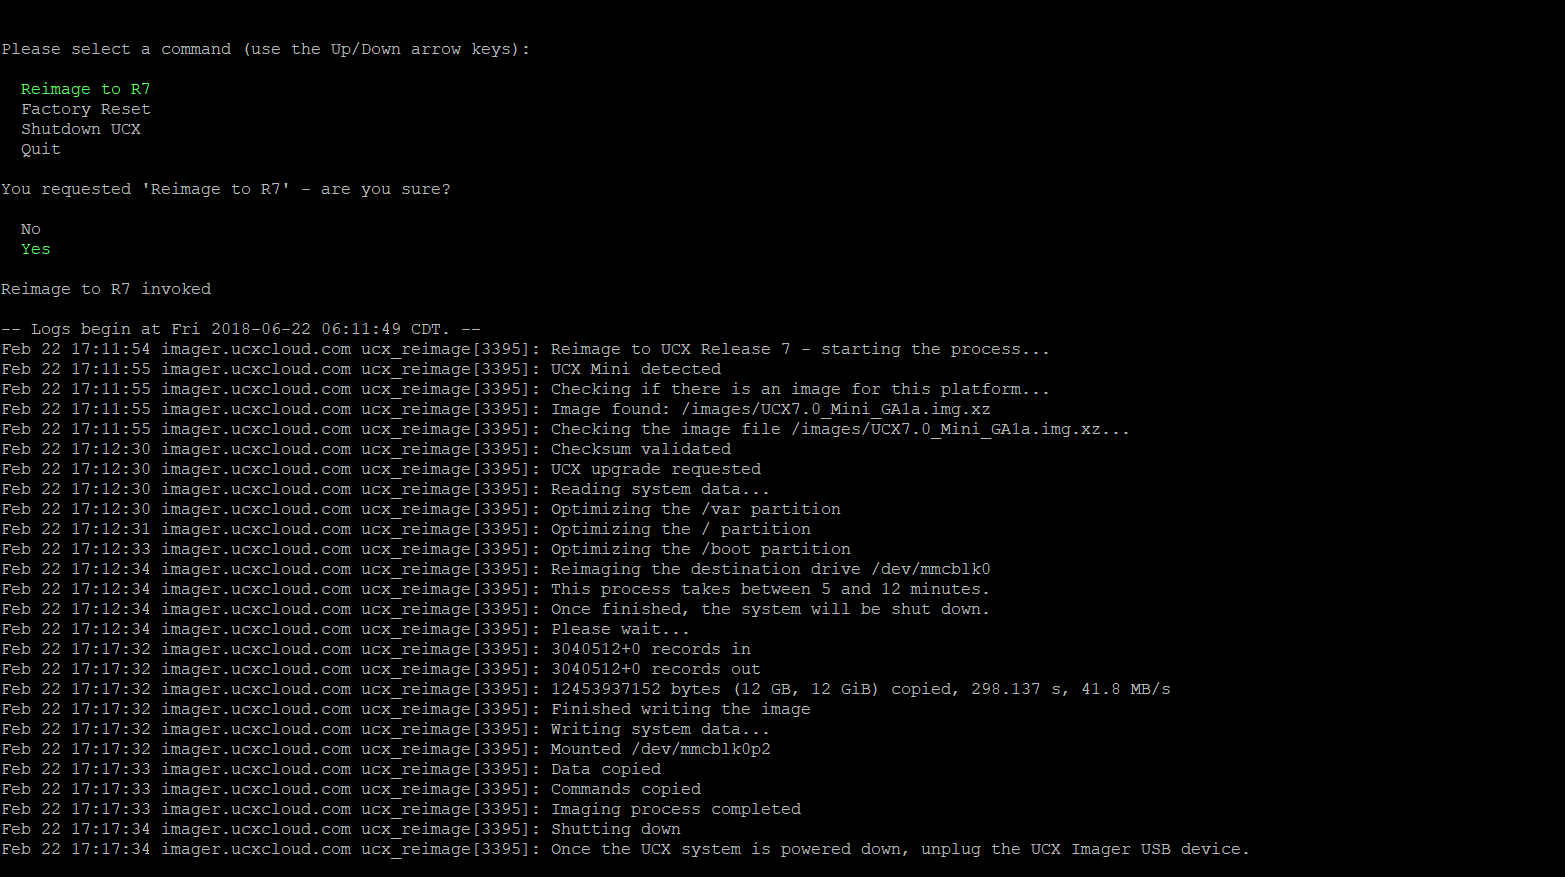
Follow the prompts to Reimage to R7.

If necessary, use the keyboard up/down arrows to select the Reimage to R7 item (highlighted in green), then press Enter -
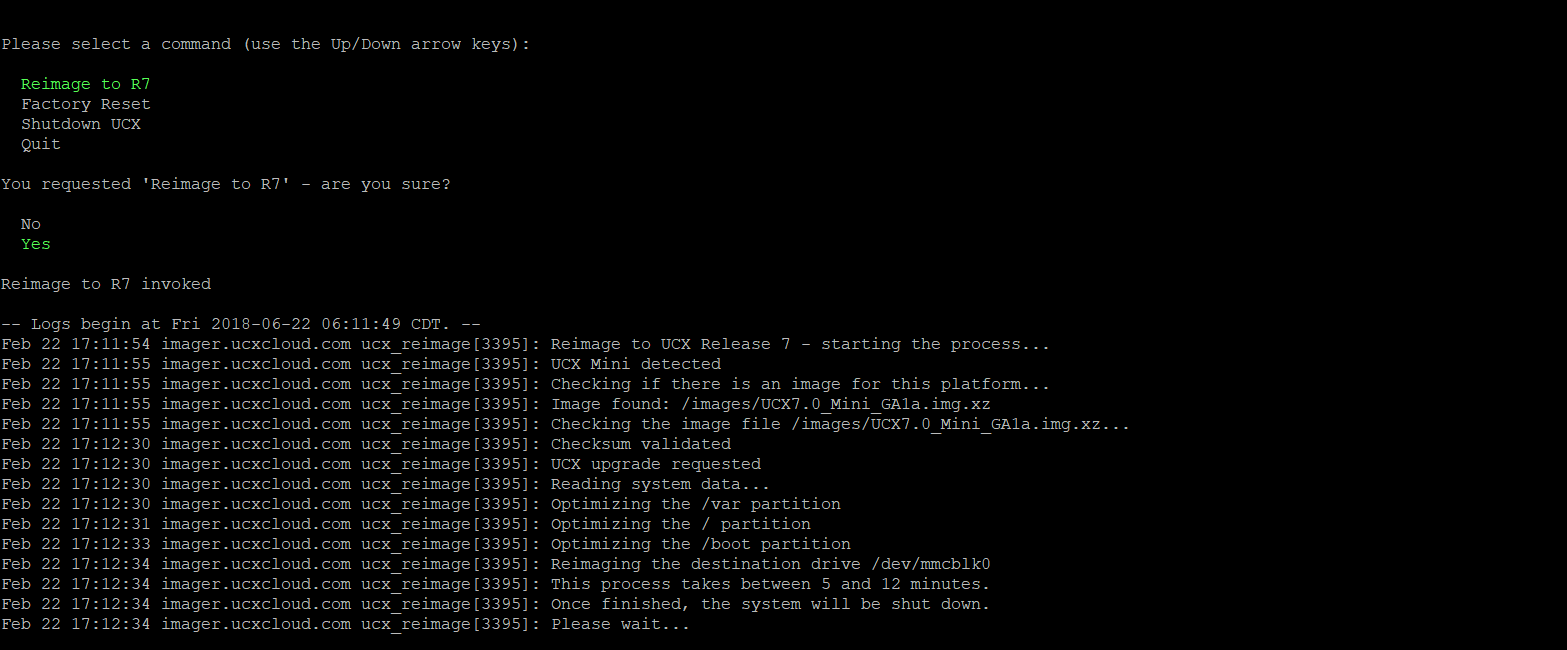
You will be prompted to confirm the request to Reimage to R7
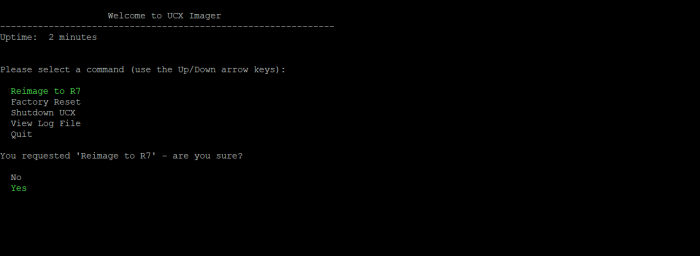
- Select Yes (or No if you are not ready) and press Enter
-
You will see log entries as the process begins:
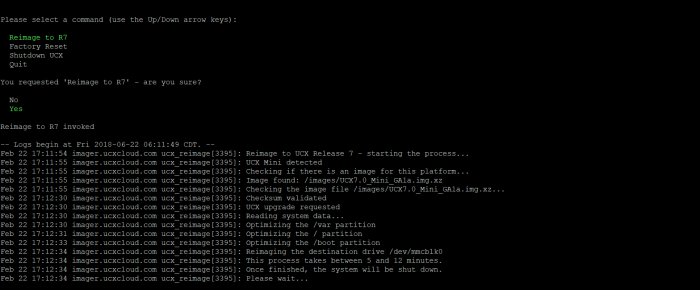
-
When the process is complete, you will see a message similar to the following:
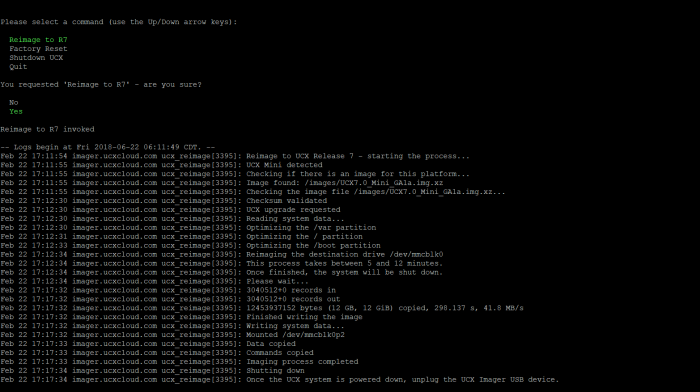
- Once you see the message that the system is powered down, remove the UCX Imager tool from the USB port, unplug the power cord for 10-20 seconds, and then plug it in again.

4.4 Galaxy 250, 2930, i5, 3000 and UCX 250, 450, 1000, 3000 using Keyboard and Monitor
These systems all have an exposed interface for connecting an external monitor. The Galaxy 250, 450 and 2930 use a VGA port while the Galaxy i5, 1000 and 3000 use an HDMI port. All systems have USB interfaces that can support a keyboard and UCX Imager USB stick. If necessary you may use a USB Hub to connect both devices.
4.4.1 UCX Imager Operation Selection
The process for UCX Imager operation using the connected keyboard and monitor is exactly the same as the process for using SSH (see Section 4.3 above). However, you will not be required to login with a username/password (Step 5) as required for SSH operation.
4.5 Updates requiring changes in the appliance BIOS
There are two situations where working with the BIOS of the appliance may be required. In some cases, the BIOS may be set to always boot from the system's internal drive, and adjusting the BIOS Boot Options will be required. The second scenario occurs on a small number of UCX 250 appliances that were built using the N2930 processor and an older version (2018) of the BIOS than most UCX 250 and Galaxy 250s use (which is 2019 or newer). For these systems, an update of the BIOS will be required, which can be performed using a properly updated UCX Imager Tool.
4.5.1 Adjusting the BIOS Boot Options (when required)
If you have attempted to boot from the UCX Imager but the system continues to boot from the existing UCX 6.0 or UCX 5.0 software, it is likely because the BIOS on that particular version of hardware is not configured to boot from the USB interface. You will know that this step is necessary if you see any of the following after the system has completed the startup process:
- On a Galaxy 250, the front panel display shows:
E-MetroTel
IP Address (the system's original IP address)
or
or
E-MetroTel
Network Down (if its not connected to the network)
- When attempting to connect 192.168.1.247 using SSH on any system and there is no response.
- When attempting to connect using a keyboard and monitor on any system and the UCX Imager user interface does not appear but the monitor shows the old IP address of the UCX 6.0 system.
If any of the above scenarios are noted, you will need to configure the system BIOS to make sure the USB interface is listed first in the Boot sequence.
4.5.1.1 Configuring the BIOS Boot Options on Galaxy hardware
- Make sure the Galaxy system is powered OFF.
- Connect a monitor to the video interface on the Galaxy hardware using the appropriate video interface (HDMI or VGA) depending on the hardware.
- Connect a wired USB keyboard to the Galaxy hardware.
- Connect the UCX Imager USB device to the Galaxy hardware. (It may be necessary to connect a USB bridge device so that both the UCX Imager and the keyboard can connect.)
- Connect power to the Galaxy system.
- Watch the monitor carefully during the system startup process.
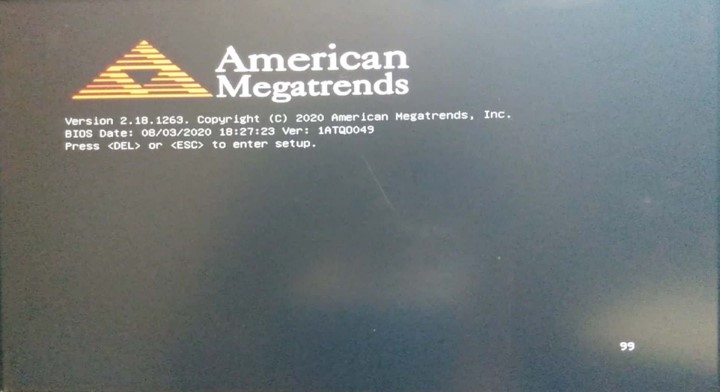
-
When the Splash Screen with the instructions to press <ESC> or <DEL> is visible, press one of those two buttons on the keyboard to launch the BIOS setup.

-
When entering the BIOS, you will use the keyboard arrow navigation keys to move between Screens (Left/Right arrows) and between Items (Up/Down arrows).
-
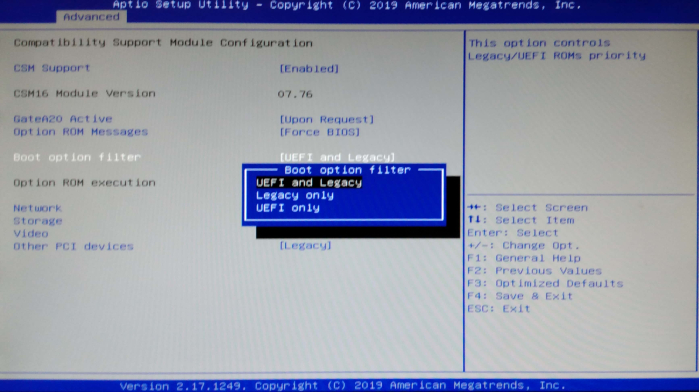
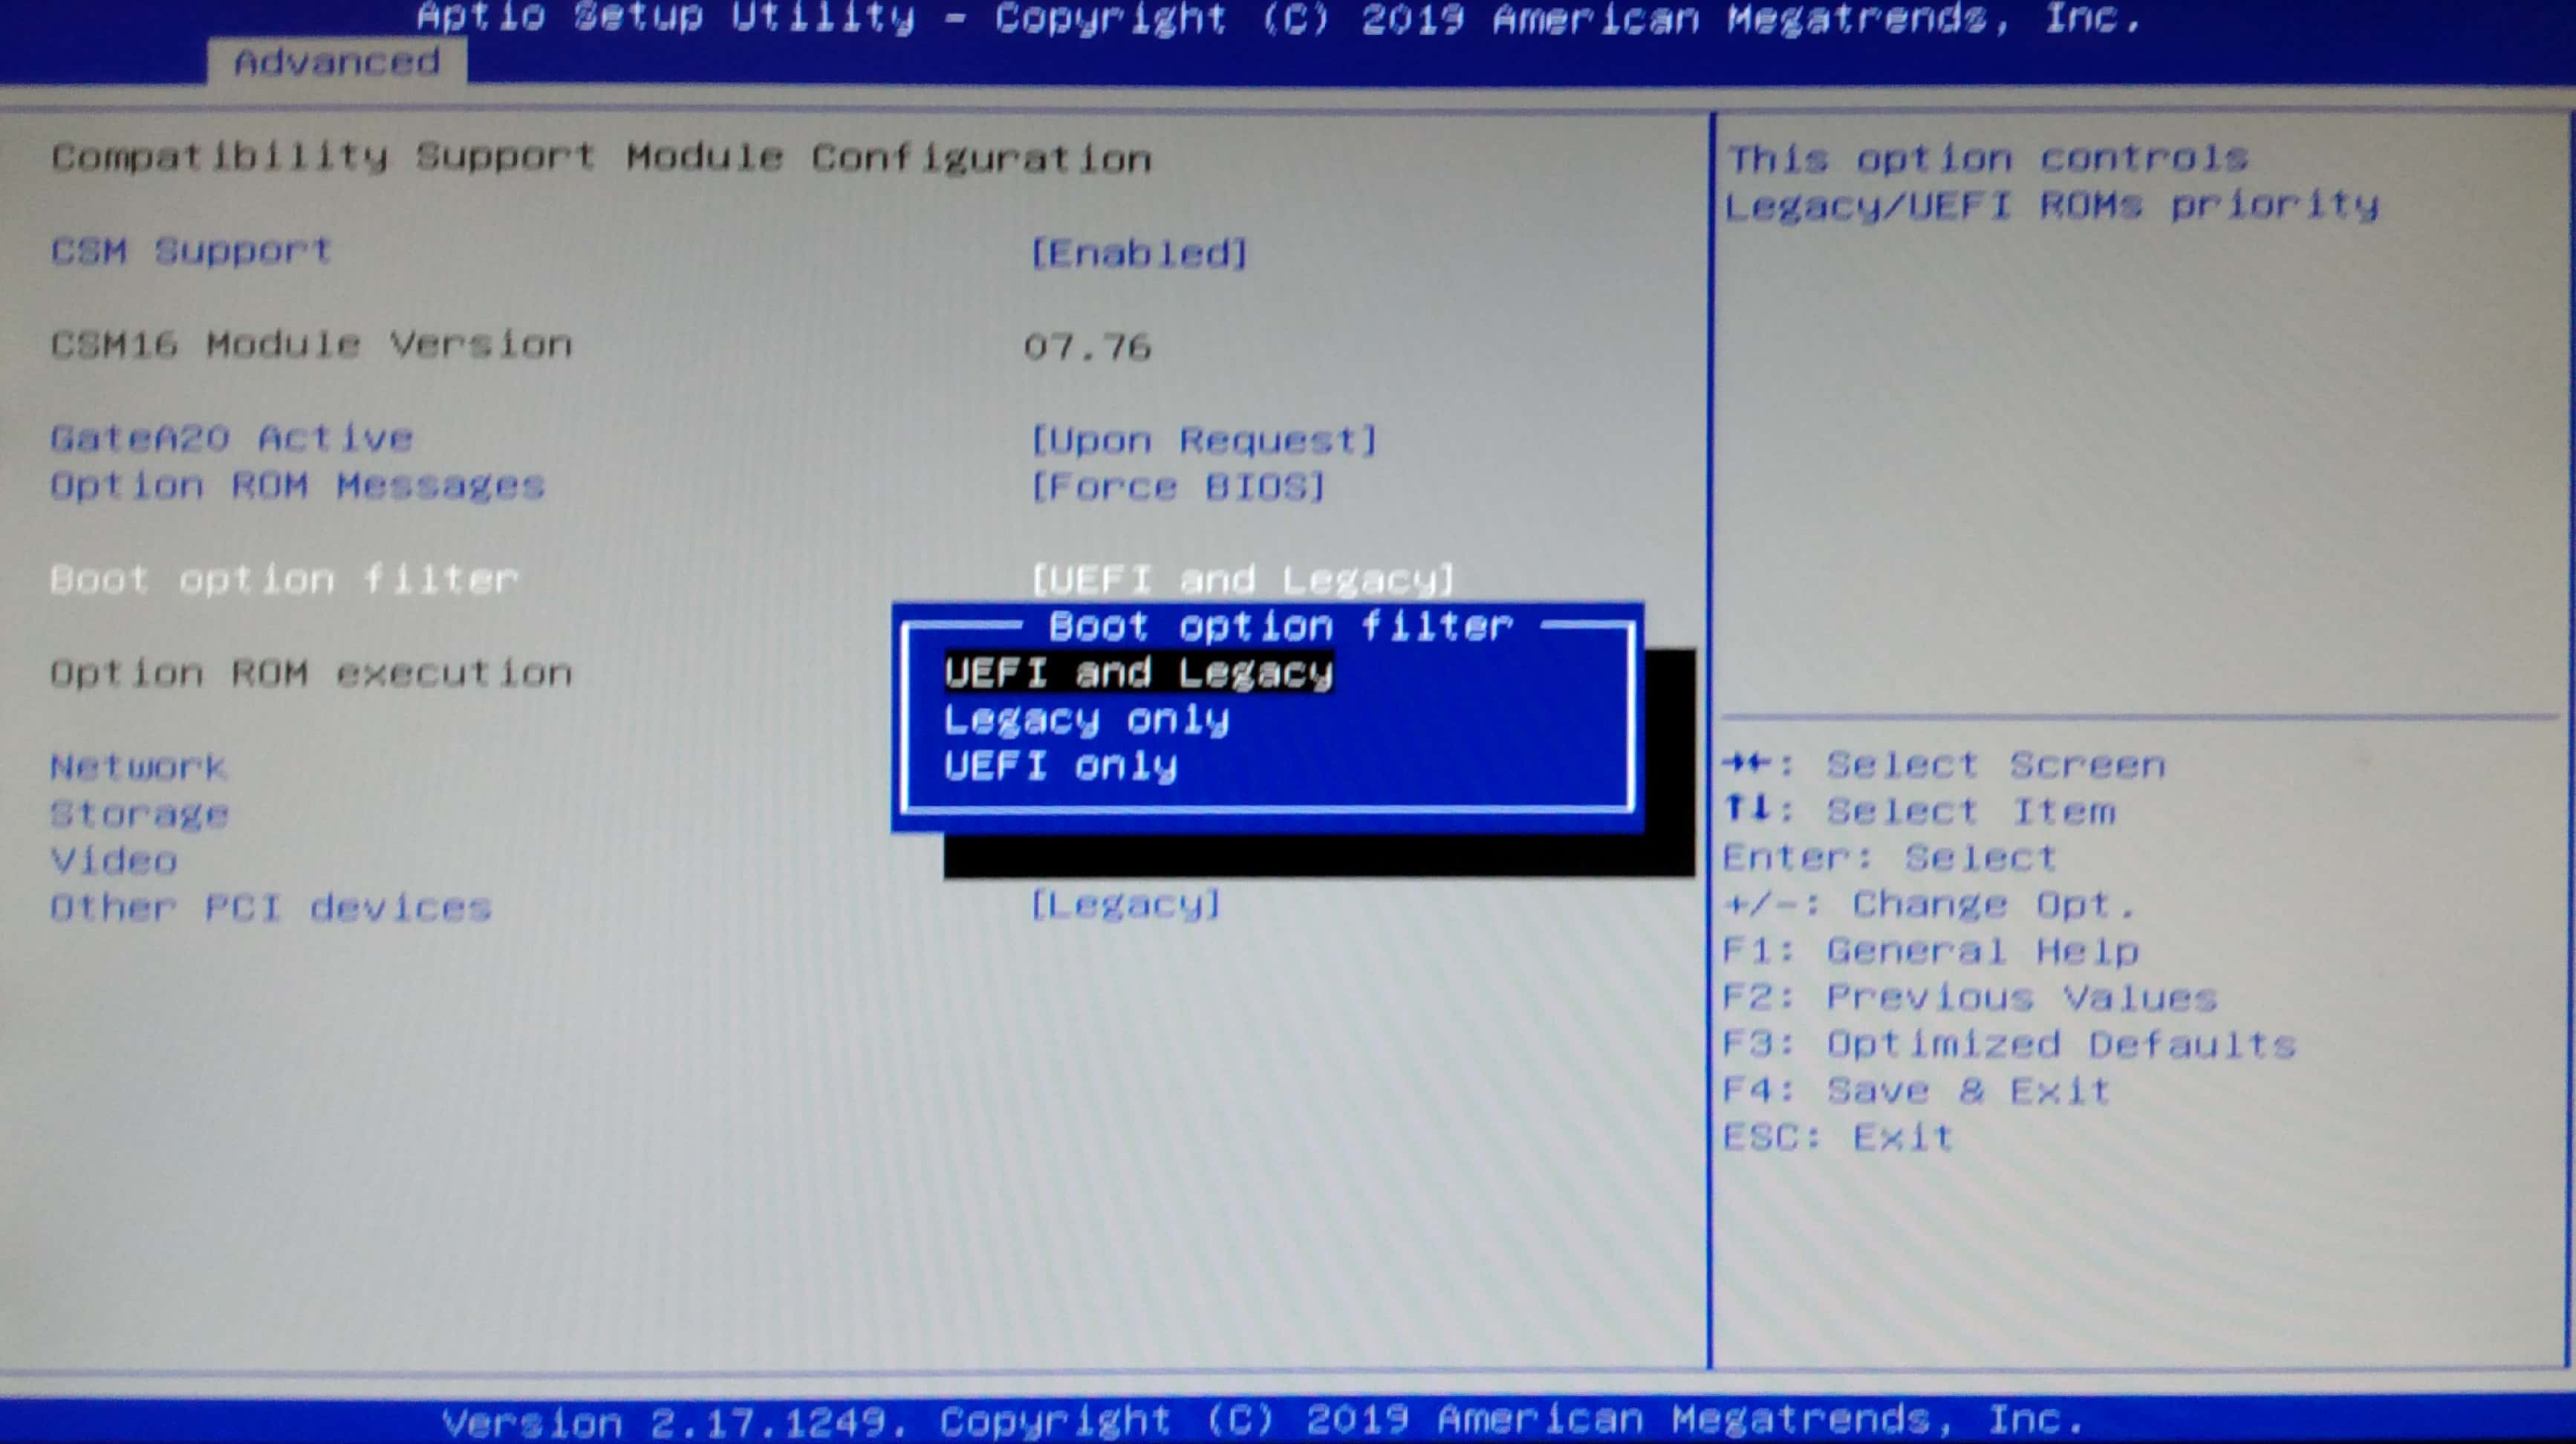
If you are updating a Galaxy 250, you must navigate to the Advanced / CSM Support setting and ensure the Boot option filter is set to UEFI and Legacy setting.
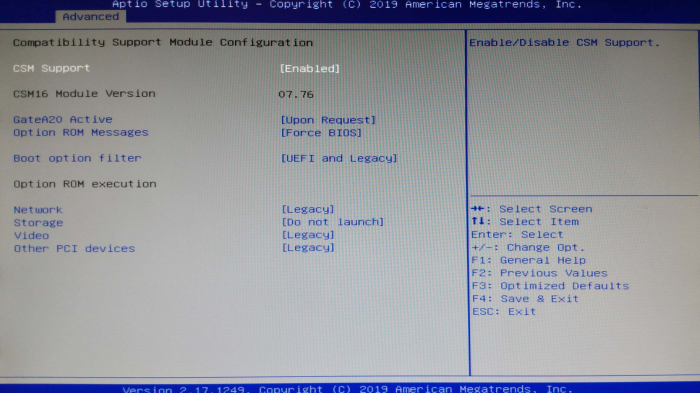
-
If it is not, use the down arrow key to highlight the parameter. Press the Enter key to open the drop down list, select UEFI and Legacy from the the drop down list and press Enter once more.
-
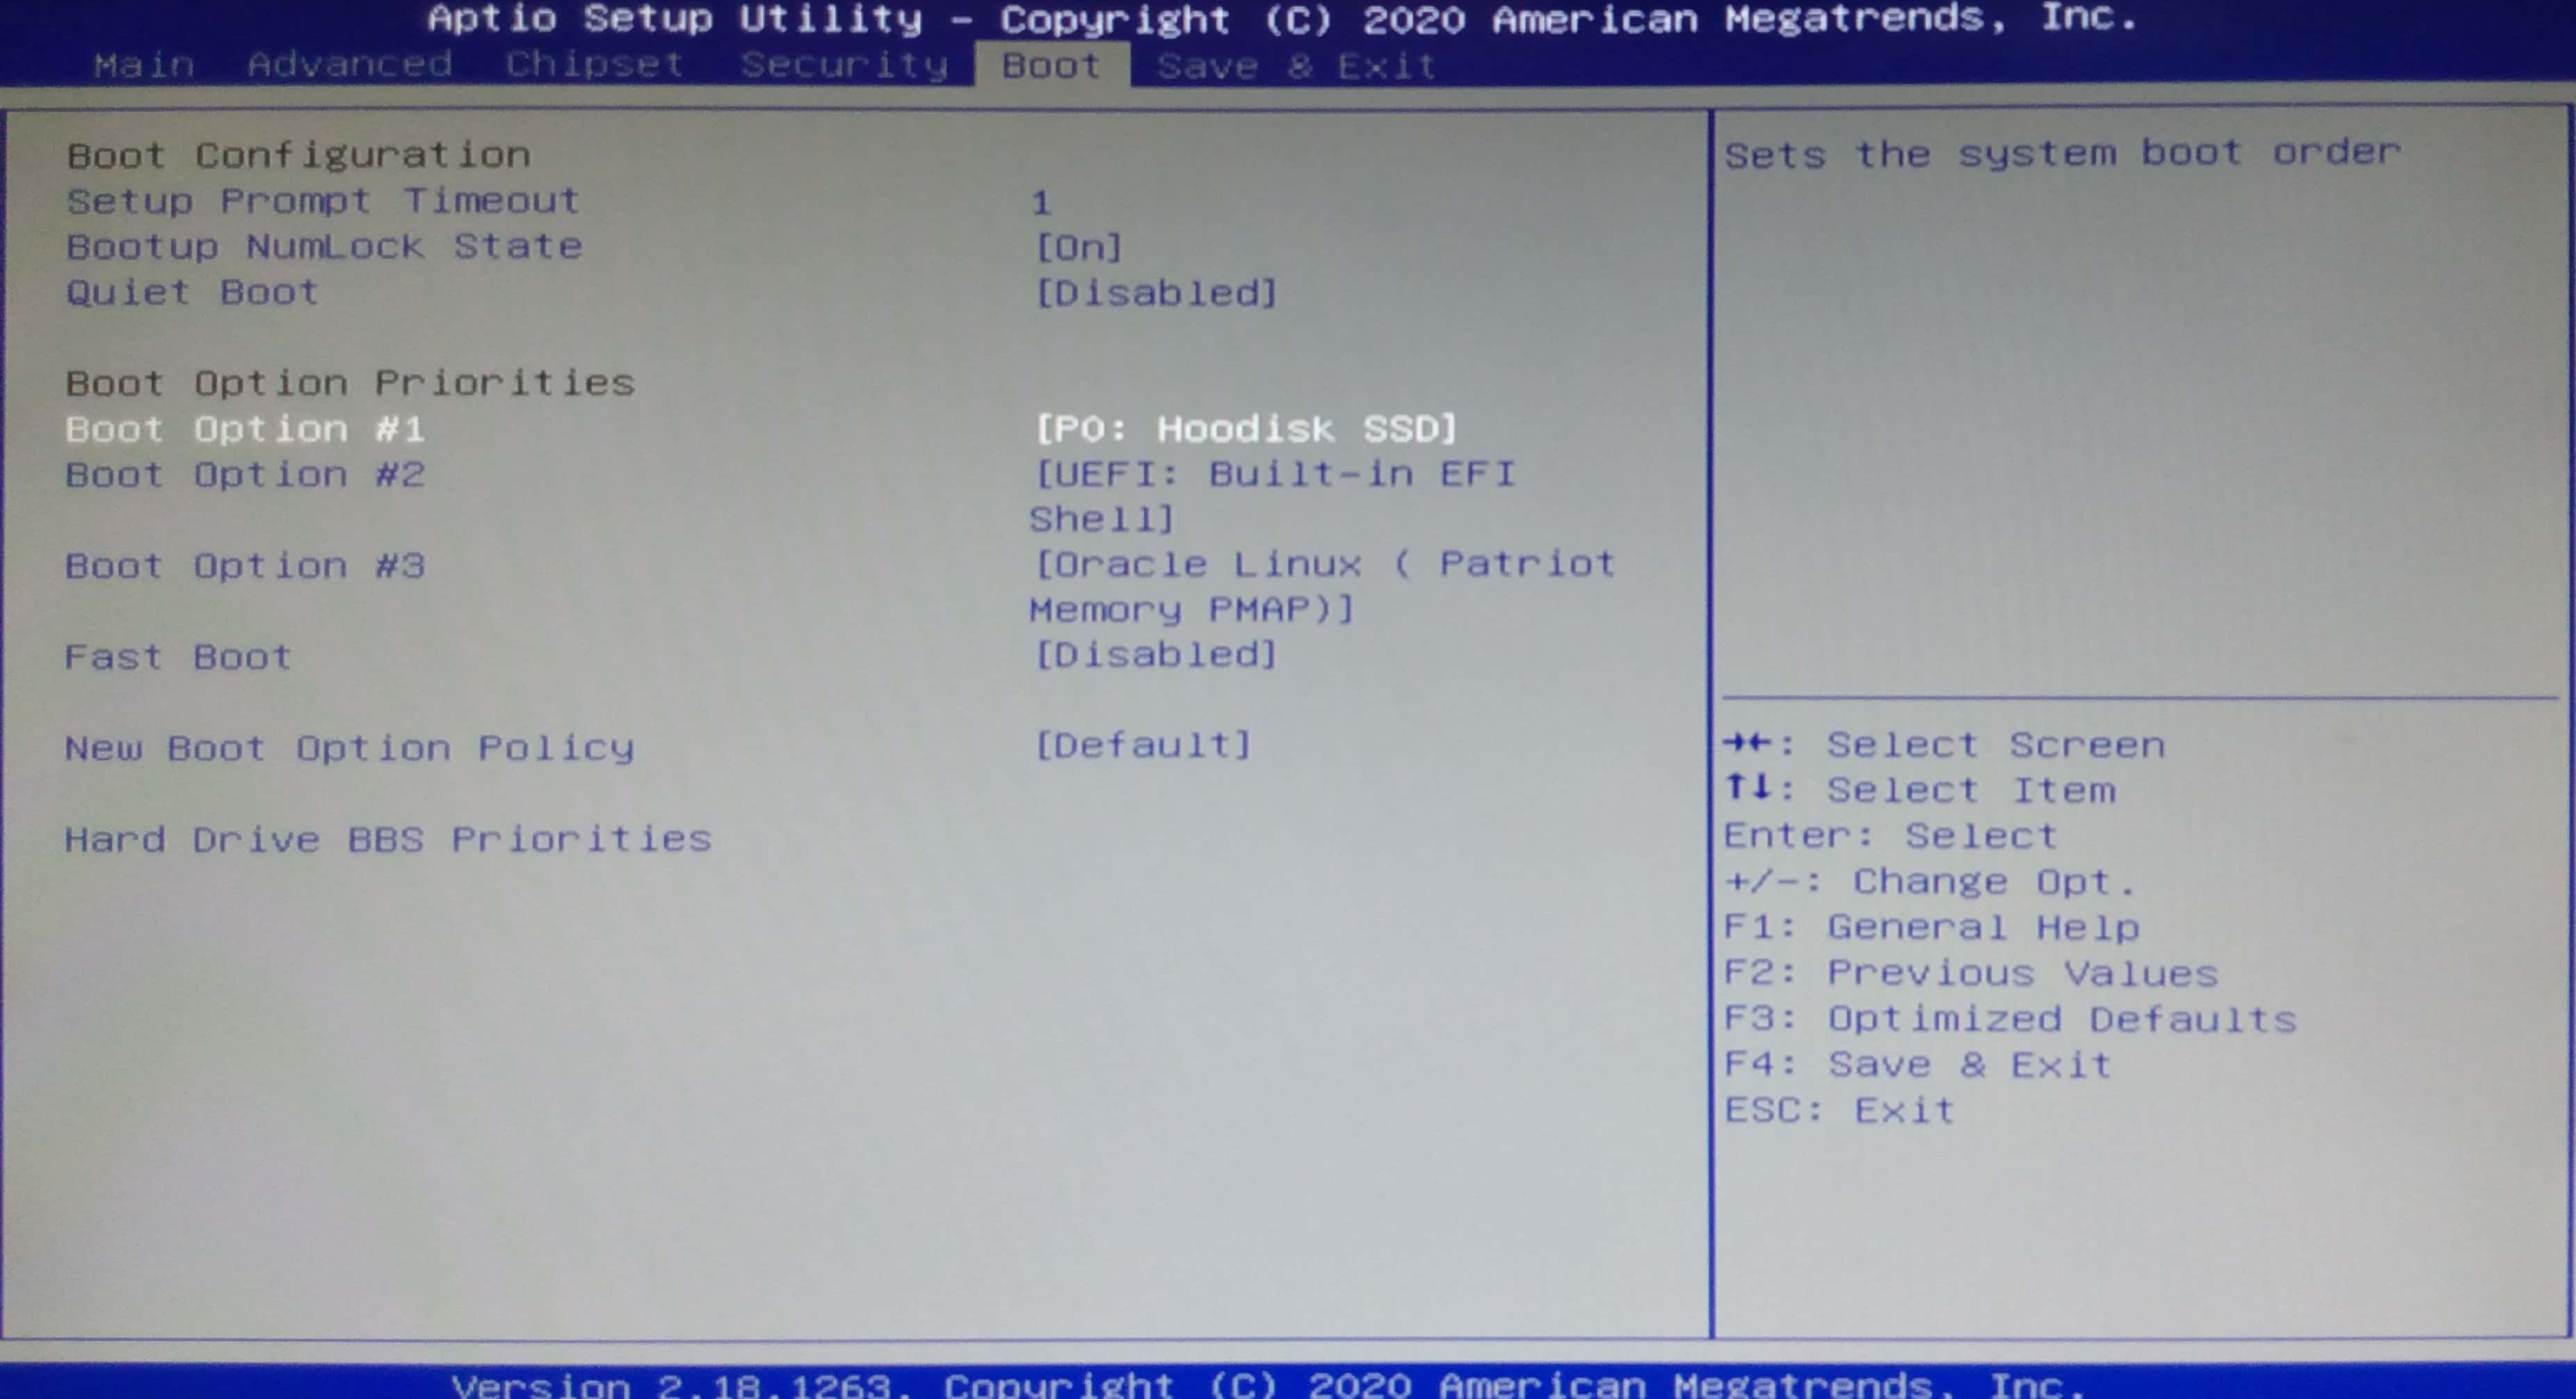
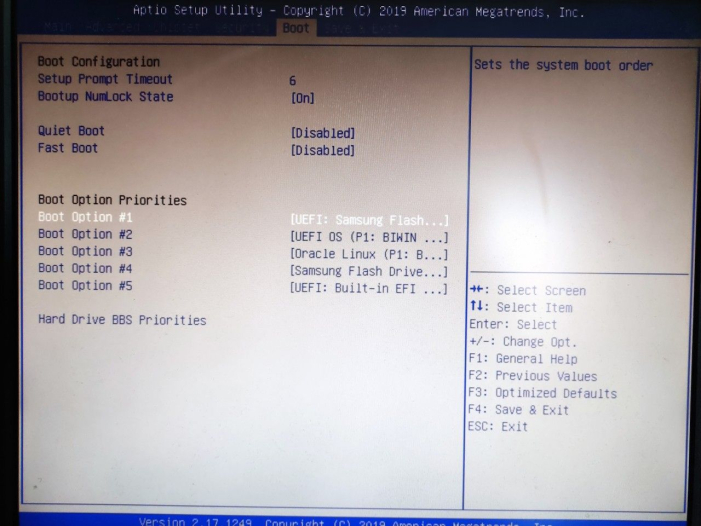
Navigate to the Boot page using the Right arrow, then if necessary use the Up or Down arrow to highlight the Boot Option #1 item.
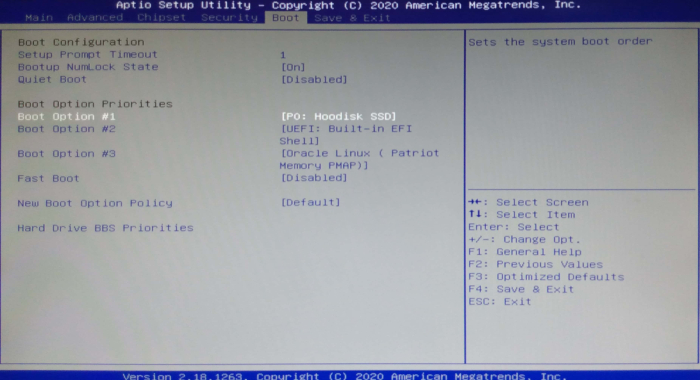
-
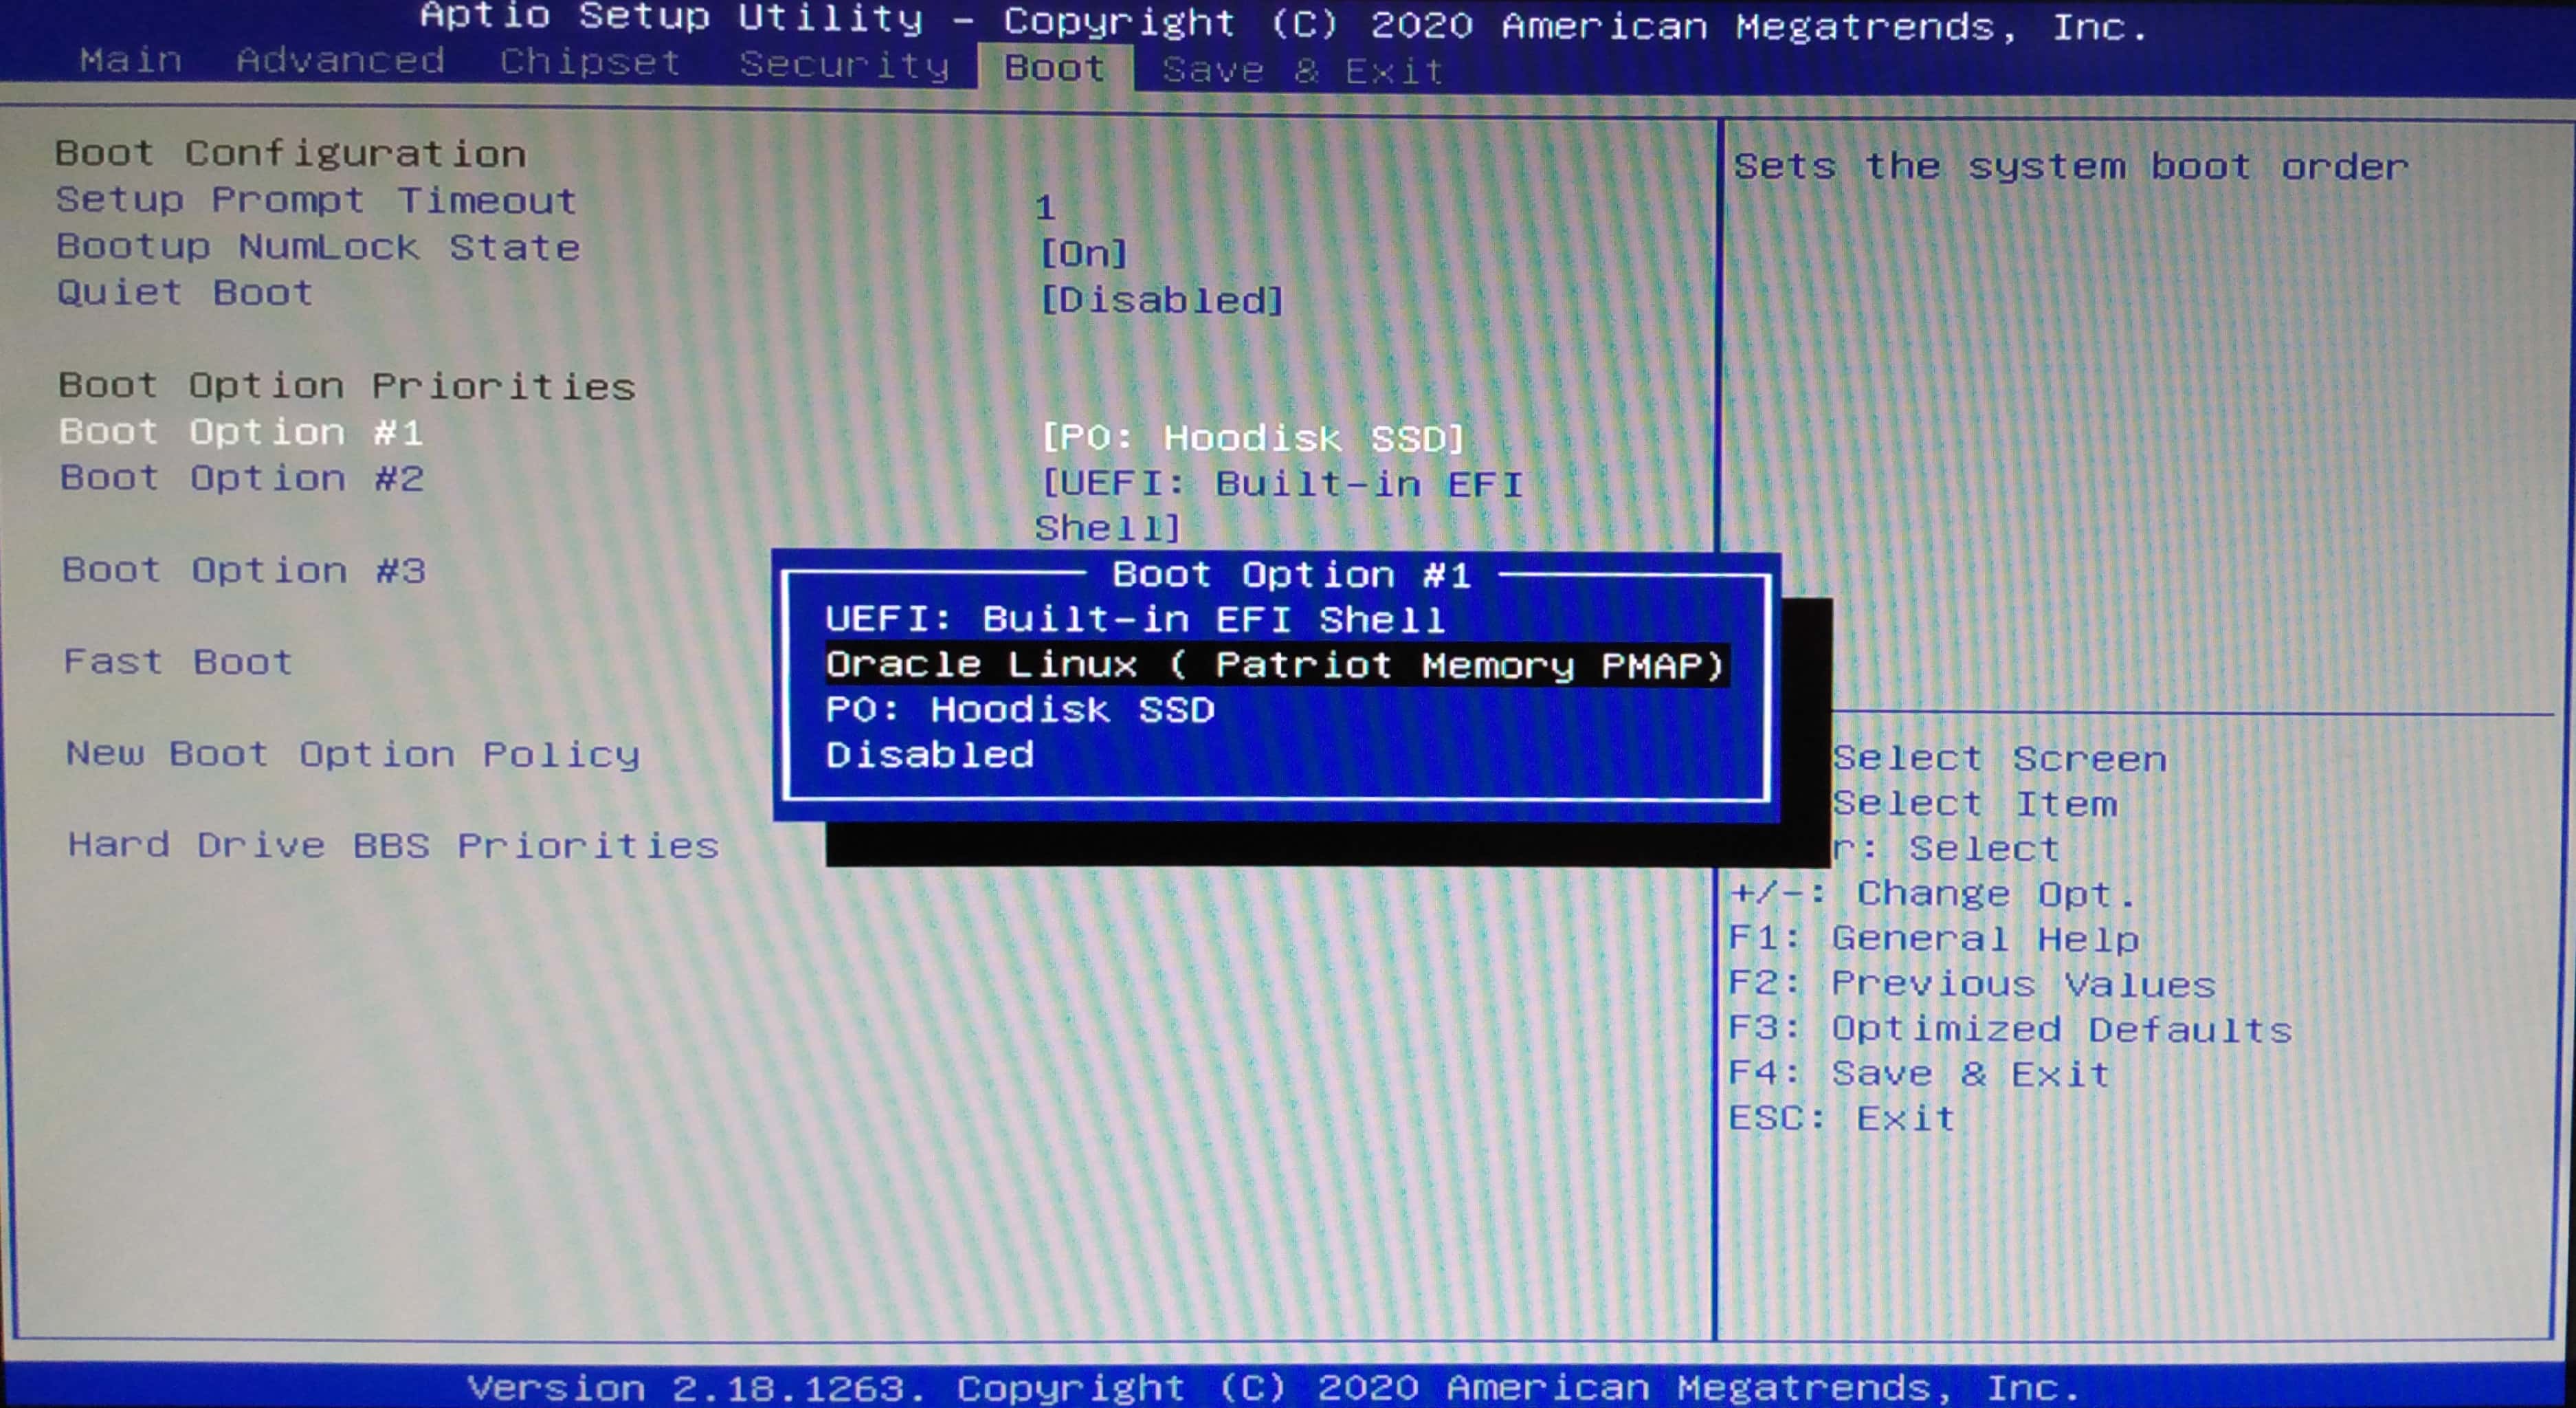
Press the Enter key to change the currently selected Boot device and the Up/Down arrow key to select the entry associated with the UCX Imager USB. (In this case it is labeled Oracle Linux (Patriot Memory PMAP) sine the UCX Imager was loaded on a Patriot memory stick.)

-
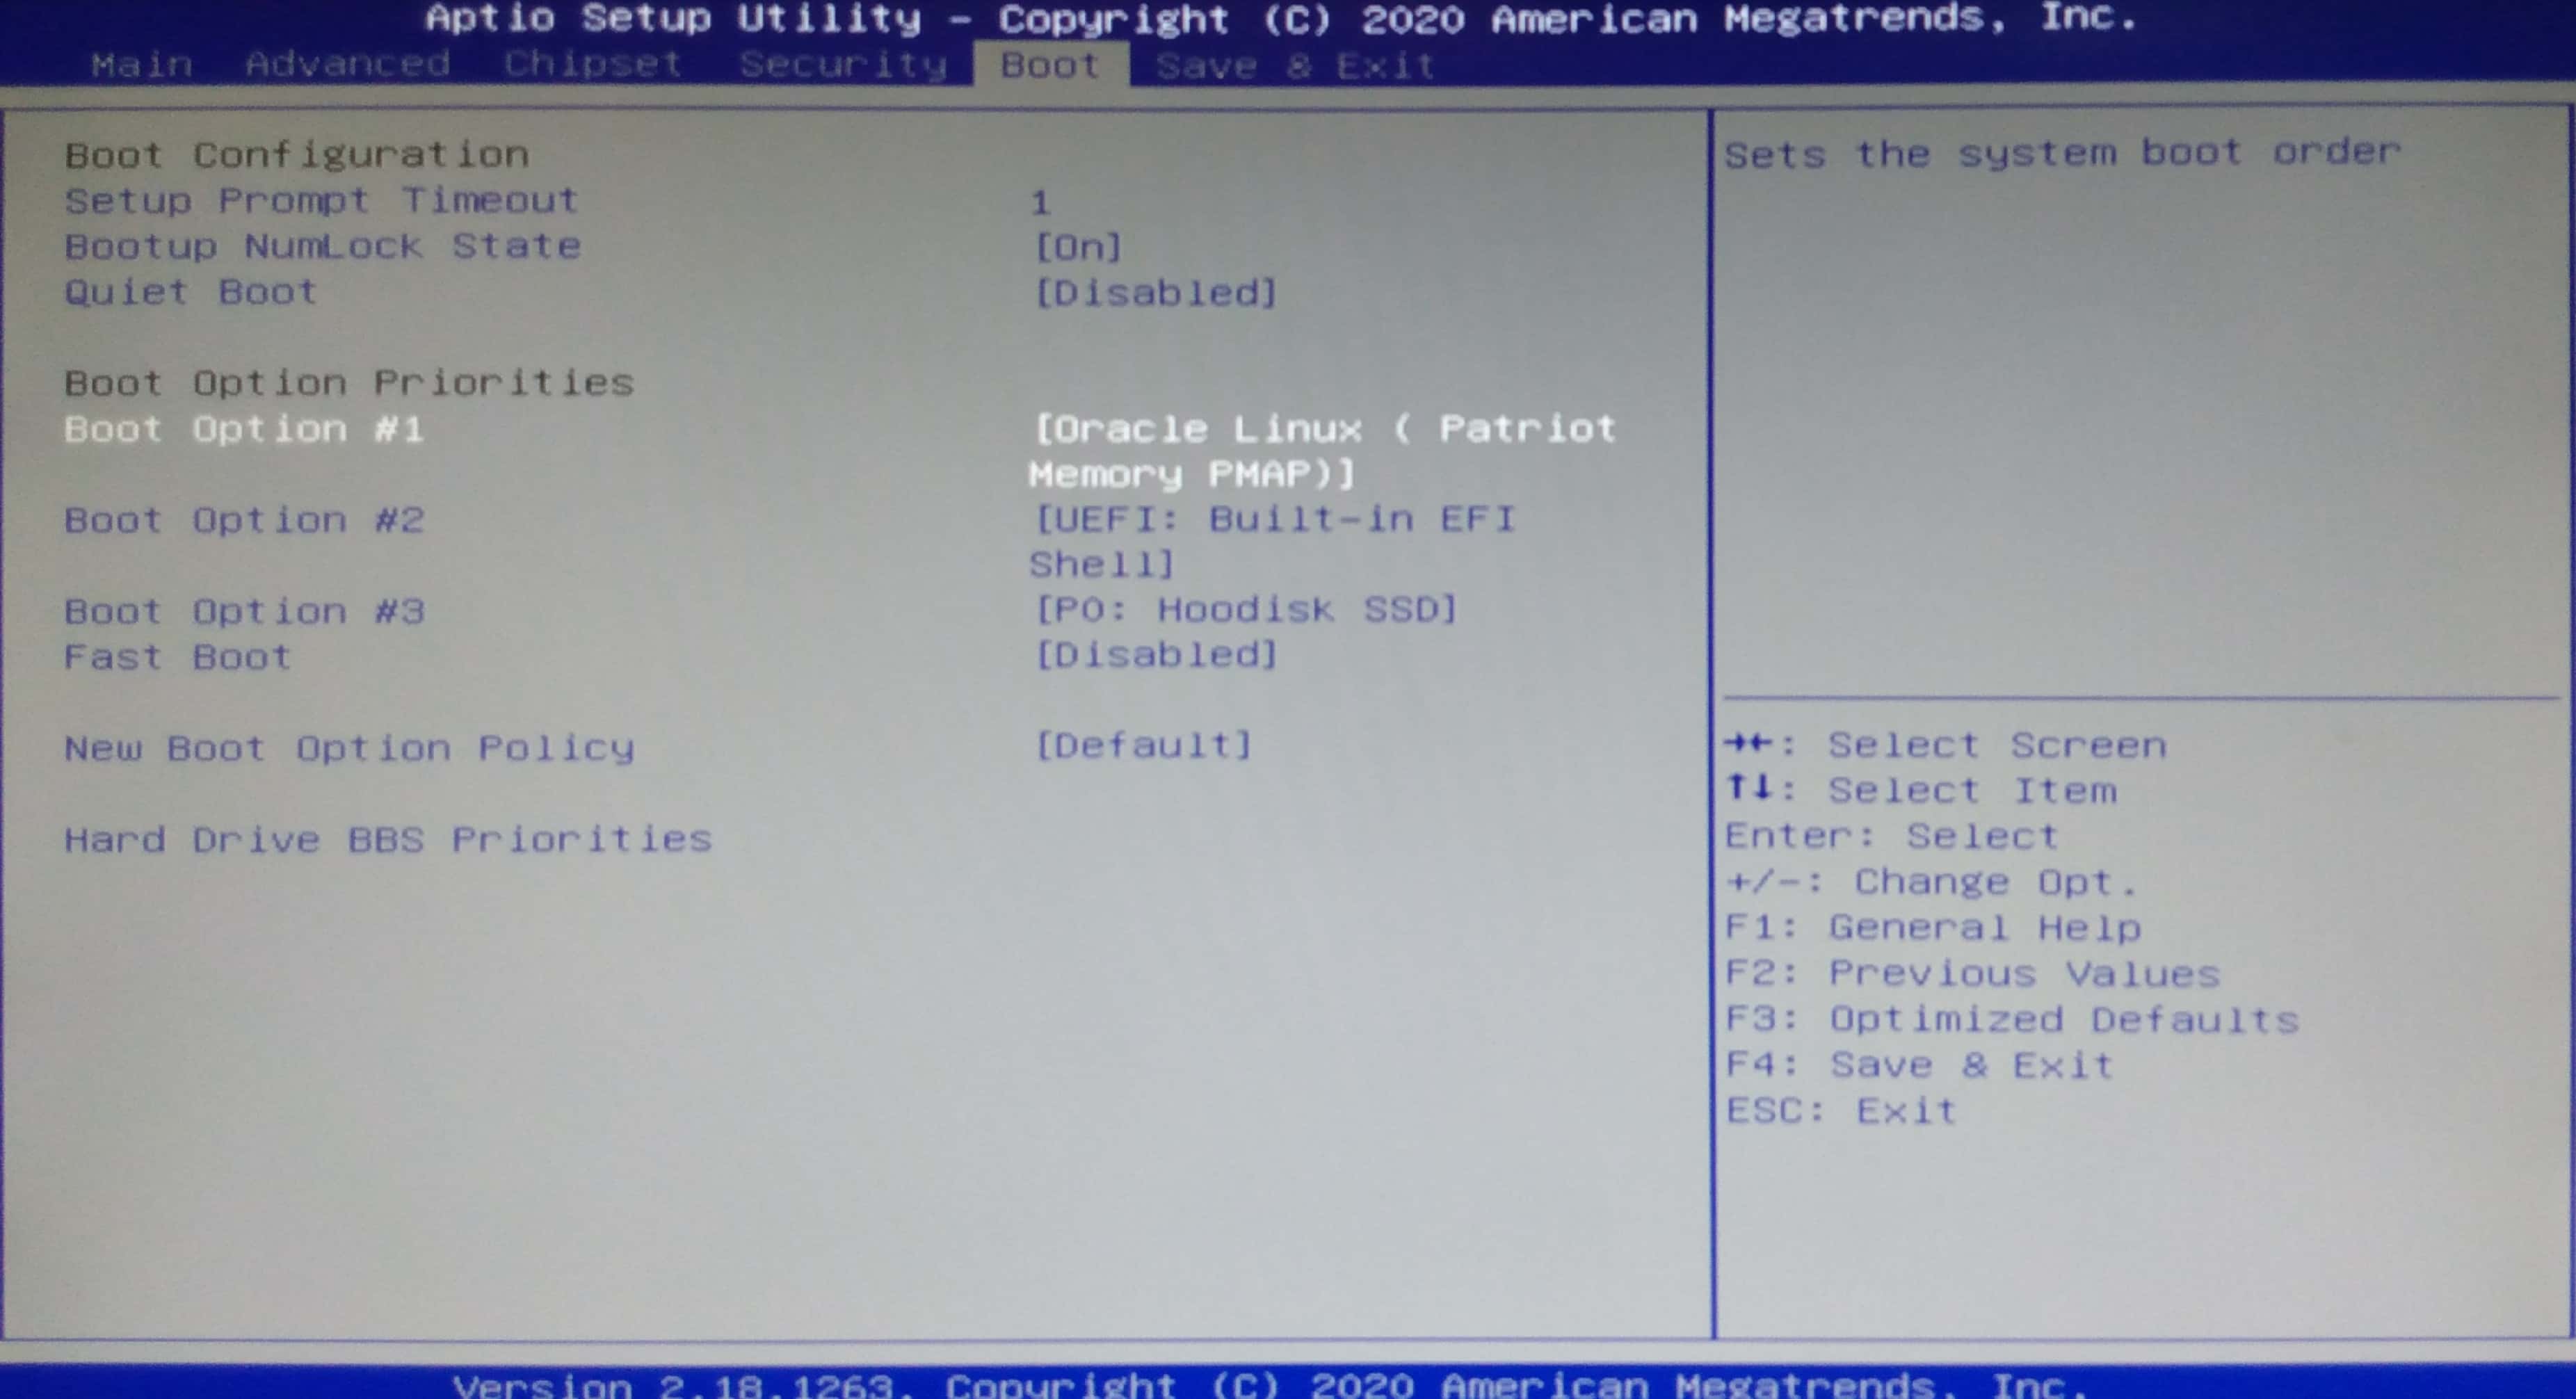
Finalize the selection by pressing Enter and the Boot Option #1 item will be updated.

-
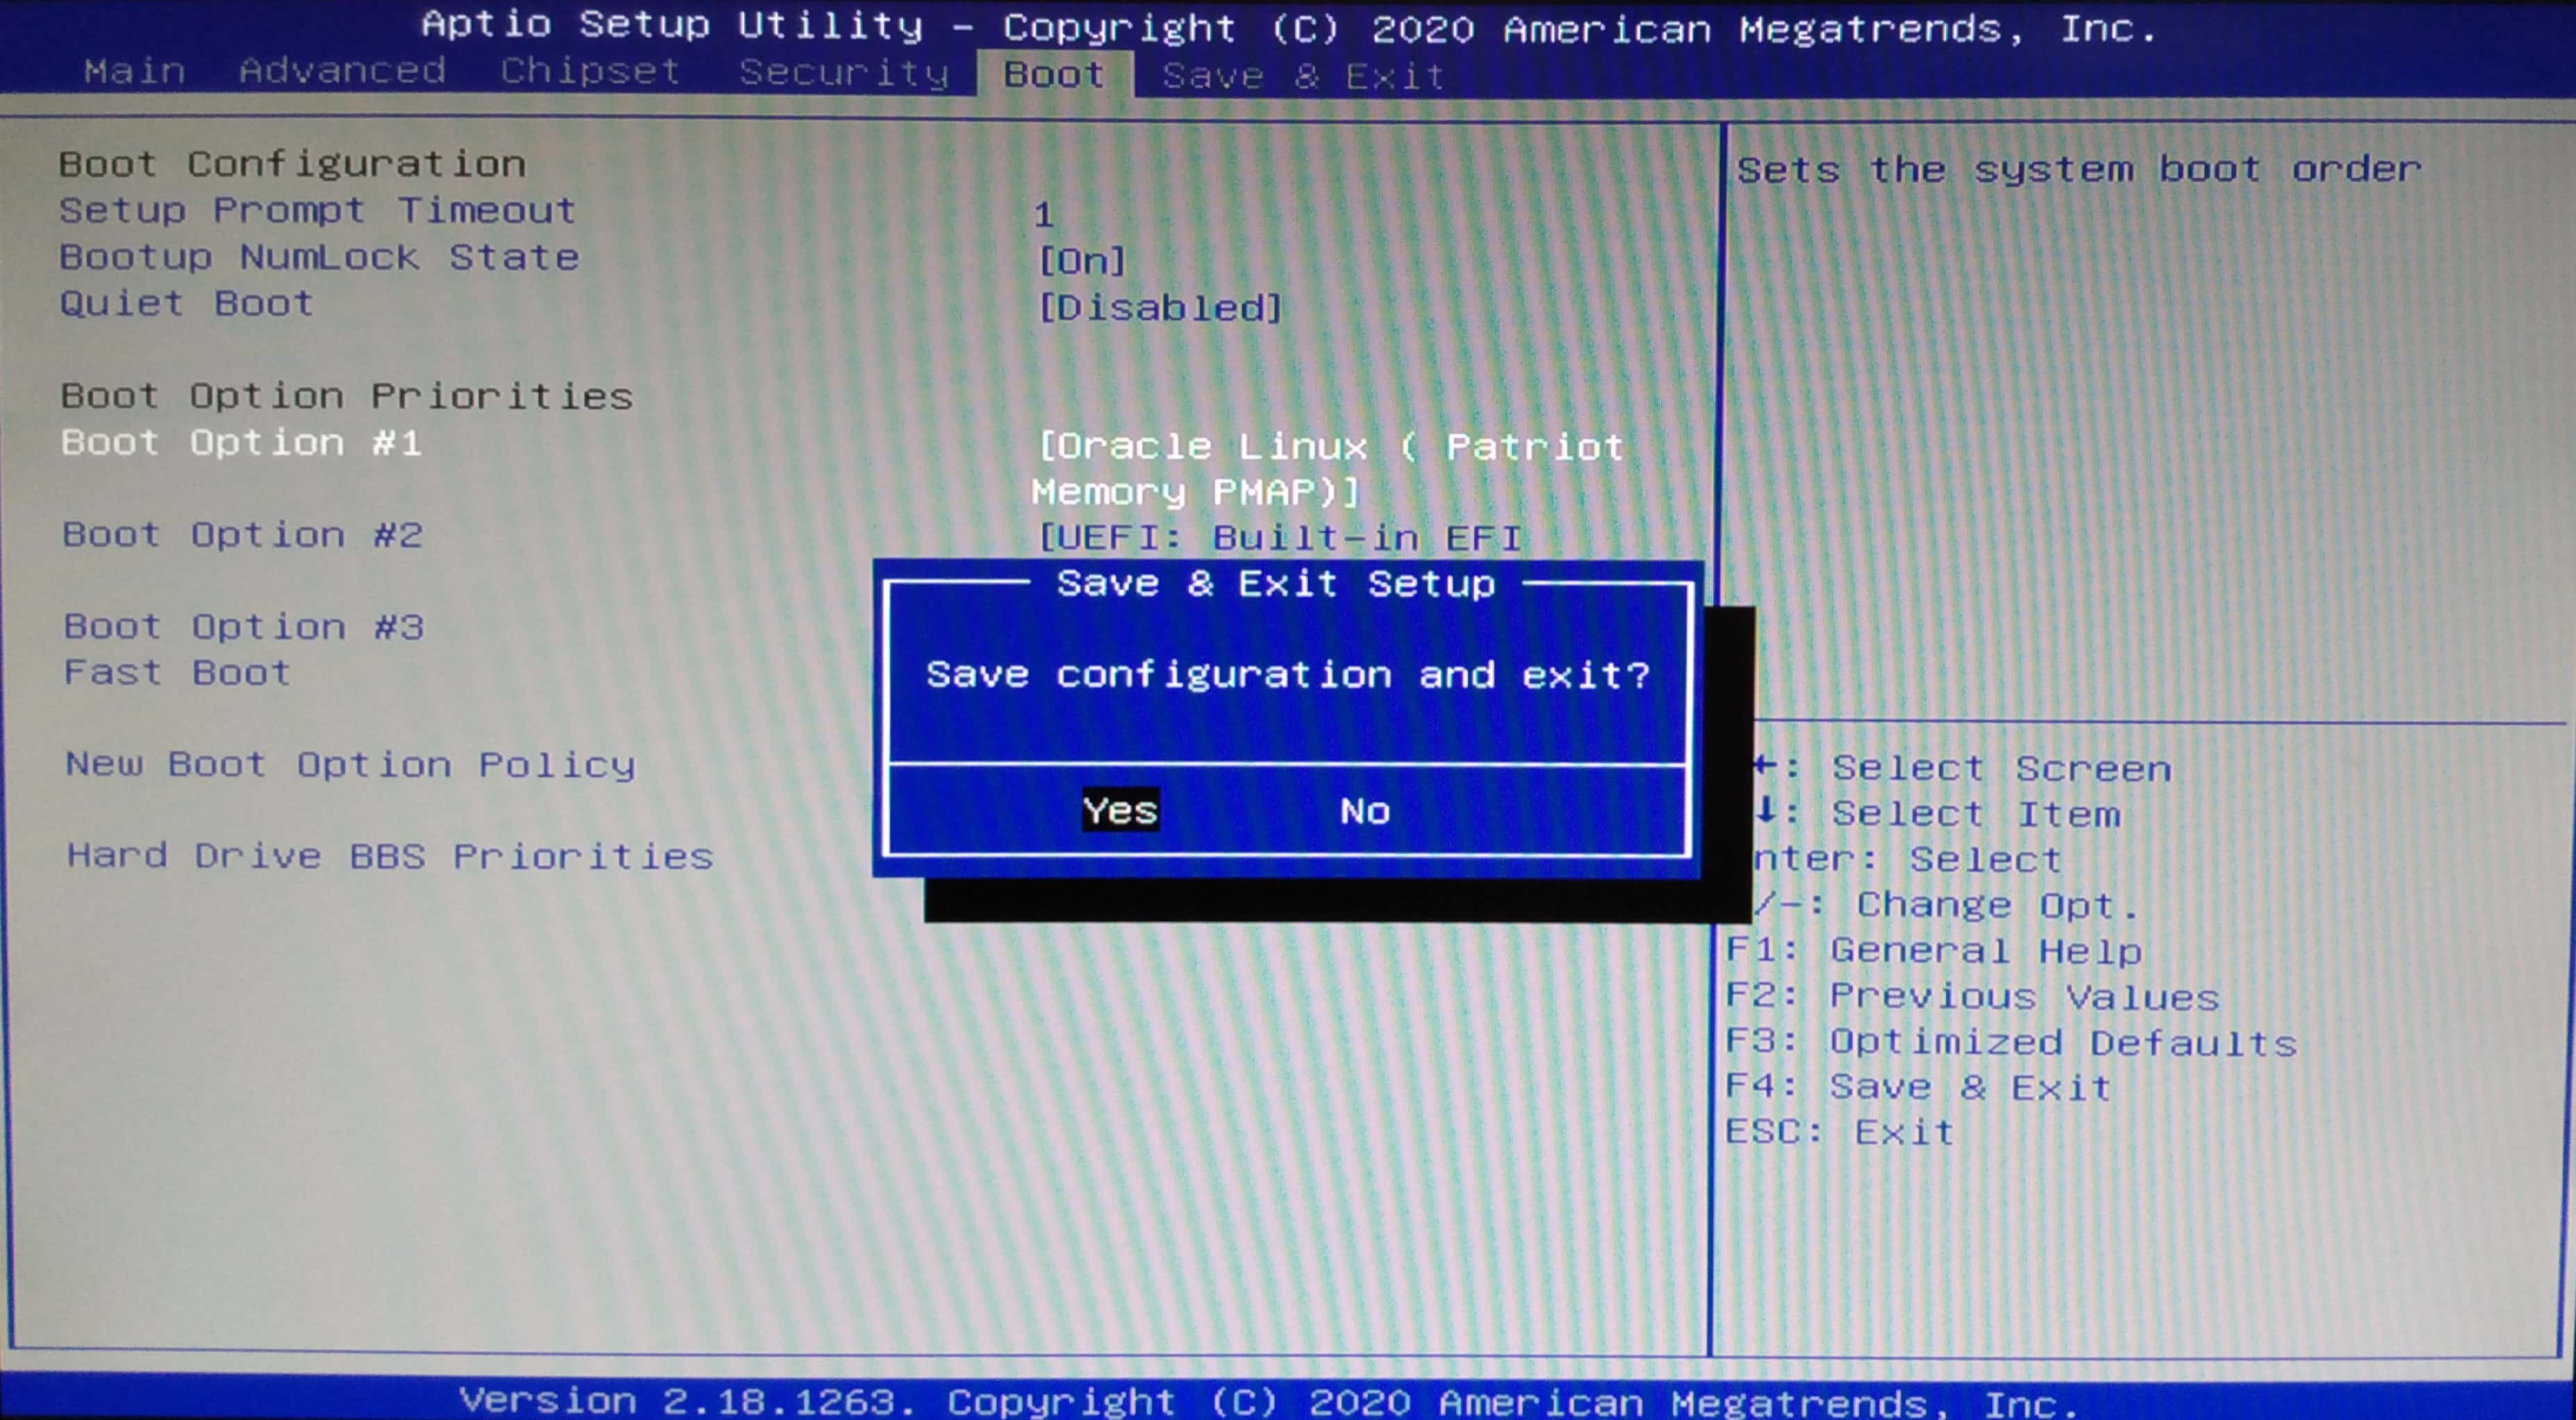
Press the F4 key to Save and Exit and then confirm by highlighting Yes and pressing Enter.

- The Galaxy system will immediately begin the boot up process using the USB as its first boot option and the UCX Imager software will load.
-
If you are updating a UCX450, UCX1000, or Galaxy/UCX 3000, then you must force the BIOS to boot in UEFI mode rather than BIOS in order for the Imager to be used during startup. During system startup, press F11 on the attached keyboard to enter Boot Manager configuration.
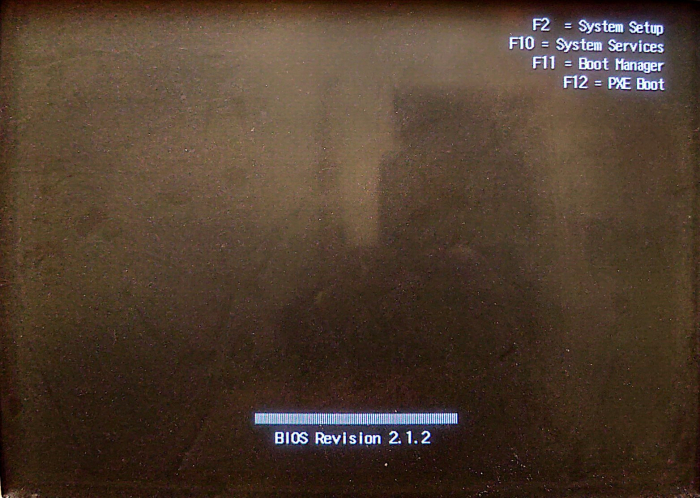
-
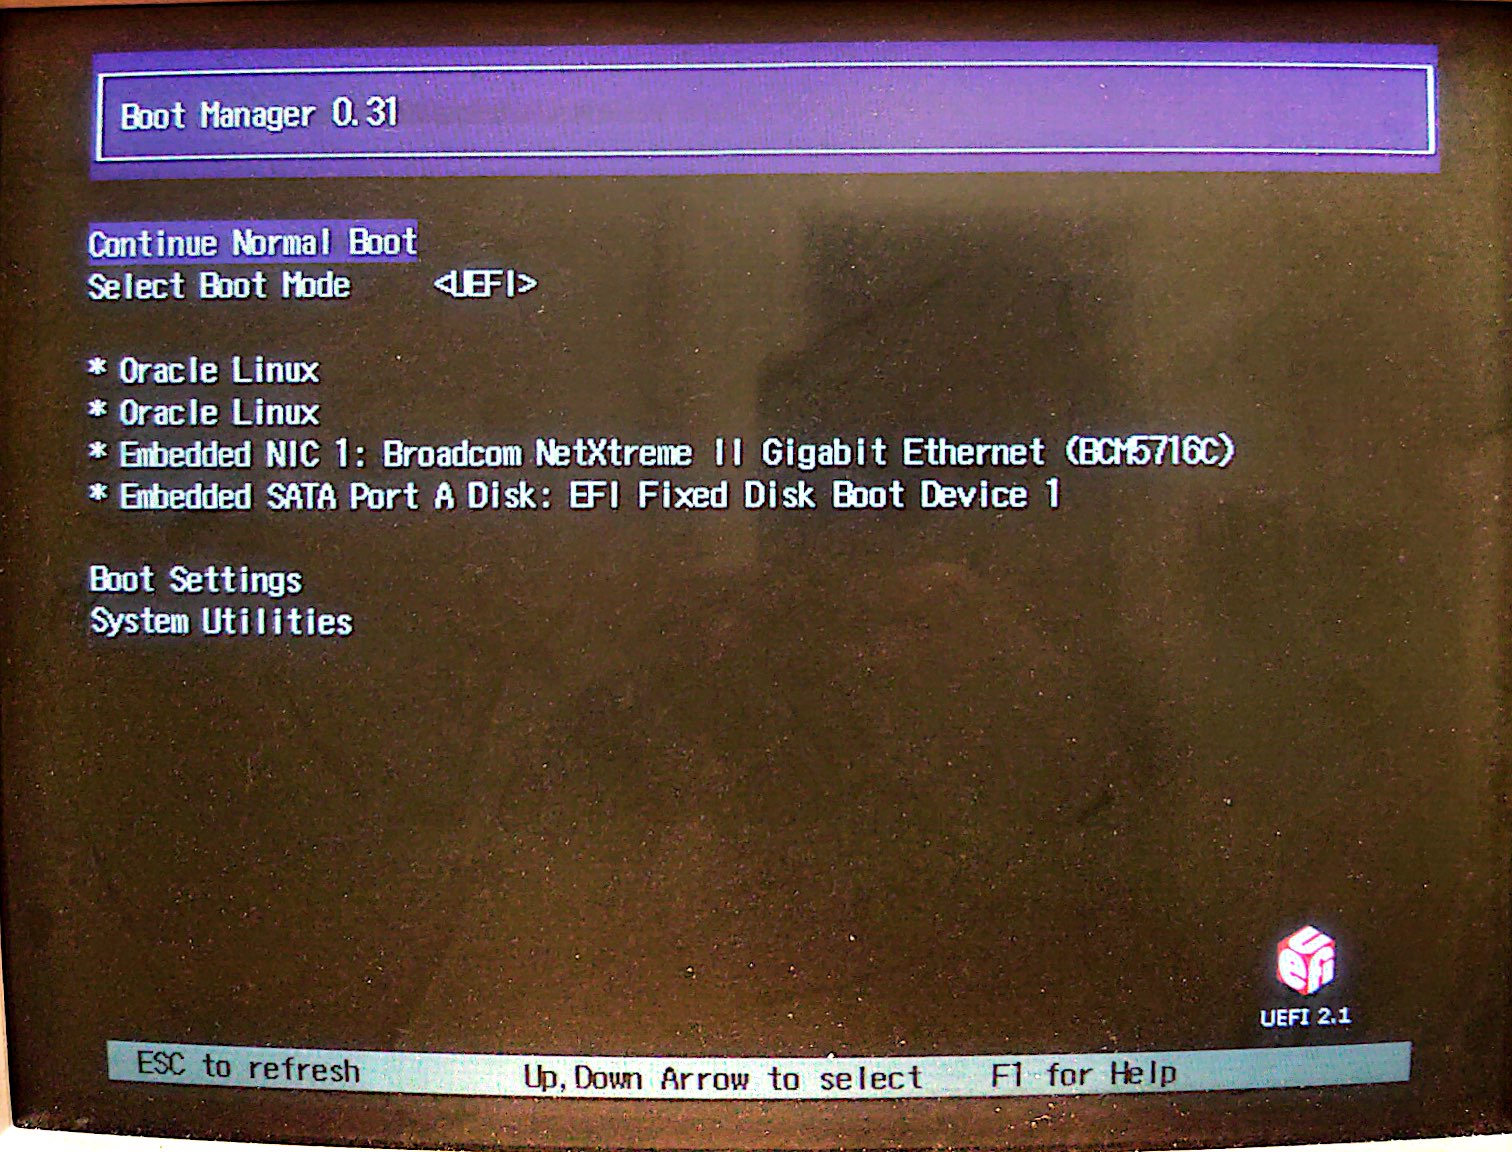
In the Boot Manager screen, highlight Select Boot Mode and press Enter

-
In the next screen, select Boot Mode and select the UEFI option
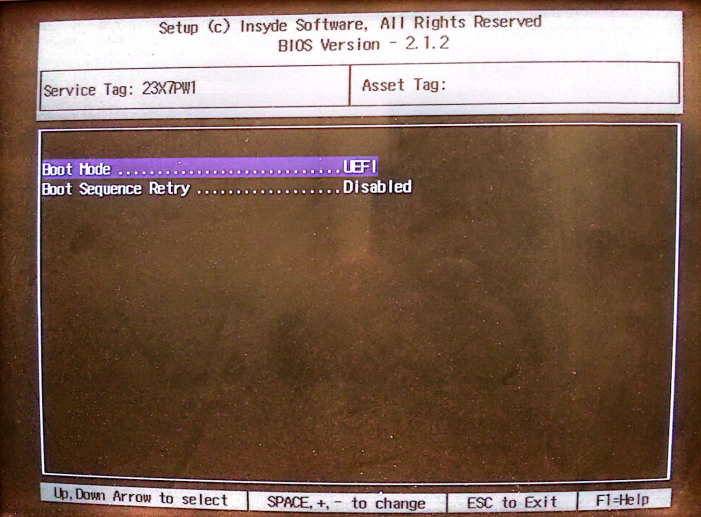
- Press the ESC key to exit
-
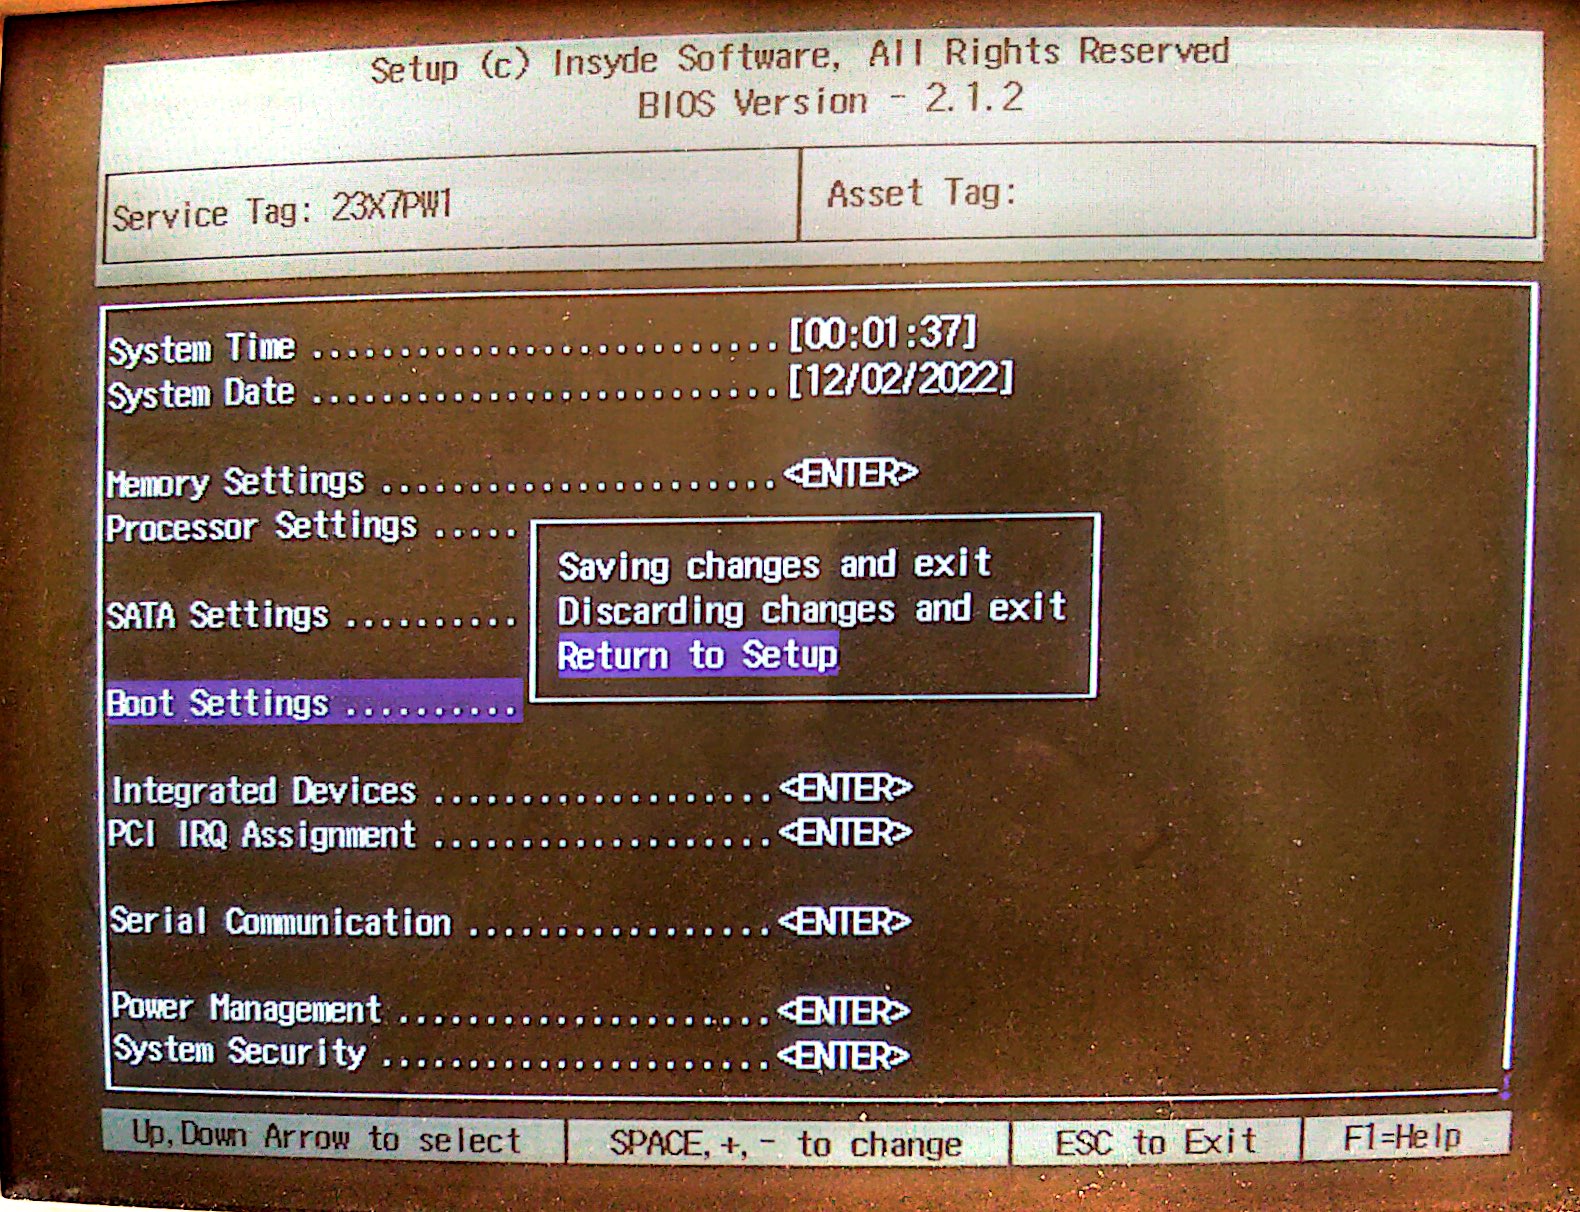
In the Settings screen navigate to the Boot Settings line and select Saving changes and exit

- At this point you may return to section 4.4 Galaxy 250, 250, 2930, i5, 450, 1000, 3000 using Keyboard and Monitor to begin the UCX Imager process.


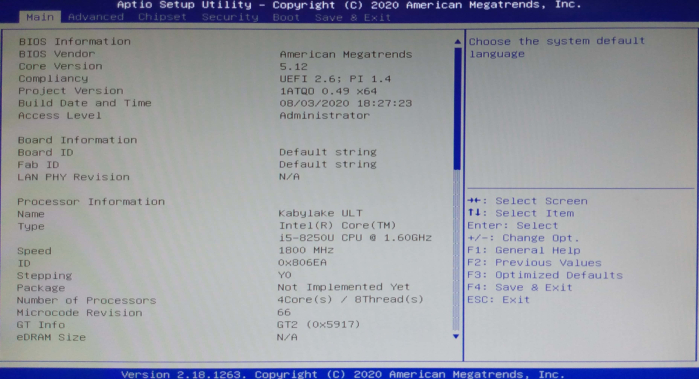
4.5.2 Updating the UCX 250 BIOS (when required);
- Make sure the Galaxy system is powered OFF.
- Connect a monitor to the video interface on the Galaxy hardware using the appropriate video interface (HDMI or VGA) depending on the hardware.
- Connect a wired USB keyboard to the Galaxy hardware.
- Connect the UCX Imager USB device to the Galaxy hardware. (It may be necessary to connect a USB bridge device so that both the UCX Imager and the keyboard can connect.)
- Connect power to the Galaxy system.
- Watch the monitor carefully during the system startup process.
- When the Splash Screen with the instructions to press <ESC> or <DEL> is visible, press one of those two buttons on the keyboard to launch the BIOS setup.
-
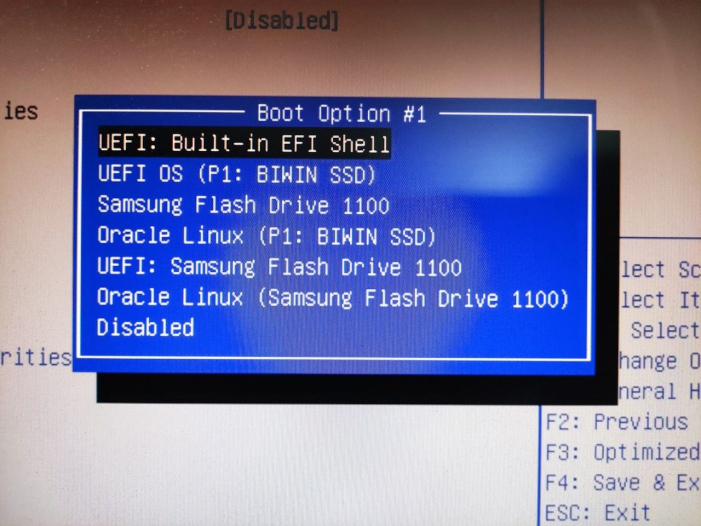
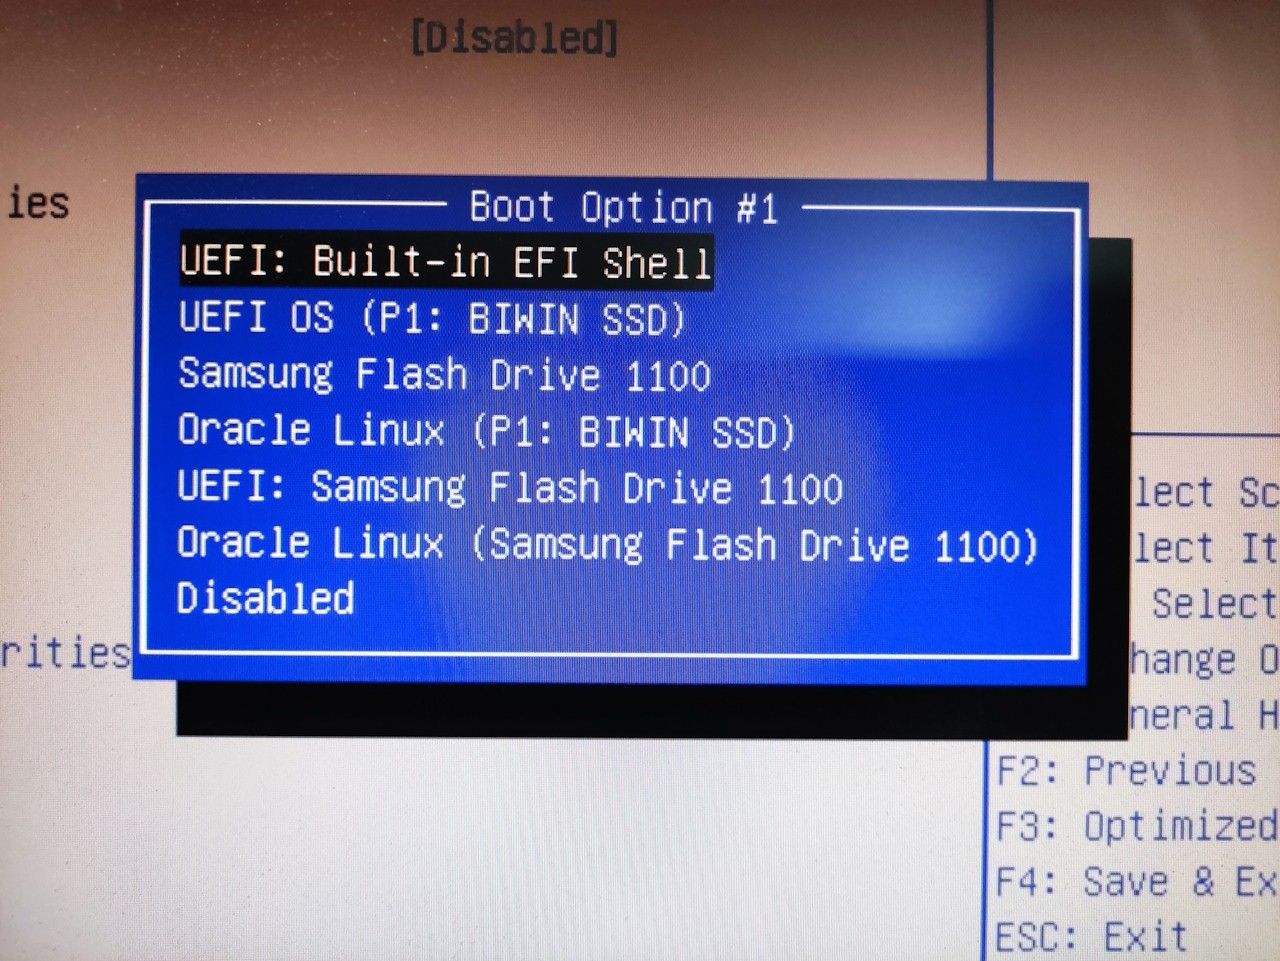
Navigate to the Boot menu with the Left/Right arrow keys
-
Navigate to Boot Option 1 by navigating using the down arrow and press Enter. Then select the Built-in EFI Shell and press Enter again.
-
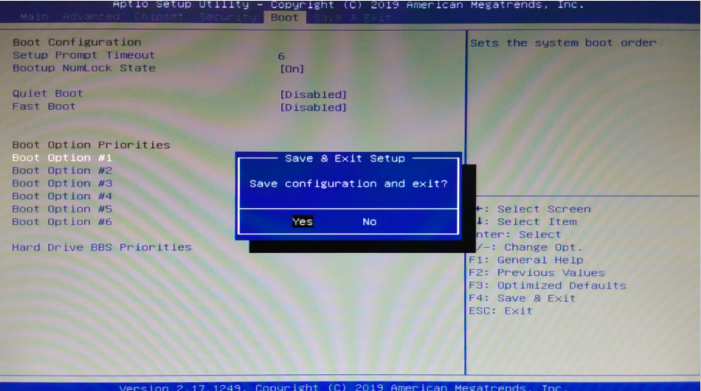
Press F4 to Save and Exit
-
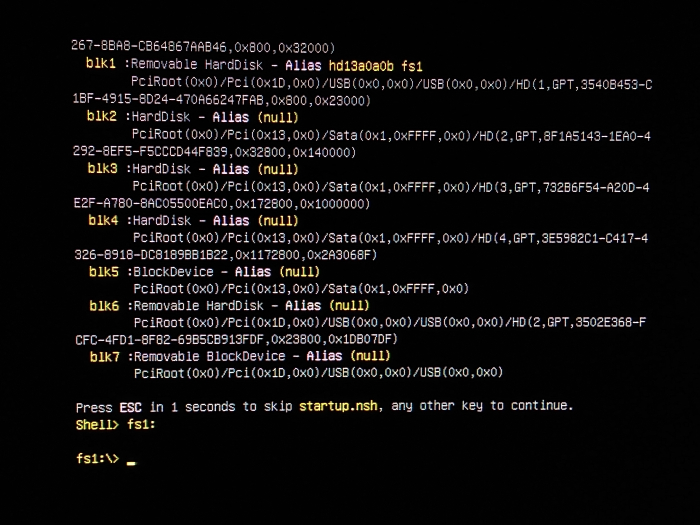
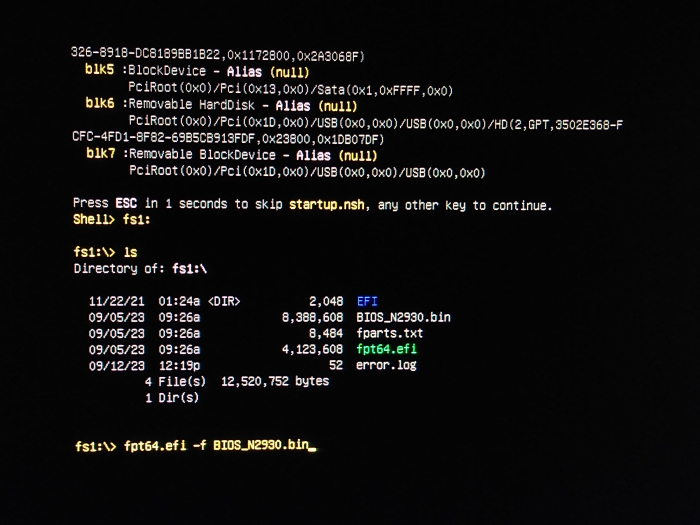
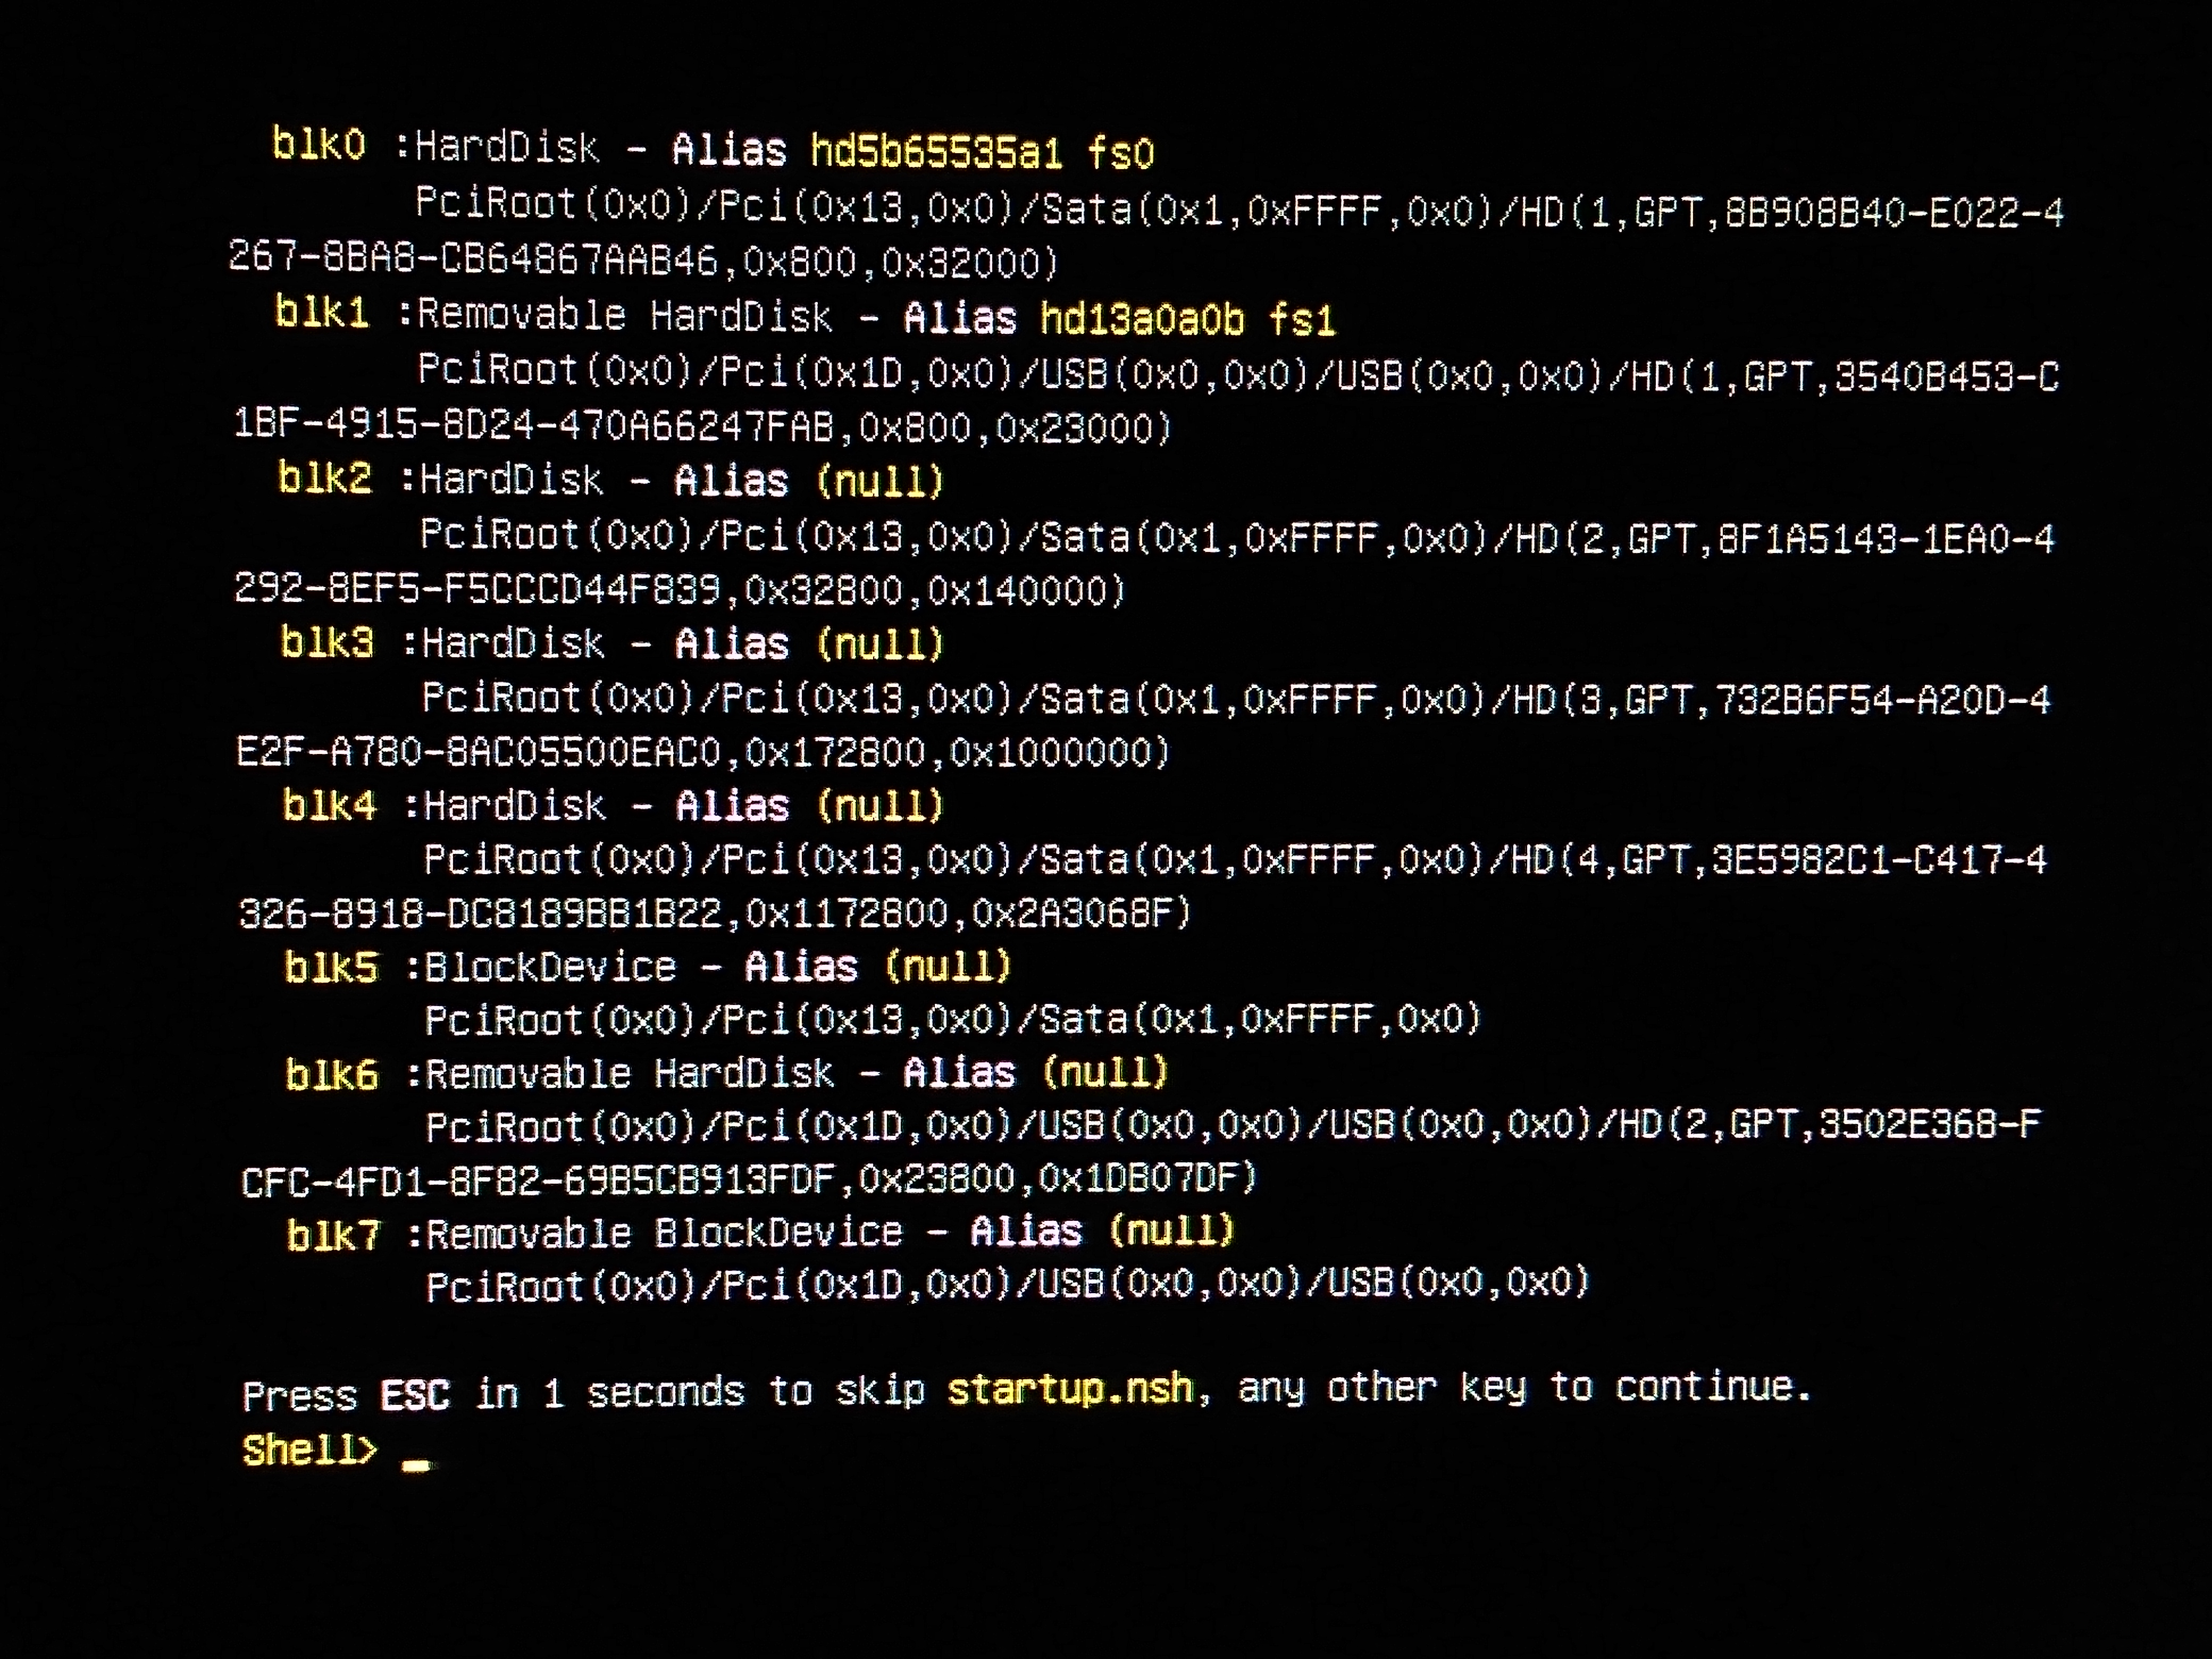
Wait for the Shell to finish loading:

Note that the screen may list the Removable HardDisk as fs0 or fs1. In this example it is listed as fs1. -
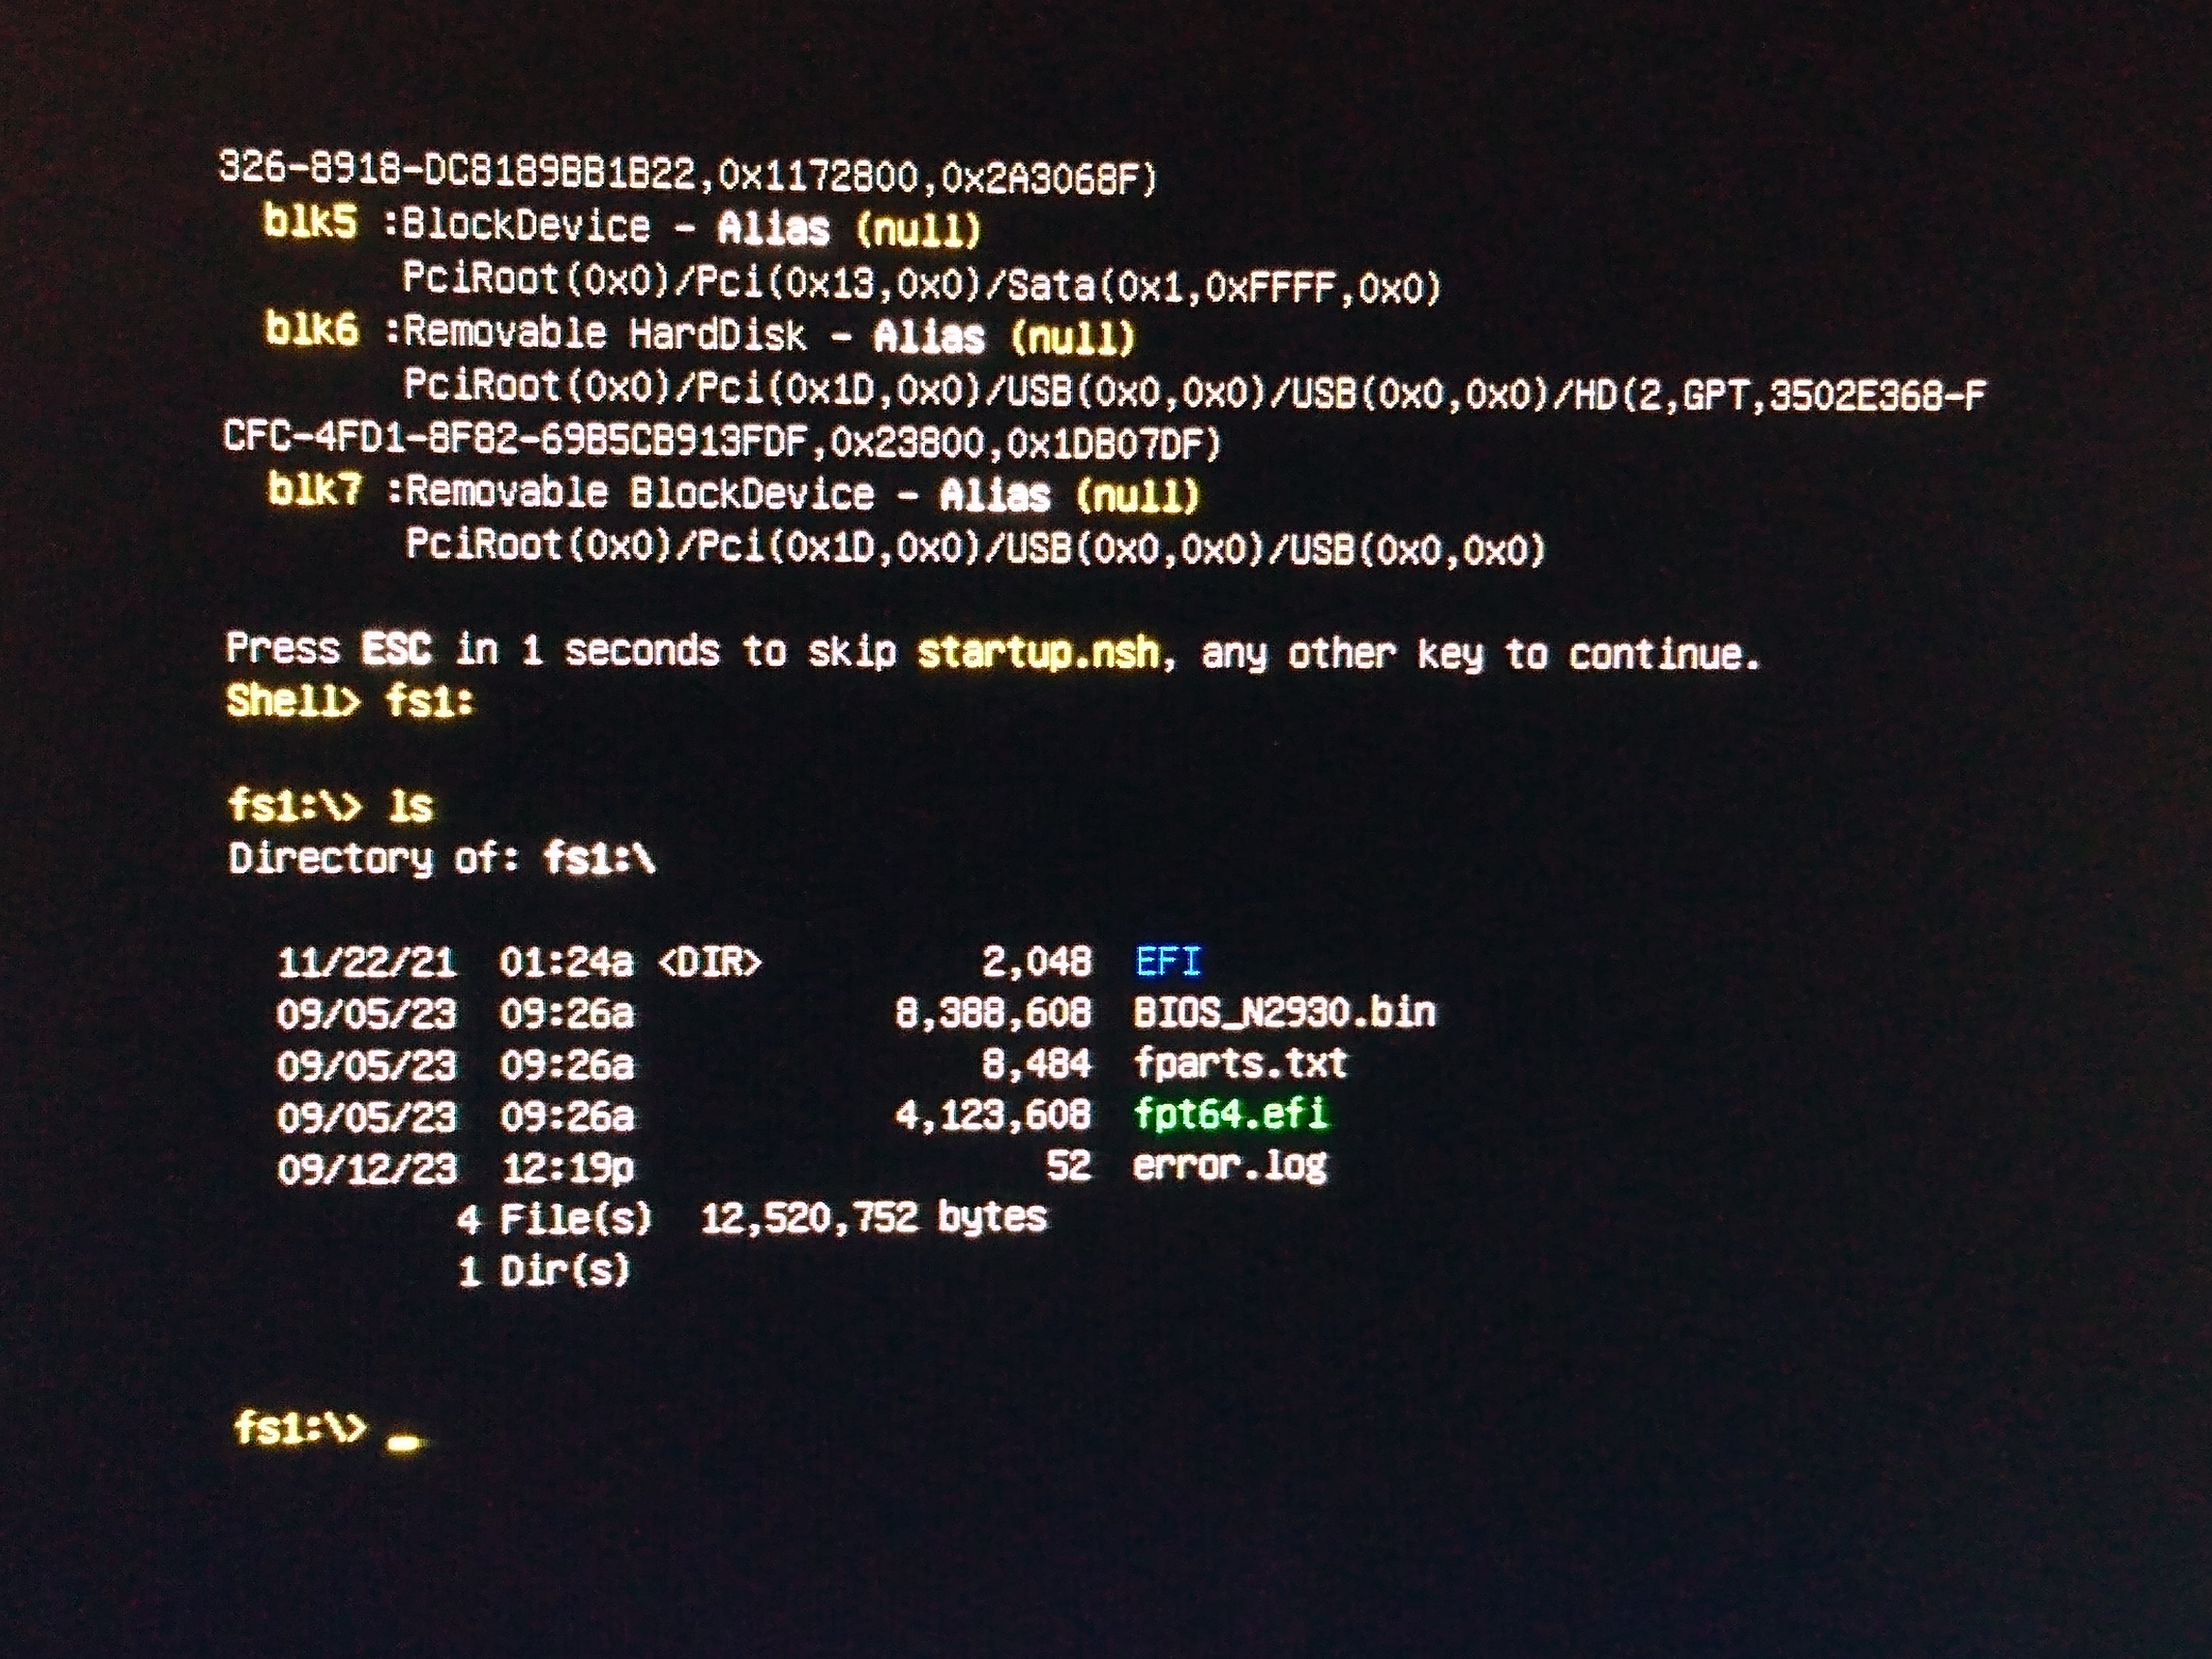
At the Shell prompt, enter the command fs0: or fs1: including the colon symbol, using whichever is identified above as the Removable HardDisk and press return. In this example we need to use fs1:
-
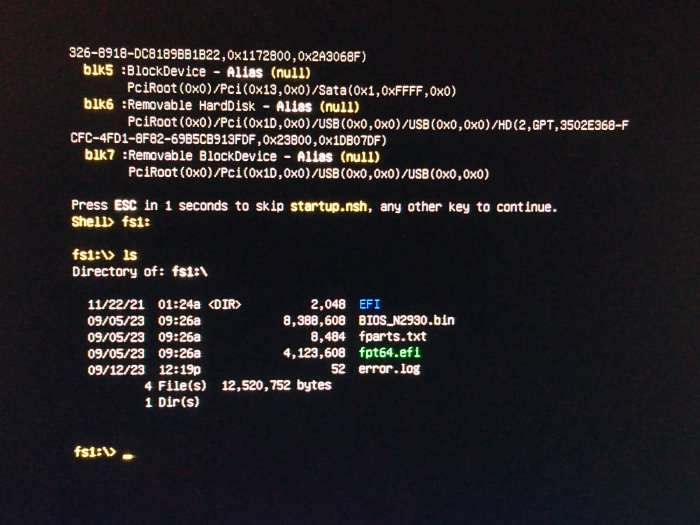
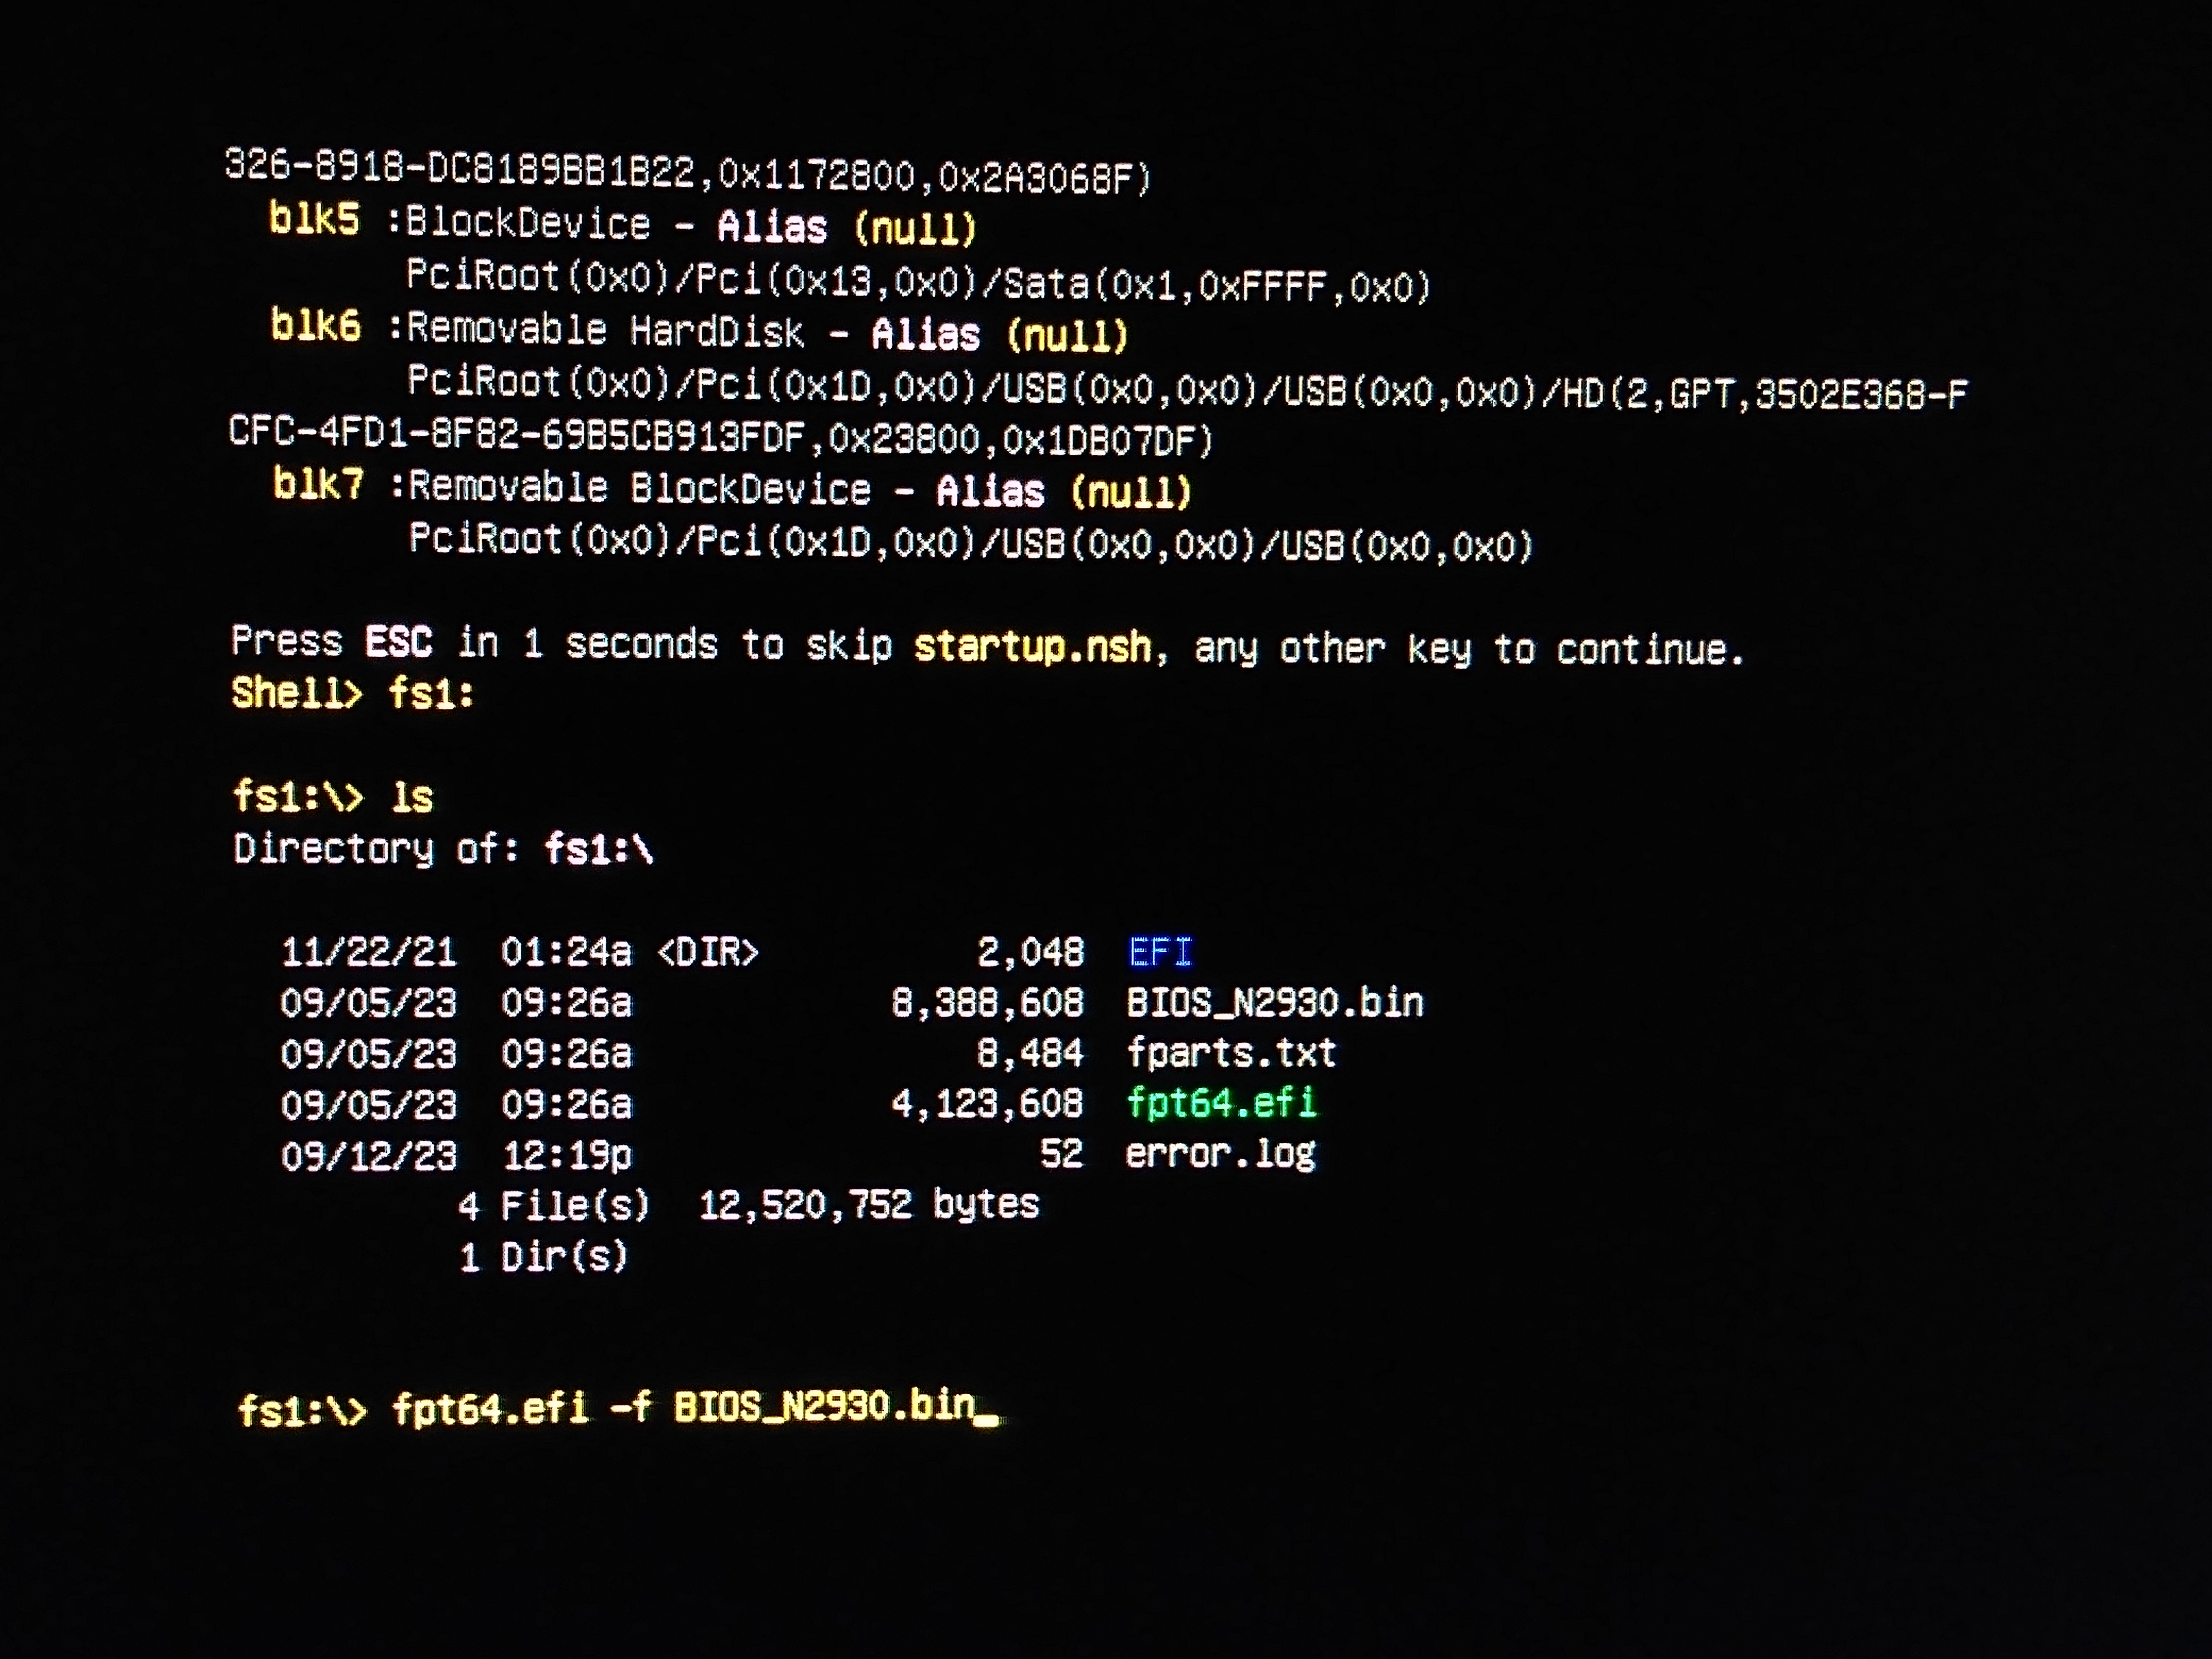
Now enter the command ls to ensure that the files "fpt64.efi" and "BIOS_N2930.bin" are listed
-
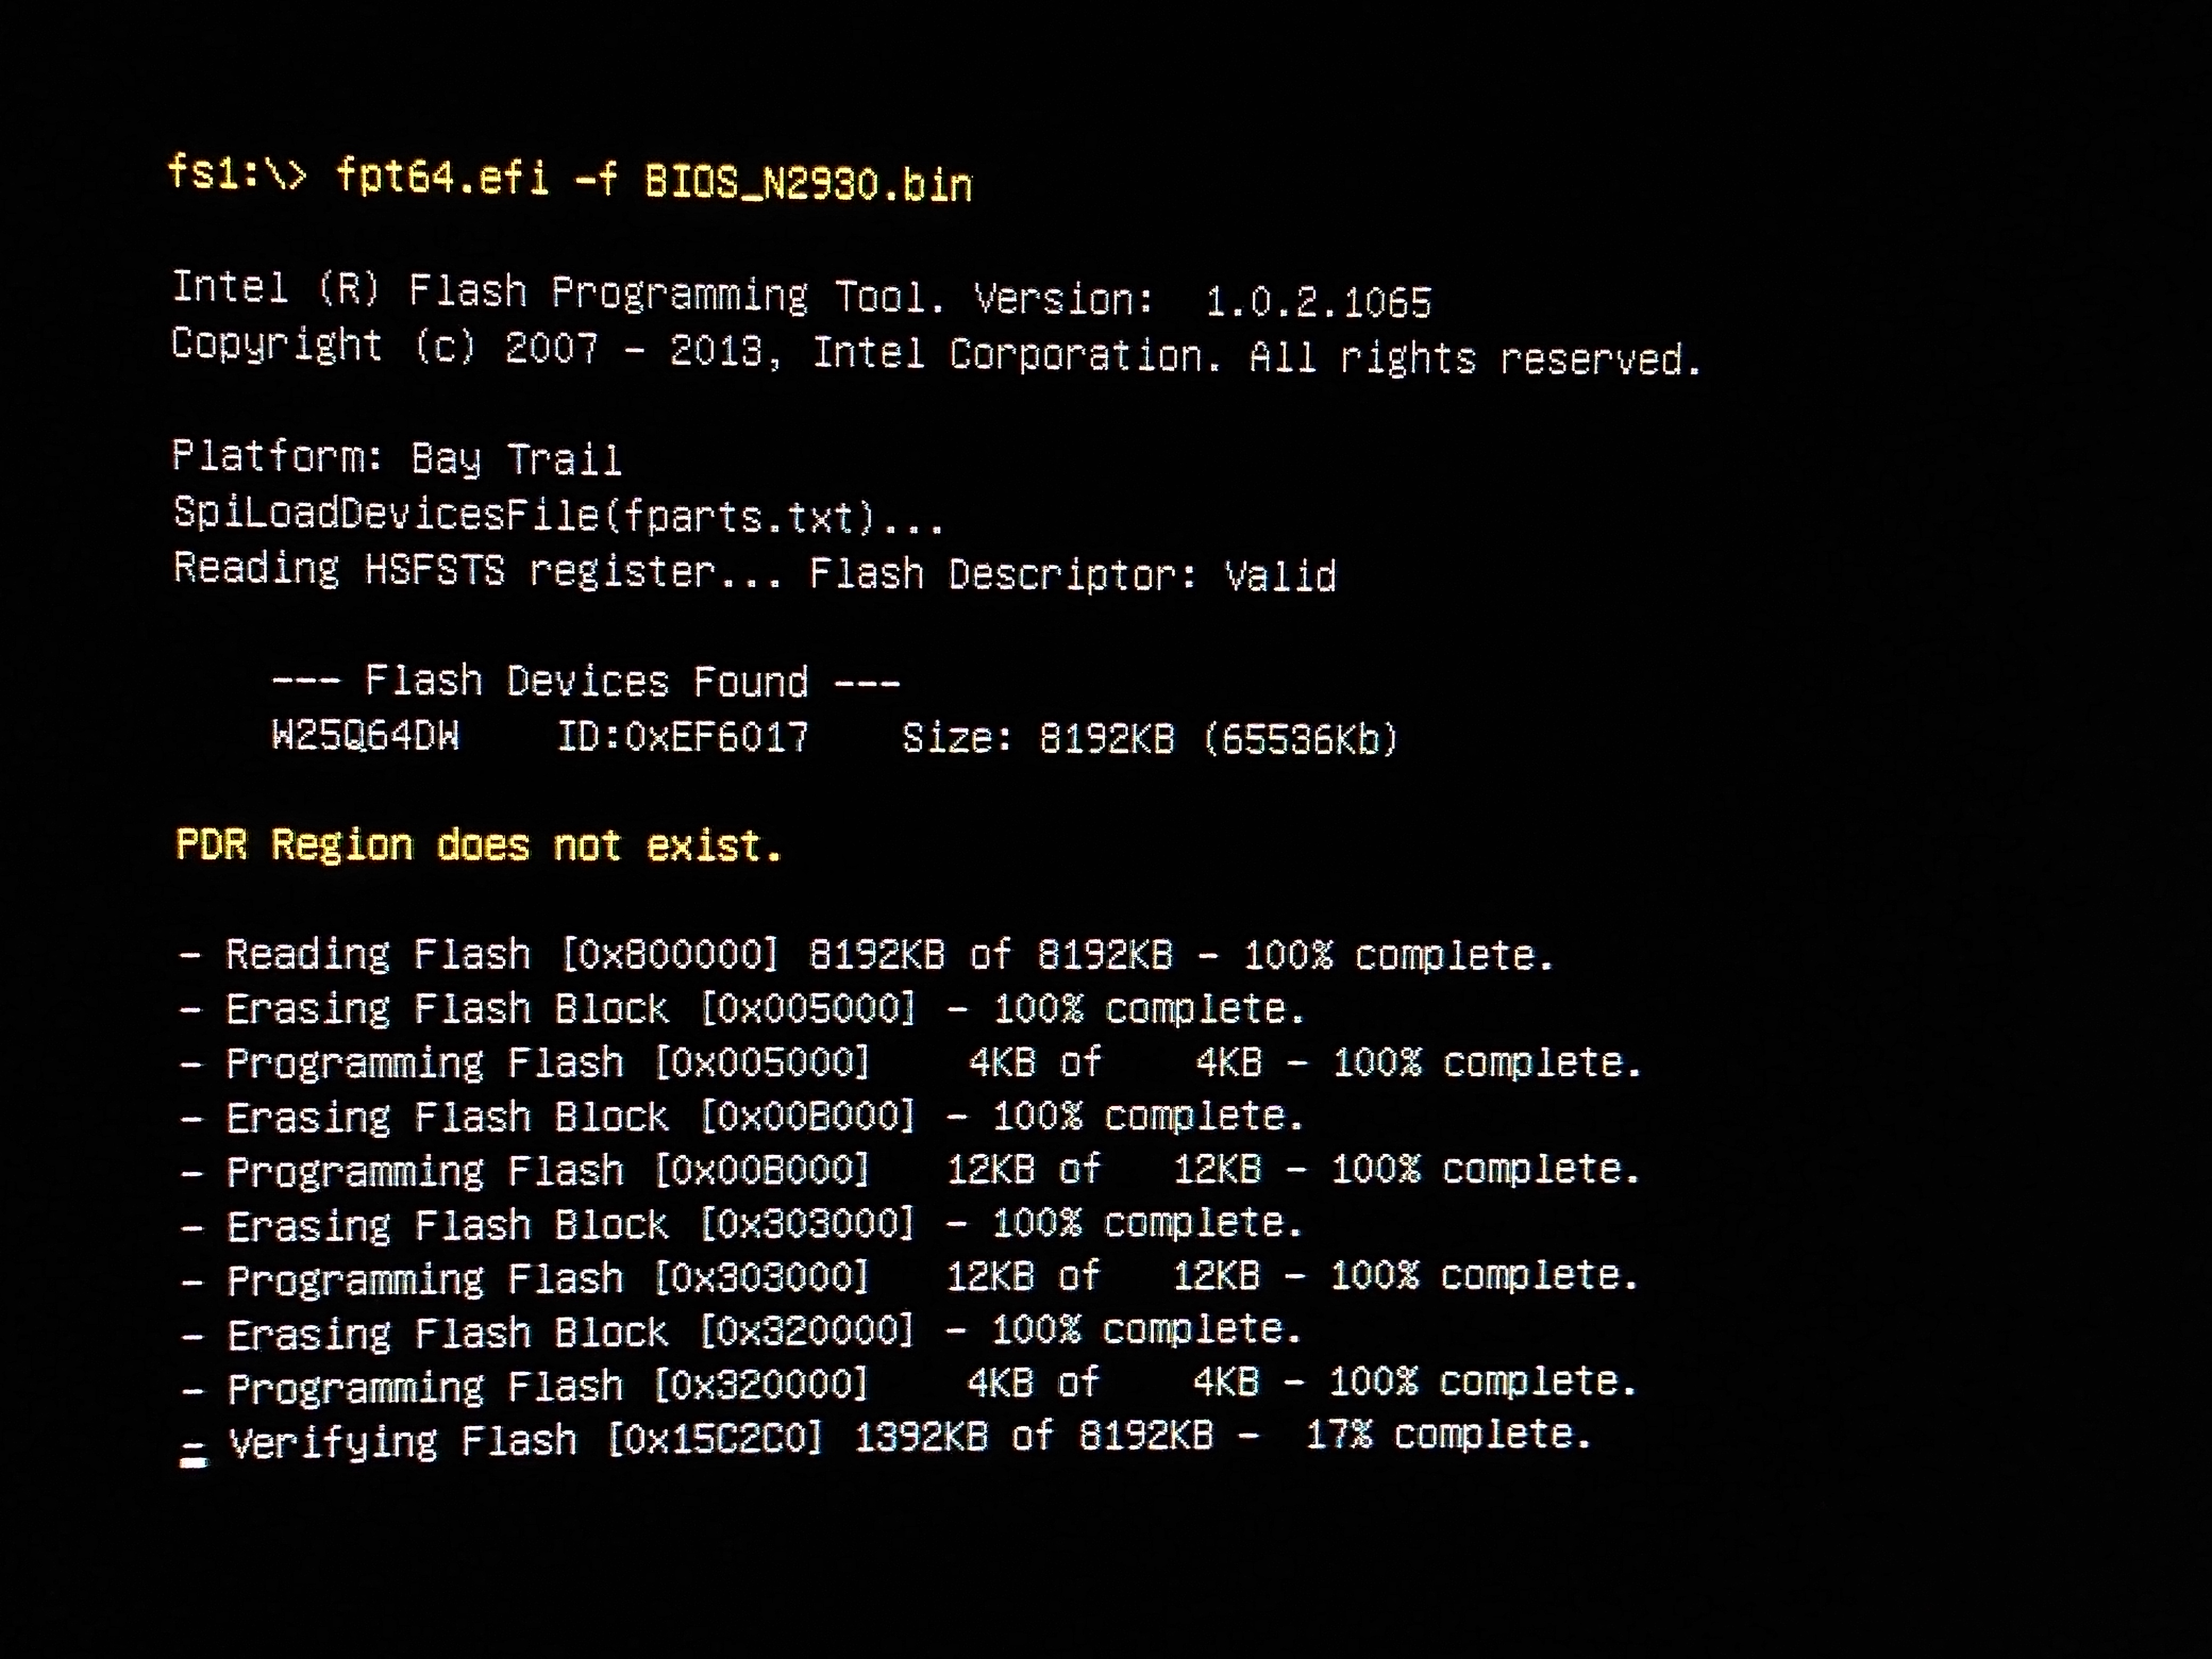
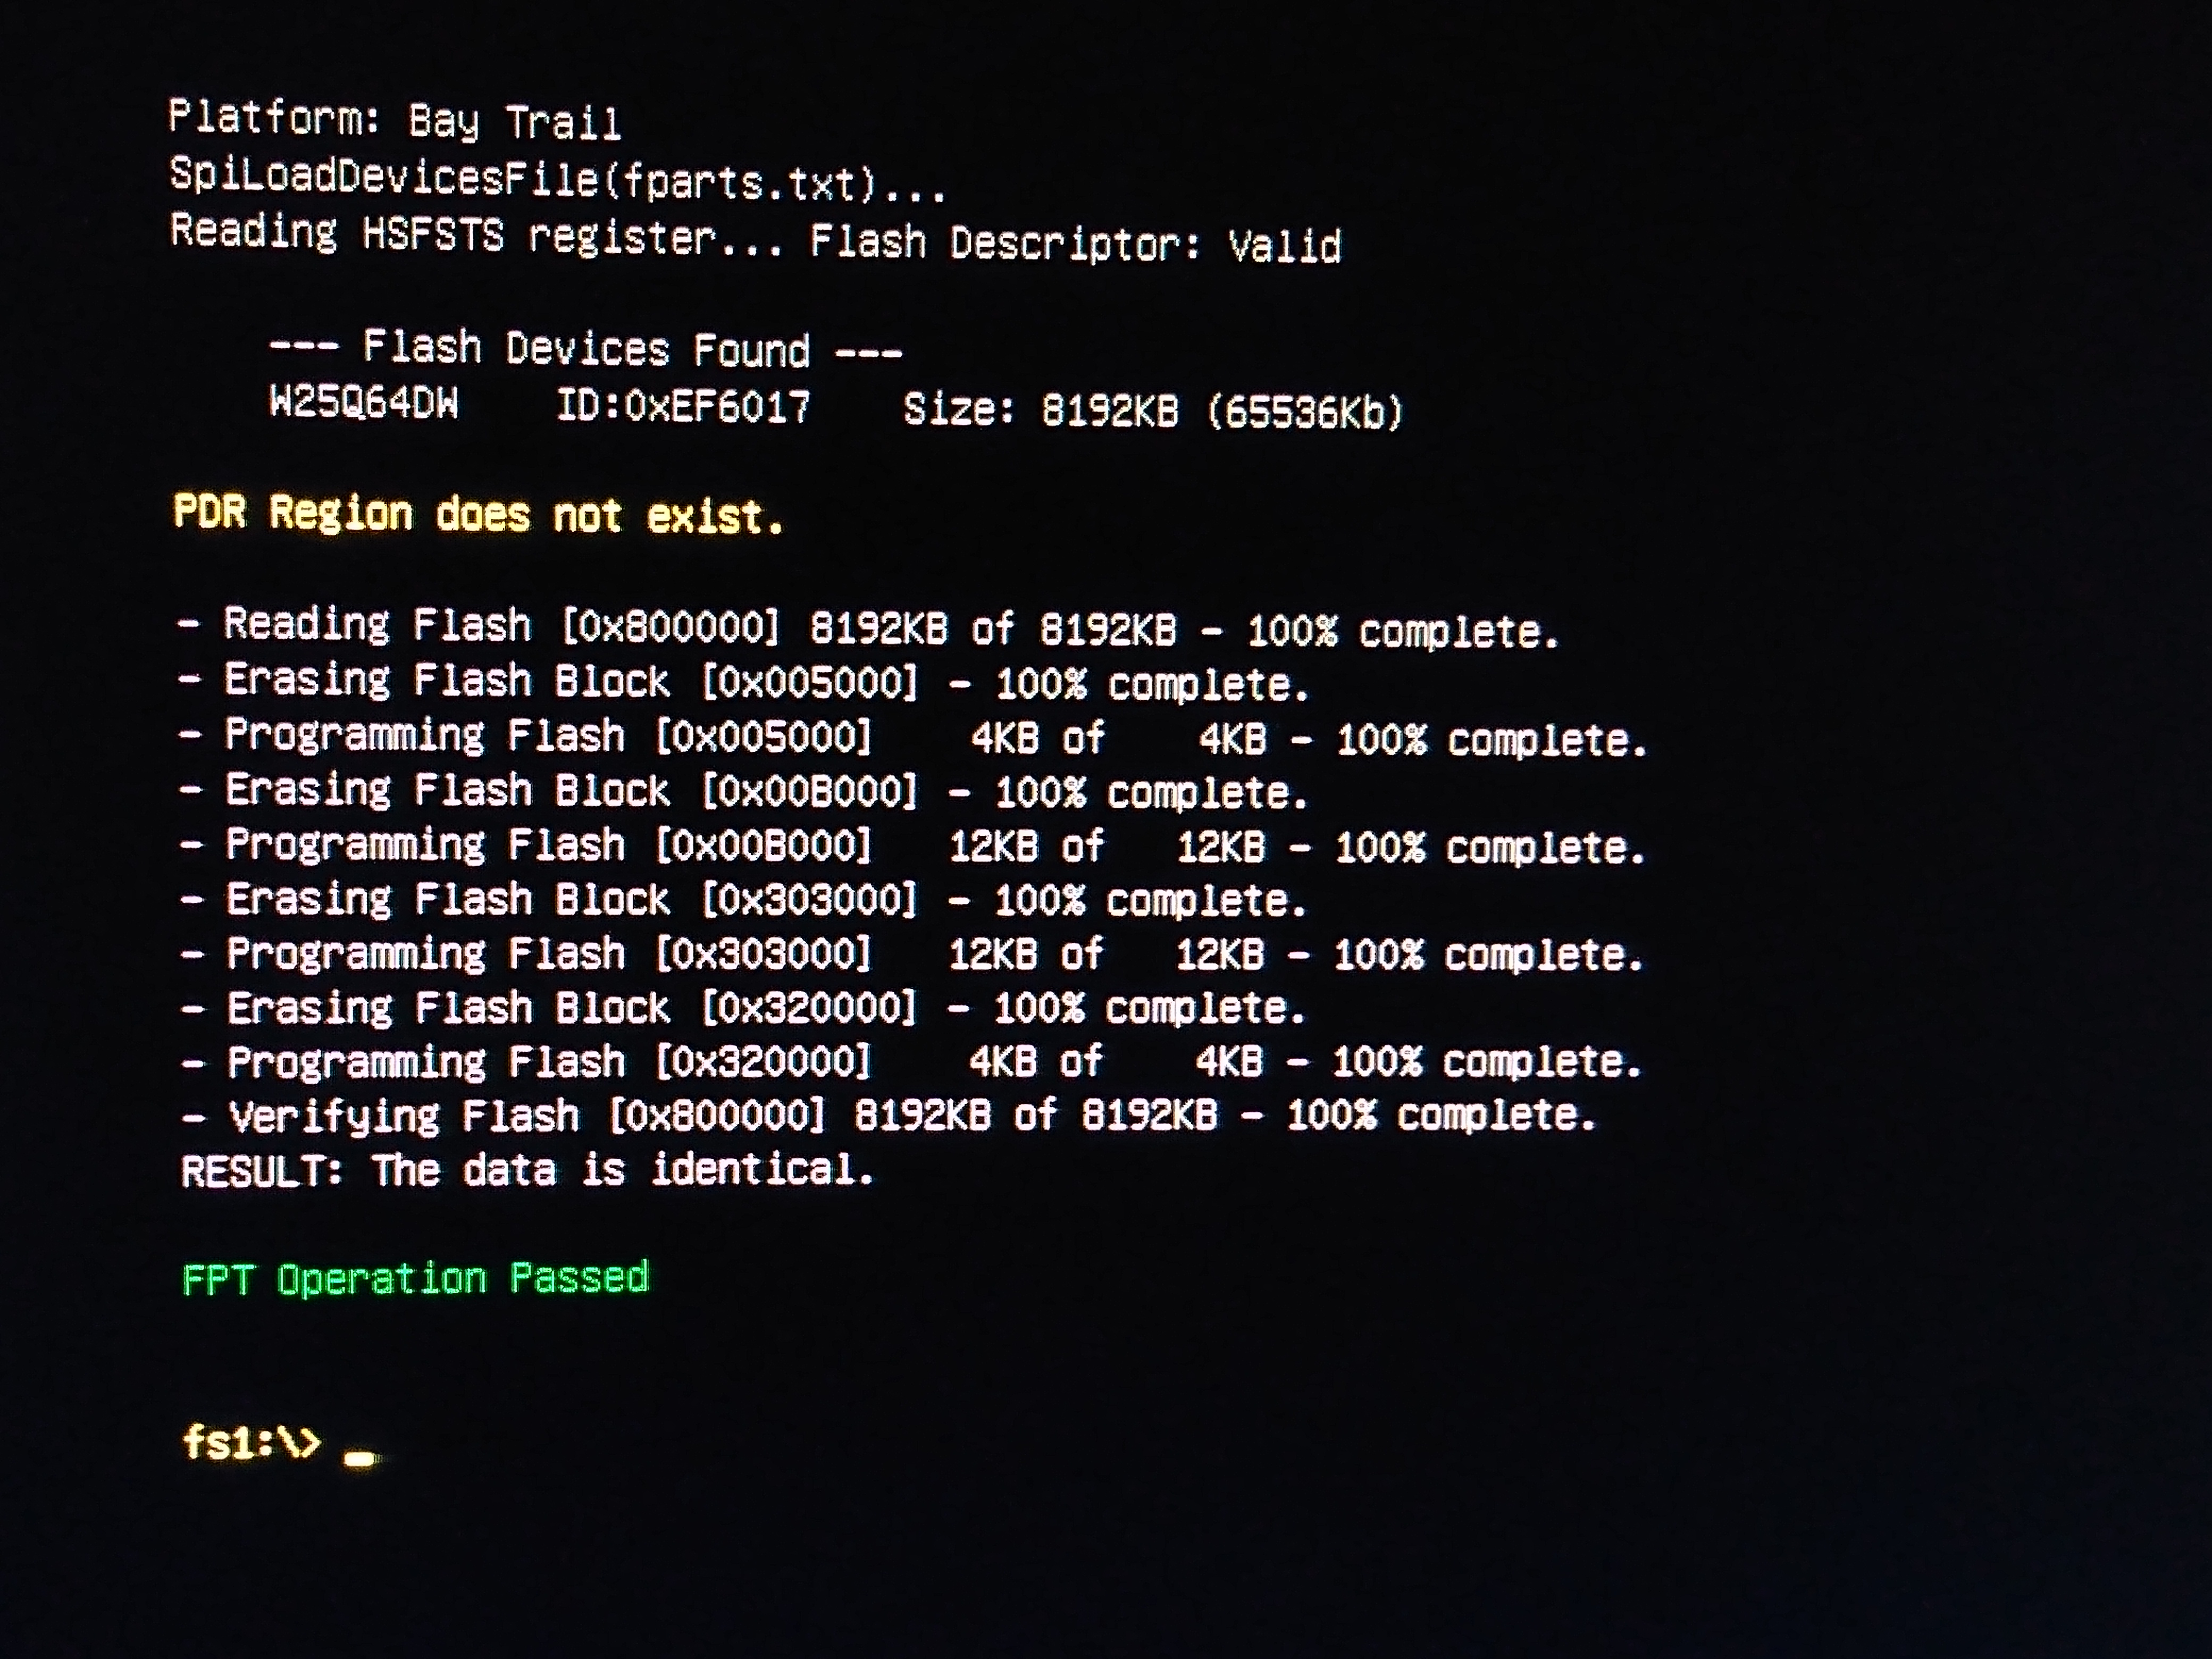
Now enter fpt64.efi -f BIOS_N2930.bin
-
The system will begin execution (ignore the "PDR Region Does not exist message.)
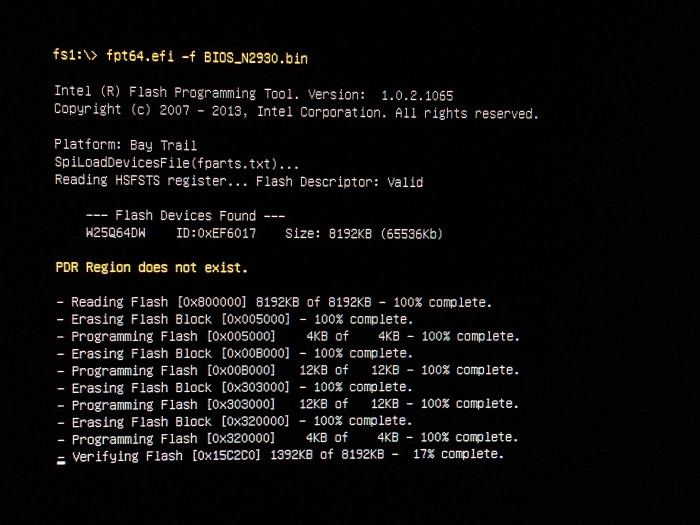
-
Once you see the prompt FPT Operation Passed, then the system is finished
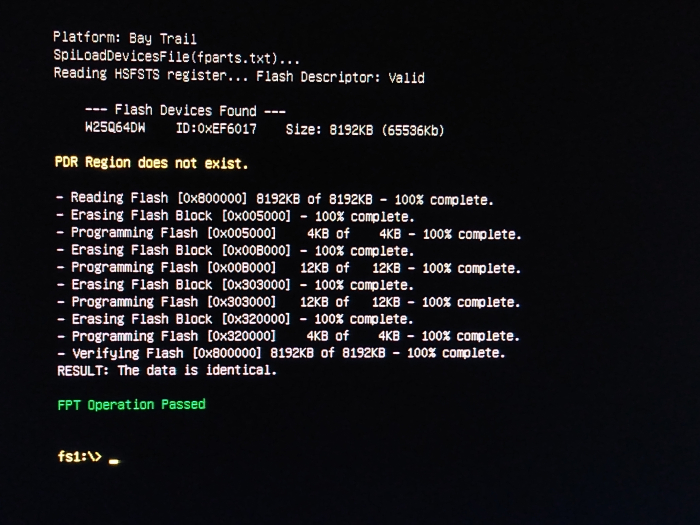
- Press "Ctl-Alt-Del" on the keyboard to power the system down


At this point the BIOS will have been updated and you may power the UCX 250 back up and proceed to re-image the system using either the Front Panel Display method or the SSH Operation method