

Advanced Settings (5.0)
The Advanced Settings page contains settings that are applied to the entire UCx system. One of the first steps in the configuration of your UCx system is to review the Advanced PBX settings.
To view the Advanced settings of your UCx system, perform the following steps:
- Open the UCx Web-based Configuration Utility
- From the PBX tab, select PBX Configuration
- From the left side column, select Advanced Settings
- Review the configured defaults
If you change a setting, you must save the change by clicking on the green check box that appears on the right hand side of the setting. ![]()
You can restore the default value by clicking on the green arrow icon. This icon is displayed if the value is not the default. ![]()
The example below shows the green icons after a change is made to one of the settings.

The Advanced Settings panel contains settings for the following modules:
- Call Flow Control
- DAHDI Configuration
- Device Settings
- Dialplan and Operational
- Follow Me
- Media Settings
- Queues
- System Setup
- Time Condition
- Voicemail
Call Flow Control Module

DAHDI Configuration Module

Device Settings

Dialplan and Operational

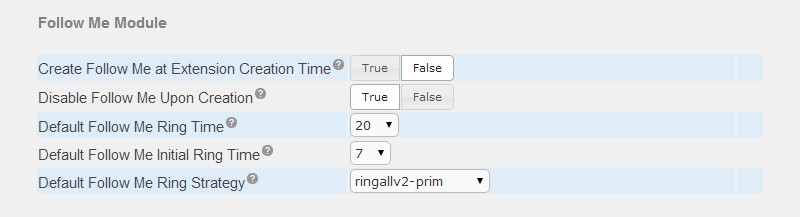
Follow Me Module
Media Settings
| Field | Description |
|---|---|
| ICE Support Enabled | Set this field to TRUE if you are configuring UCx WebRTC clients on your system. |
| STUN Server Hostname | If ICE support is enabled, you must configure a STUN Server for ICE to be operational. Enter the hostname of the STUN Server to be used by the ICE feature. |

Queues Module

System Setup

Time Condition Module

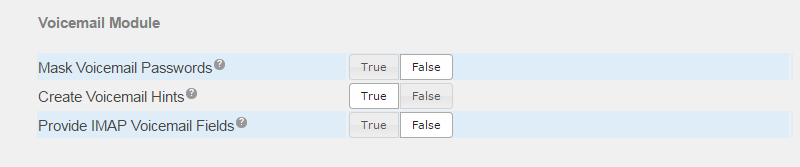
Voicemail Module
|
Field
|
Description
|
|---|---|
| Mask Voicemail Passwords | This field controls the display of the voicemail password, "masked" or "unmasked" in the Extensions page. By default the password is unmasked (False). |
| Create Voicemail Hints | Set this to TRUE to allow the programming of busy lamp fields (BLF) for voicemail boxes on your phone. |
| Provide IMAP Voicemail Fields | Set this to TRUE if you have voicemail configued with IMAP, so the IMAP username and password fields are displayed on the Extensions page. |
Self Assessment Quiz
- If the Asterisk Outbound Trunk Dial Options contains the parameter tT, what does dialing ## do when a phone is engaged in a call?
- Do you know the implications of changing the setting for Disallow Transfers for Inbound Callers?
- Have you reviewed the Asterisk Dial Options, do you know what the wW option is for?