Bulk Add XSTIM Extensions
Table of Contents
1.0 Bulk Add Using Extension Template
1.1 Displaying Other Extension Fields
2.0 Migrating Extensions from M1/CS1000
3.0 Migrating Extensions from BCM
1.0 Bulk Add Using Extension Template
Besides adding a single XSTIM extension at a time, the UCX Web-based Configuration Utility also allows the administrator to use an existing XSTIM extension as a template to create one or multiple XSTIM extensions at the same time. The new extension(s) are created with the same configuration as the template extension including items such as the extension type, number of line appearances, call waiting configuration, button configuration and others.
To configure XSTIM extension(s) using an existing XSTIM extension as a template, perform the following steps:
- Open the UCX Web-based Configuration Utility
- From the PBX tab, select PBX Configuration
- From the left side column, select Extensions
- From the right hand column, select Bulk Add (XSTIM)

- On the Bulk Add page, enter the number of the extension that you want to use as a template in the Template Extension field.
- Enter extension numbers and/or extension ranges in the New Extension Range field
- Press the Prepare Template button.
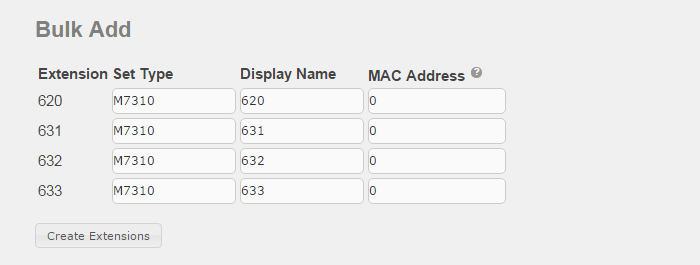
- On the Bulk Add template page, configure extension specific values such as the Display Name and MAC Address
- Once all extension specific values are properly configured, press the Create Extensions button to create the XSTIM extension(s).
1.1 Displaying Other Extension Fields
The list of fields presented on the template page is based on the configuration of the template extension.
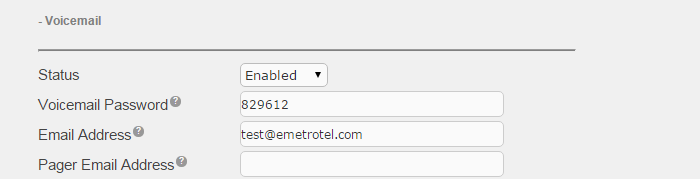
For example, if you want the Voicemail Password and Email Address fields to be displayed, then the template extension should have both these fields configured.
If you want the Hotdesking Password field to be displayed, then configure hotdesking password for the template extension.

2.0 Migrating Extensions from M1/CS1000
Information related to extensions can be collected from a M1/CS1000 system and then imported into the UCX Server using the Bulk Add feature.
Please refer to CS1000 Extension Migration to UCX page for details.
3.0 Migrating Extensions from BCM
You can also import extension related data from a BCM and have the UCX configure the same feature set on those extensions.
3.1 Preparing the BCM Data
Before entering any data here, you must first prepare the file containing the BCM extension related data. Begin by creating and exporting a Program Record on your BCM. The file is exported as a multi-tabbed Excel spreadsheet. One of those tabs will be named Active Sets. This sheet contains the data related to the programming of the extensions that needs to be uploaded to the UCX, Some editing may be required and the single tab must be converted to a text file prior to upload. For details on how to retrieve the Programming Record from which contains the Active Sets data from a BCM, refer to Chapter 2 of Norstar/BCM to UCX Conversion Guide.
The following shows the typical layout of the first few lines of the Active Sets data. The areas in RED are used in the BCM migration data.

In general, the other information can be left in place or deleted, and the tool will function appropriately. However, some rows of data must be deleted. These sections are:
- CAP/KIM Button Programming
- Details of - Restrictions
Be sure to save the edited Active Sets Excel tab in .txt format and note the file's location.
3.2 Uploading the BCM Data
-
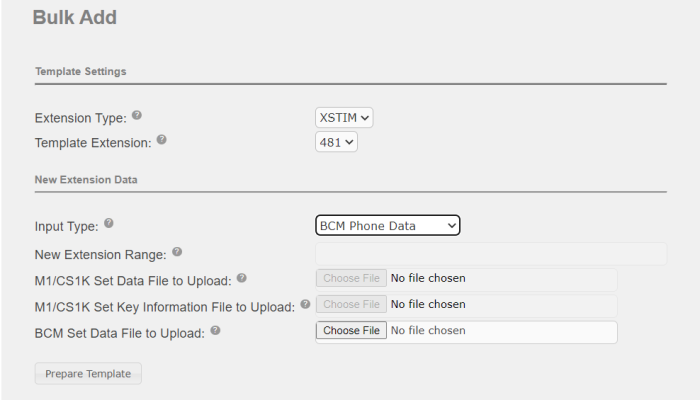
In the Template Extension field, select an existing extension from the pull-down list to use as a template. If you do not have any existing XSTIM extensions, proceed to
Adding an XSTIM Extension page to add the extension. -
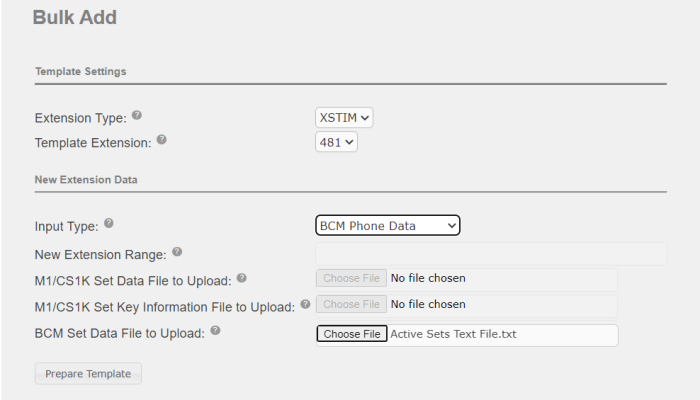
In the Bulk Add page in the UCX, select BCM Phone Data from the Input Type drop-down box:
-
Click the Choose File and navigate to the .txt file created in the previous section.
-
Click Prepare Template and you will be presented with a list of extensions extracted from the BCM data.

-
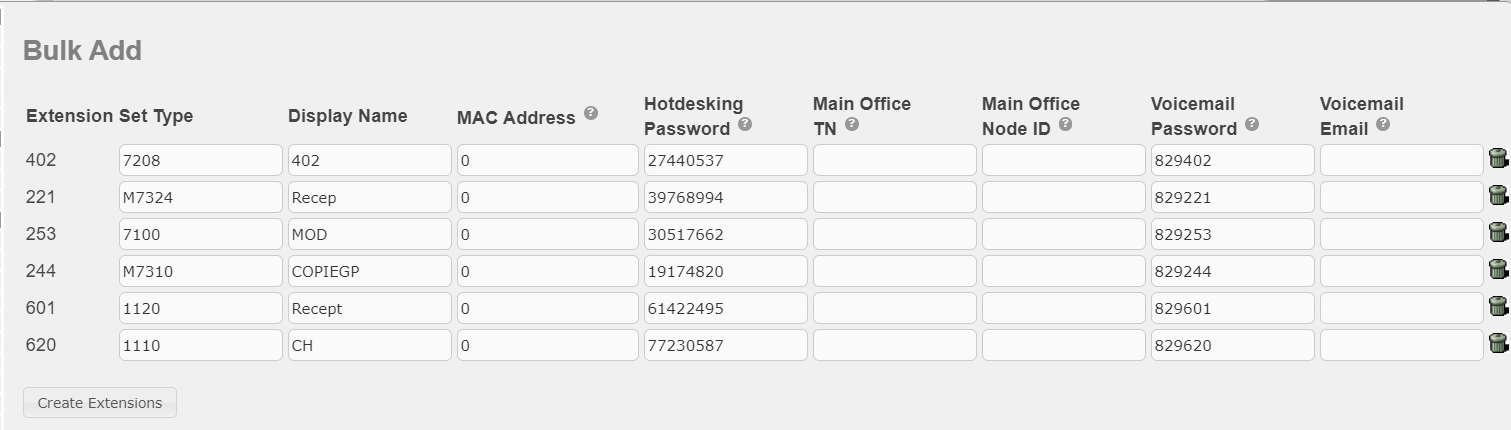
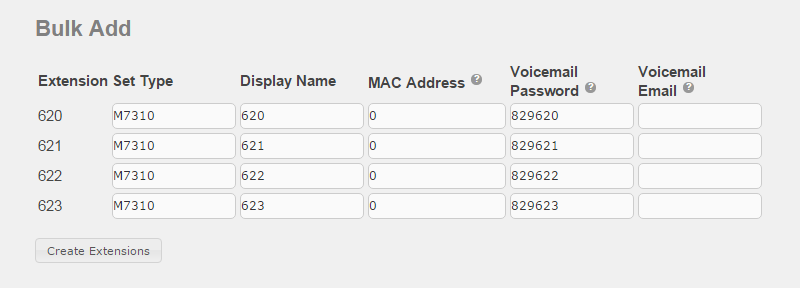
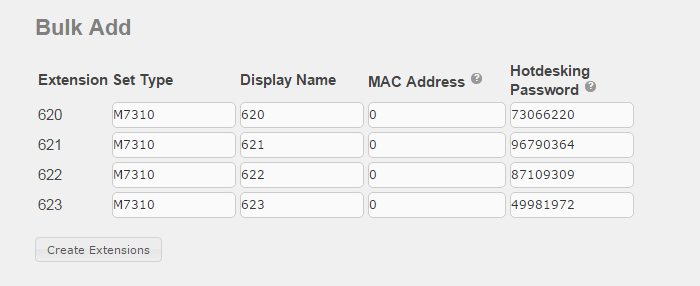
If you have added a Hotdesking password or have enabled Voicemail in the applied template, then the imported sets will be assigned passwords. The Hotdesking password will be randomly generated while the Voicemail password will be based on the UCX default format of 829+Extension (eg. 829402 for extension 402)

-
Make any required changes to the data, including deleting any unwanted extensions by clicking on the Trash Can icon on the desired row, and the click Create Extensions

- Click Apply Changes to complete the import
-
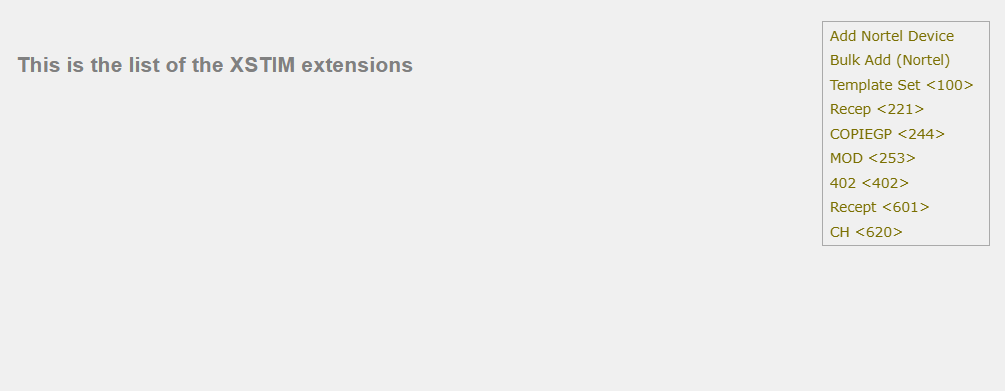
You can verify the import and make any additional edits to any of the new extensions through the standard Extension (XSTIM) panel