

Configuring UCX Hyper-V with a Microsoft Azure Monitoring Agent
A UCX Hyper-V Virtual Machine can be configured for being monitored by Microsoft Azure.
Pre-Requisites
- A licensed UCX Hyper-V Virtual Machine image installed in a Microsoft Azure Environment.
- During the installation process, the UCX must have internet access to be able to reach the E-MetroTel software repositories to allow the installation process to retrieve and install the latest version of the WALinuxAgent package.
- The UCX host name must be changed from its default value following the instructions in the Network Parameters documentation page. The name chosen must be coordinated with the Microsoft Azure monitoring system administrator.
Procedure
Step 1: Create the OMS configuration file for the UCX-Azure installation
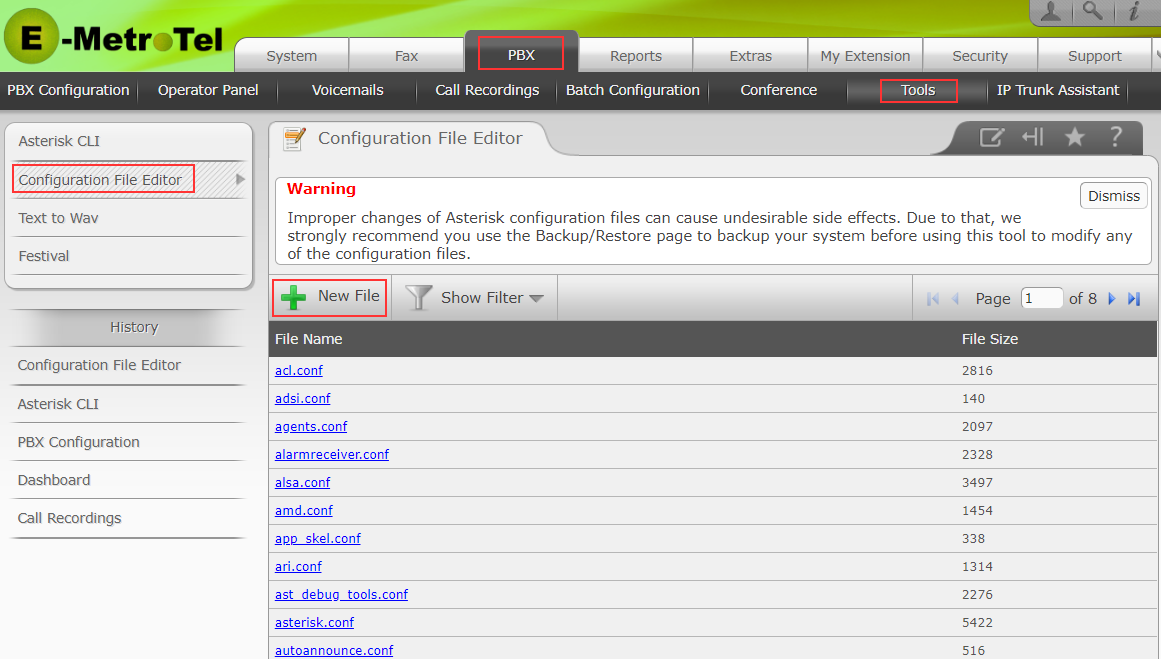
This step requires creating a file named oms.conf using the Configuration File Editor on the UCX VM instance.
-
Begin by navigating to the Tools panel of the PBX tab in the Web-based Configuration Utility.

-
Enter the text oms (the ".conf " suffix is added automatically).

-
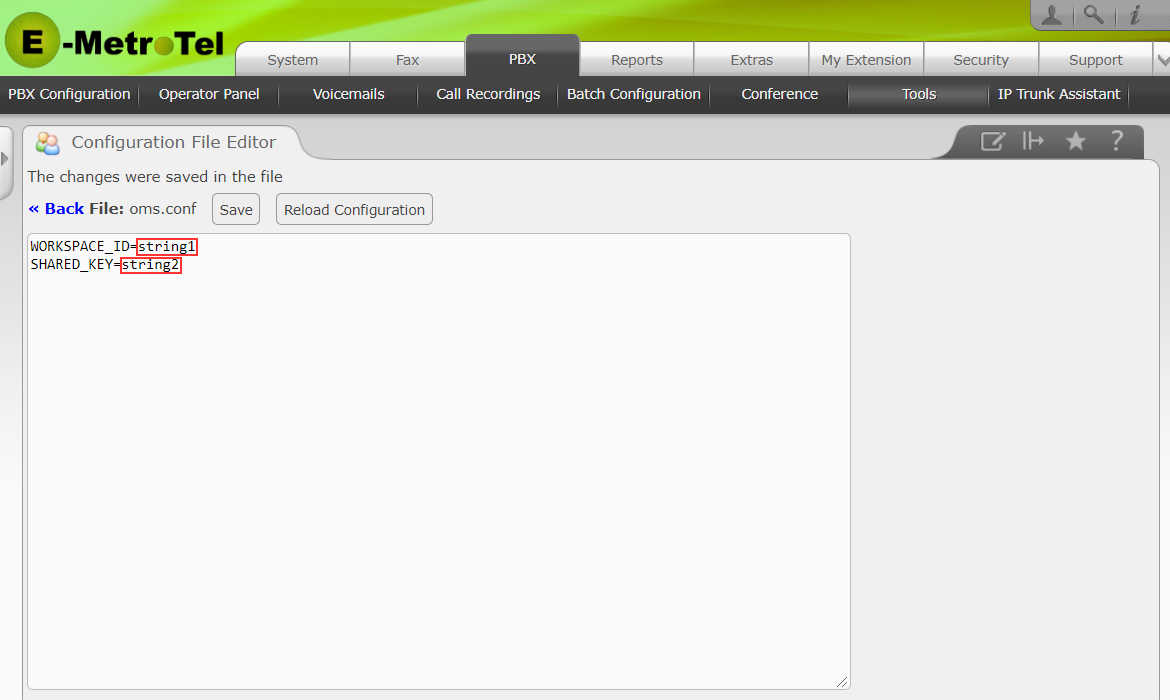
In the text box for the file, enter the text "WORKSPACE_ID=" followed by the WORKSPACE_ID string (string1 below) supplied by your Microsoft Azure monitoring system administrator and on the next line enter the text "SHARED_KEY=" followed by the SHARED_KEY string (string2 below), also supplied by your Microsoft Azure monitoring system administrator. The "WORKSPACE_ID" and "SHARED_KEY" entries must be capitalized (all caps) and punctuated (using the "_" underscore) exactly as shown:
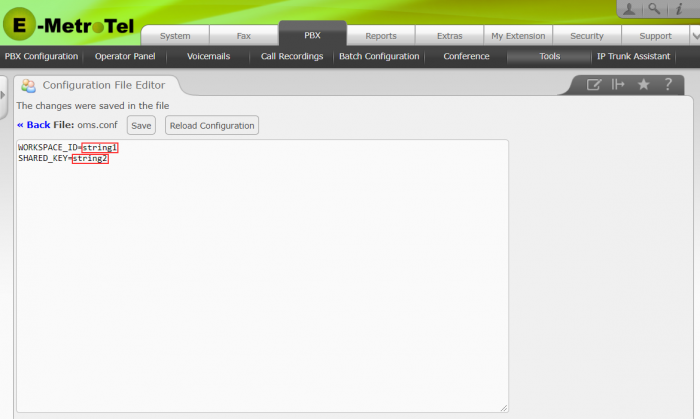
- Press Save to create the file.

Step 2: Install the UCX-azure package on your UCX.
- Update your system using the Web-based Configuration Utility and follow the instructions in the Software Updates documentation page.
- Follow the instructions for installing packages in the Packages documentation to install the UCX-azure package. You can use the Show Filter button to search for "azure".
Once the installation is complete the UCX VM no longer requires access internet access for the Azure agent to run.