FXS 16-port Card - Configuring Extensions
Configuring analog extensions using the FXS 16-port card
The communication between the FXS 16-port Card and the UCX software takes place via SIP protocol. Before analog extensions can be used on the FXS 16-port Card, configuration on both the FXS 16-port Card and the UCX software is required. The following steps are involved:
- Create SIP Extensions on the UCX
- Configure the SIP Endpoints on the FXS 16-port Card
- Configure Analog Channel Settings on the FXS 16-port Card
- Configure the Dial Matching Table on the FXS 16-port Card
Step ONE: Create SIP Extensions on the UCX
The steps to configure SIP Extensions on the UCX software can be found in Adding a SIP Extension. You will need to use the Secret that you create for each SIP extension on the UCX as the Password for each SIP Endpoint configured the steps below.
Step TWO: Configure the SIP Endpoints on the FXS 16-port Card
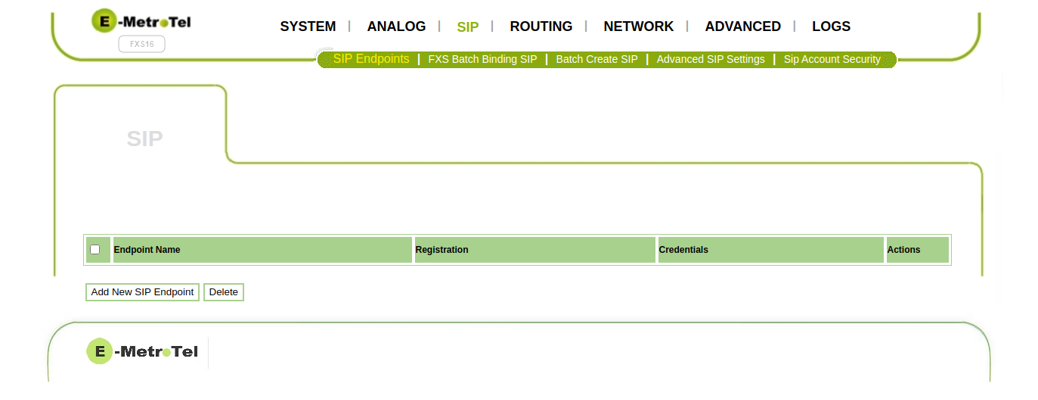
The FXS 16-port Card SIP settings are configured in the SIP / SIP Endpoints page. The steps to configure SIP Endpoints are as follows:
-
Click Add New SIP Endpoint

-
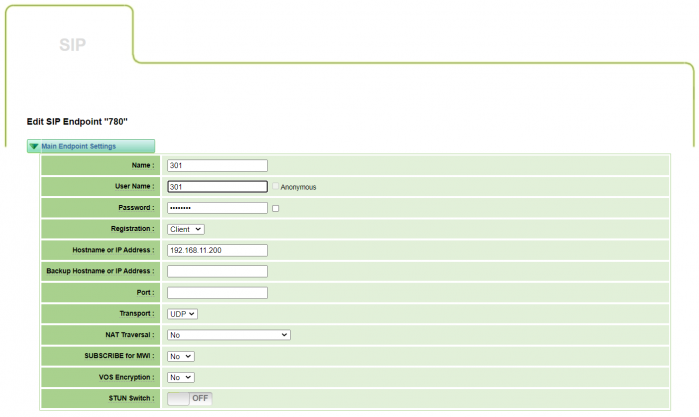
In the Main Endpoint Settings section, enter the following:
- Name: enter the extension of this connection as configured on the UCX (eg. 301)
- User Name: enter the extension of this connection as configured on the UCX (eg. 301)
- Password: Enter the Secret configured in the SIP Extension on the UCX (i.e. the valid Secret defined for this extension in Step ONE above.)
- Registration: Choose Client
- Hostname or IP Address: Enter the IP Address of the UCX Server, (eg. 192.168.11.200). This should be the UCX address associated with the backplane of the Galaxy system for single site configurations.
- Port: Enter the default UCX SIP port (eg. 5060) or same port as configured in the UCX PBX/SIP Settings/Bind Port
- Transport Type: Choose UDP
- NAT Traversal: Choose No
- SUBSCRIBE for MWI: Choose No or Yes
-
VOS Encryption: Choose No
-
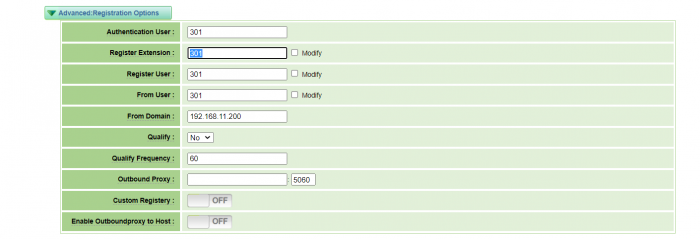
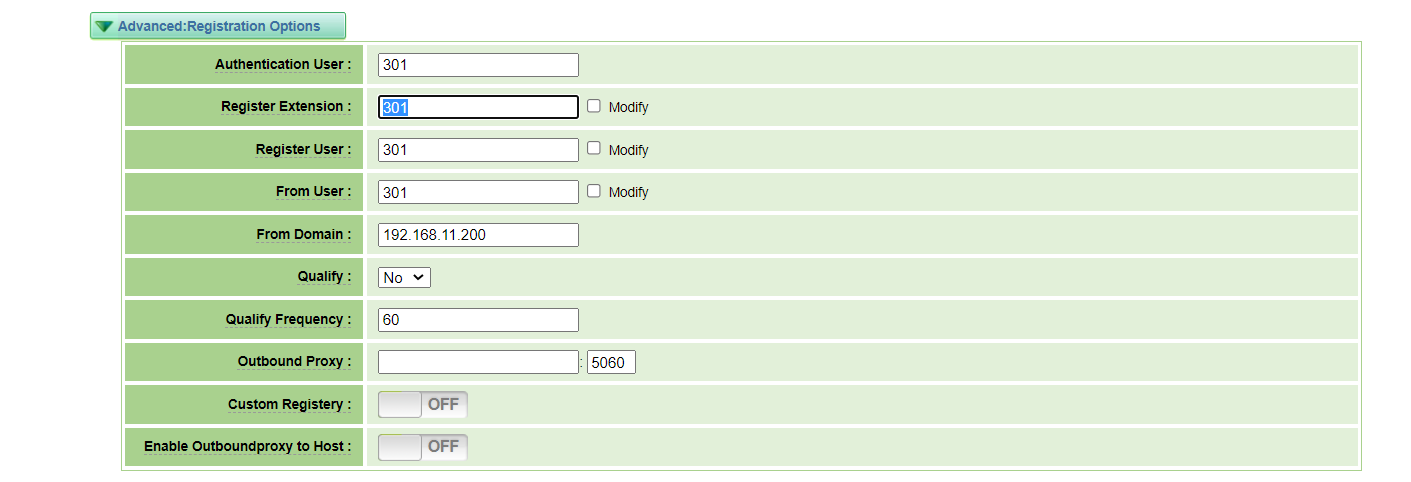
In the Advanced:Registration Options section, enter the following:
- Registration Extension: enter the extension of this connection as configured on the UCX (eg. 301)
- Register User: enter the extension of this connection as configured on the UCX (eg. 301)
- From User: enter the extension of this connection as configured on the UCX (eg. 301)
- From Domain: enter the IP Address of the UCX (eg. 192.168.11.200). See note in above section.
- Qualify: select No
- Qualify Frequency: enter 60
- Outbound Proxy: leave blank
- Custom Registery: select Off
- Enable Outboundproxy to Host: select Off
-
-
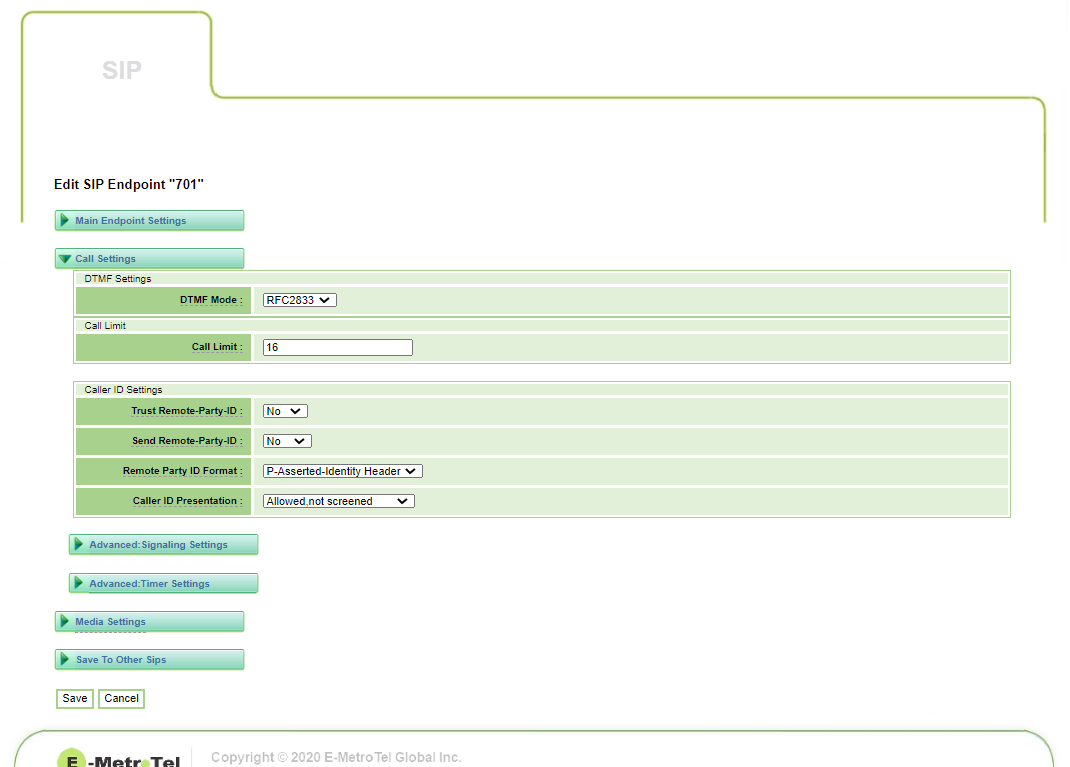
In the Call Settings section, enter the following:
- DTMF Mode: select RFC2833
- Call Limit: enter 16
- Trust Remote Party-ID: select No
- Send Remote Party-ID: select No
- Remote Party-ID Format: select P-Asserted Identity Header
-
Caller ID Presentation: select Allowed, not screened

-
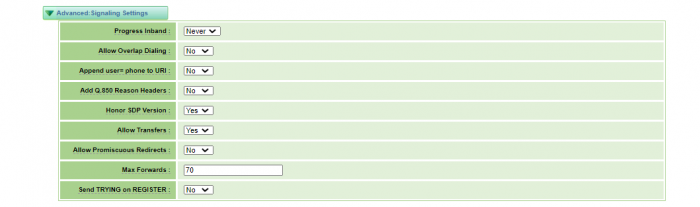
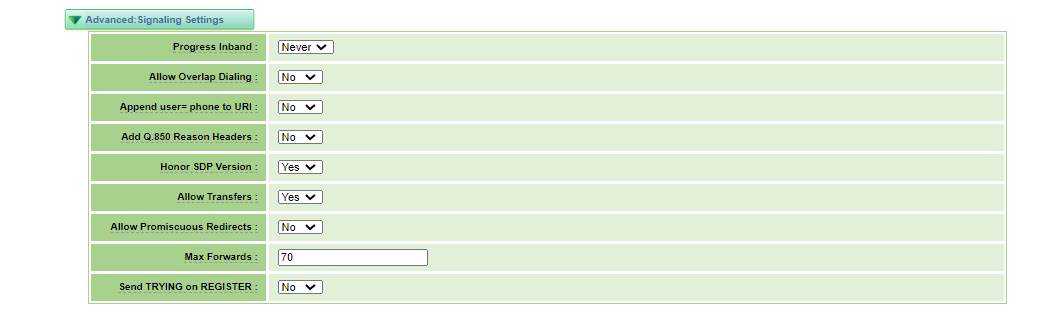
In the Advanced Signalling Settings section, enter the following:
- Progress Inband: select Never
- Allow Overlap Signaling: select No
- Append user=phone to URL: select No
- Add Q.850 Reason Headers: select No
- Honor SDP Versions: select Yes
- Allow Transfers: select Yes
- Allow Promiscusous Redirects: select No
- Max Forwards: select 70
-
Send TRYING on Register: select No
-
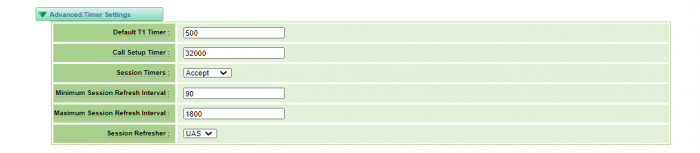
In the Advanced Timer Settings section, enter the following:
- Default T1 Timer: select 500
- Call Setup Timer: select 32000
- Session Timers: select Accept
- Minimum Session Refresh Interval: select 90
- Maximum Session Refresh Interval: select 1800
-
Session Refresher: select UAS
-
In the Media Settings section, enter the following:
- Codec Priority 1: select G.711 u-law
- Codec Priority 2: select G.711 a-law
- Codec Priority 3: select G.729
- Codec Priority 4: select G.722
-
Codec Priority 5: select ILBC

- Click Save
- Repeat steps 1 through 8 for each of the up to 16 extensions to be connected on this FXS 16-port Card.


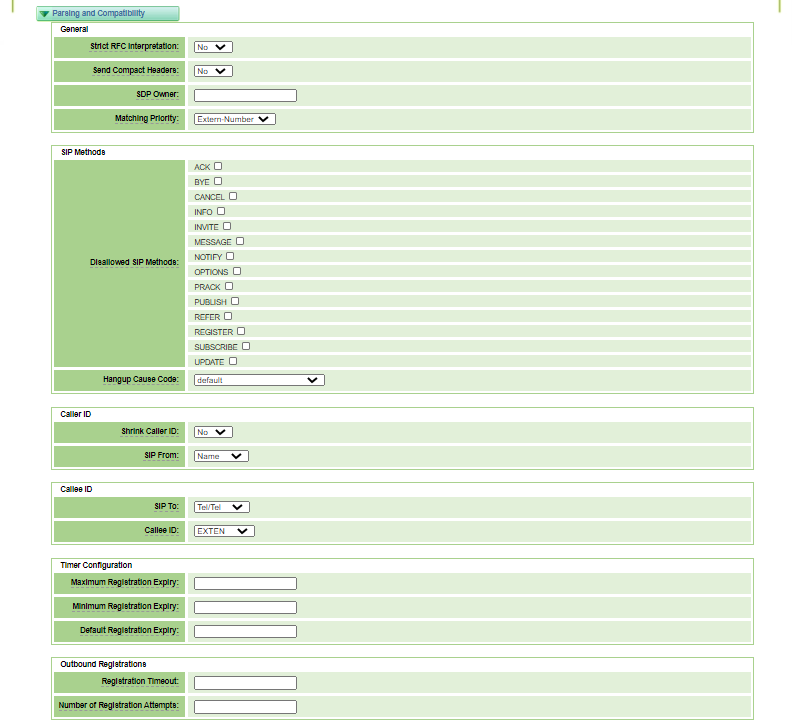
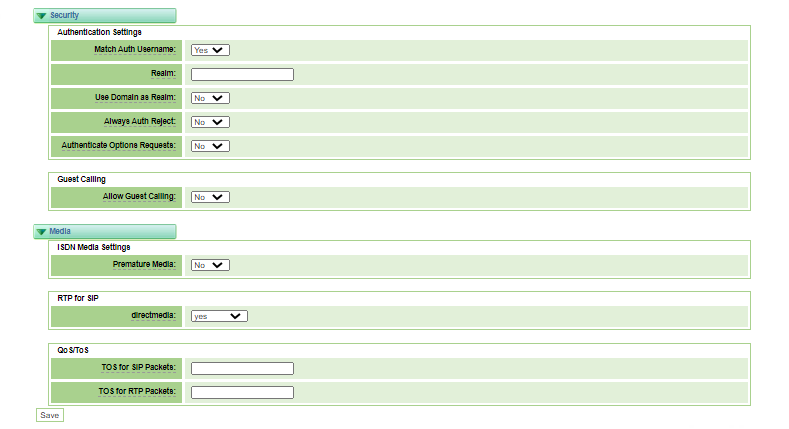
In the SIP / Advanced SIP Settings section you may leave the settings at their default values:

Step THREE: Configure the Analog Settings
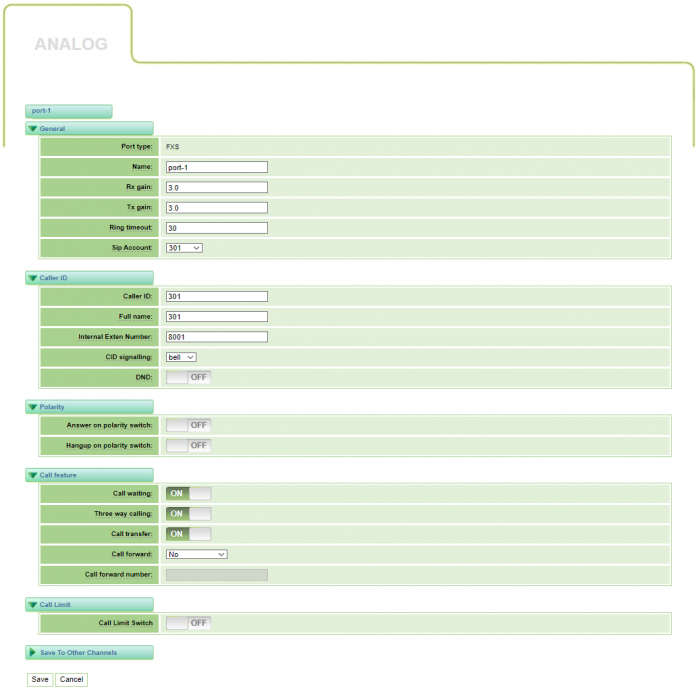
The FXS 16-port Card Analog channels are configured in the Analog / Channel Settings page:
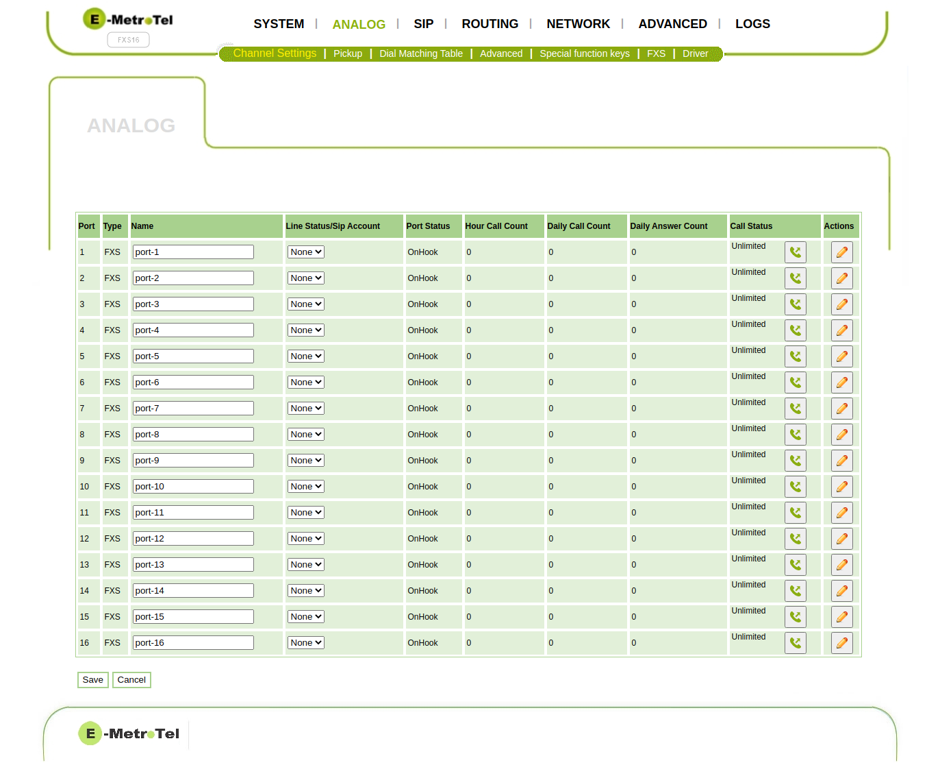
-
Click on the Pencil icon in the Actions column for each of the up to 16 ports you wish to configure
-
The General values to be configured are as follows:
- Name: input a value (eg. 301)
- Rx Gain: set to 0.0
- Tx Gain: set to 0.0
- Ring Timeout: set to 30
- Sip Account: set to the extension you wish to associated with this port (eg. 301)
-
The Caller ID values can be set based on the particular capabilities of the analog phone:
- Caller ID: set to the value you wish to be associated with that extension (eg. 301)
- Full Name: set to the value you wish to be associated with that extension (eg. 301)
- Internal Extension Number: set according to the type of signaling supported by your phone (bell / v23 / dtmf)
- CID Signalling: set according to the type of signaling supported by your phone (bell / v23 / dtmf)
- DND: choices are (on / off)
- Call Feature settings should all be set to Off
- Call Limit: Off
- When you are done with the settings for each Analog channel, press Save
-
Ensure that the Line Status/Sip Account drop-down selection for each analog port is set to the desired SIP extension.


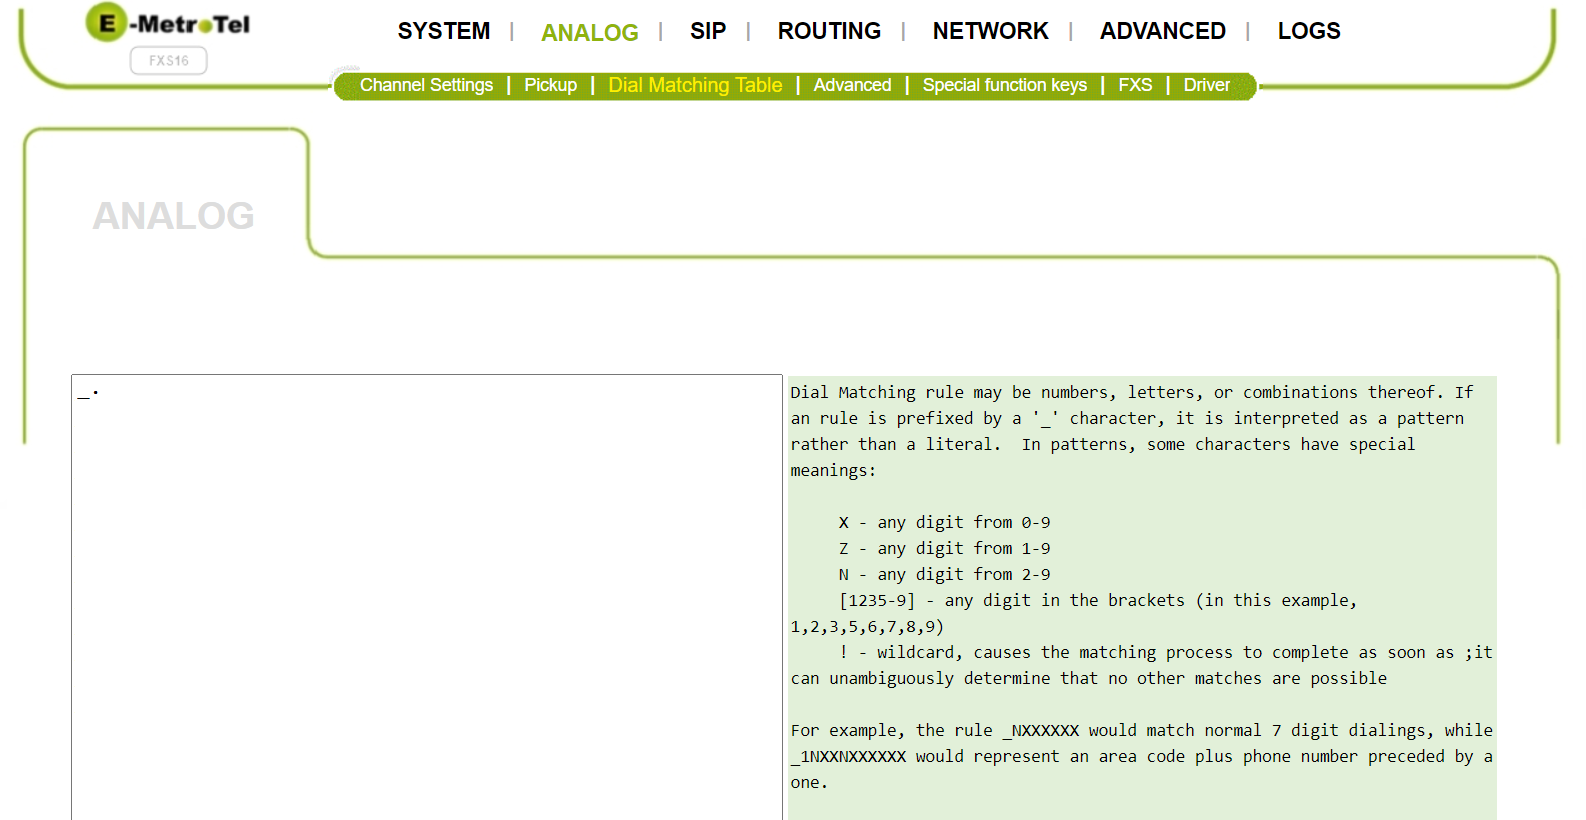
Step FOUR: Configure the Dial Matching Table on the FXS 16-port Card
The Dial Matching Table is used to determine what dial strings are allowed by the analog devices before passing to the UCX for call processing. The table should allow all dial strings to be sent to the UCX after the end of dial timeout has been reached.
-
Go to the Dial Matching Table tab on the Analog menu.
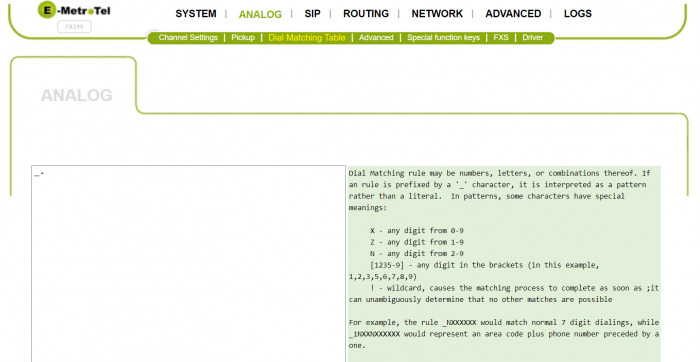
- Ensure that the only entry in the table is "_." (i.e. "underscore period" without the quotes)