Galaxy FXO Gateway
Overview
The Galaxy FXO is an Integrated Access Device that can connect your UCx to PSTN phone lines. The gateway comes in 4, 8 or 16 port configurations.
Chapter 1 - Configuring the UCx Server
1.1. Access the UCx Web-Based Configuration Utility
From a browser, enter the IP address of the UCx server . The IP address can be changed by the customer, for this example, we have used the default IP address 192.168.1.200.
Type the administrator username and password into the Username and Password ;fields. Press Enter or click on the Submit button.

1.2. Create a trunk
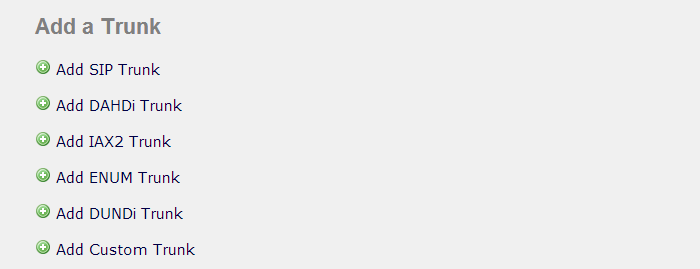
Click on the PBX tab on the menu at the top of the screen, from the left side column, select Trunks.
Select Add SIP Trunk from the list.
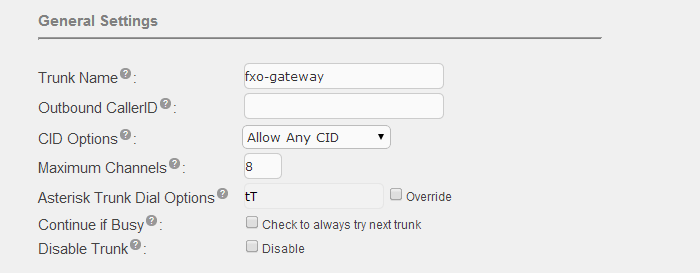
On the Add SIP Trunk page, enter the following information:
- Trunk Name ("fxo-gateway" in this example)
- Maximum Channels ("8" in this example)
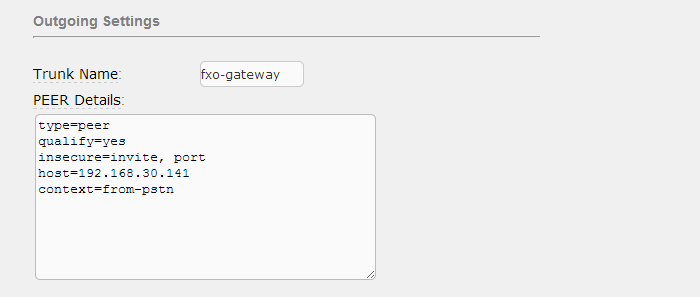
Under Outgoing Settings, enter the following information:
- Trunk Name ("fxo-gateway" in this example, no spaces allowed)
- PEER Details parameters as per screenshot below where the host value should be the ip address of your FXO gateway ("192.168.30.141" in this example)
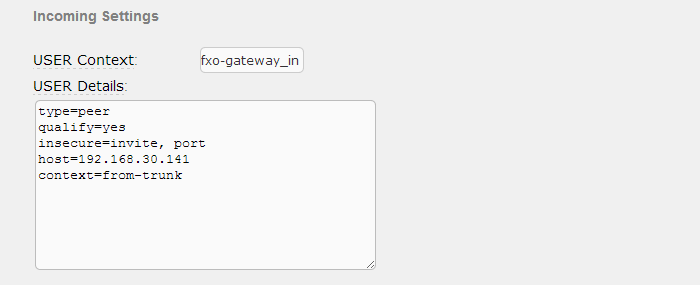
Under Incoming Settings, enter the following information:
- USER Context ("fxo-gateway_in" in this example)
- USER Details parameters as per screenshot below where the host value should be the ip address of your FXO gateway ("192.168.30.141" in this example)
1.3. Create an Outbound Route
From the left side column, select Outbound Routes to add or modify and existing outbound route
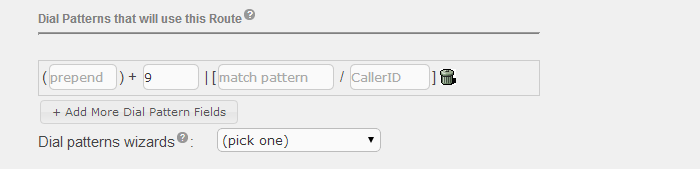
On the Outbound Routes page, fill in the following information:
- Route name ("fxo" in this example)

- Set the dial rules, for this example we use the prefix "9"
- Select the trunk that was created in Step 1.2.
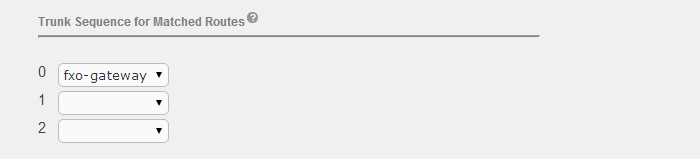
- Click Submit Changes to save the outbound route
1.4. Create an Inbound Route
From the left side column, select Inbound Routes to add or modify and existing inbound route
Configure inbound route on the Add Inbound Routes page, fill in the following information:
- Description ("fxo-gateway" in this example)
- DID Number ("s" in this example)

- Configure the Destination for the inbound route, we have chosen a time condition for this example
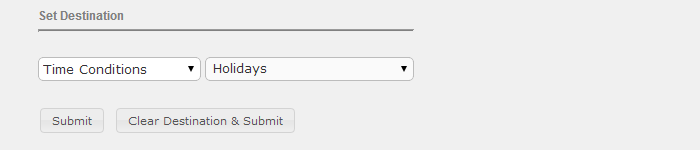
- Click Submit to save the changes
Chapter 2 - Configuring the Gateway
2.1. Access the Gateway Management Interface
Enter the IP address of the FXO GATEWAY from a browser window. The default IP address of the gateway is 192.168.11.1, this can be changed by the customer. For our example, we have used the IP address 192.168.1.11.
Login using the default login credentials:
- Username = admin
- Password = admin
2.2. Configure the SIP Server
Go to the System Configuration -> SIP Server page and enter the following information:
- SIP Server Address ( 192.168.1.200 in this example)
- SIP Server Port ( 5060 in this example)
- SIP Register Interval (1800s in this example)

- Click Save

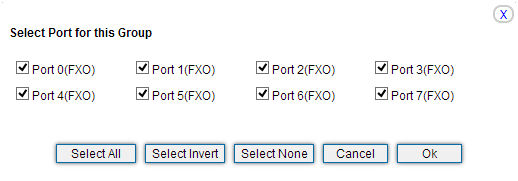
2.3. Configure the Ports
Go to the Call Routing -> Port Group page and enter the following information:
- Description
- Primary Display Name
- Primary SIP User ID
- Offhook Auto-Dial ("s" in this example)

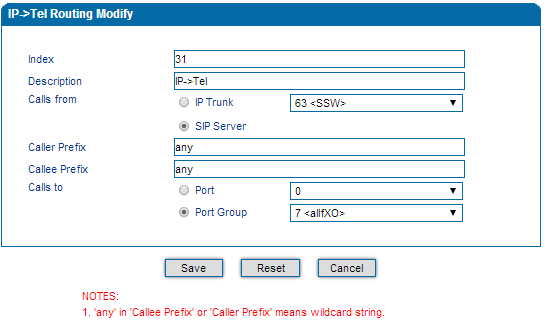
2.4. Configure the Outbound Route
Go to the Call & Routing > IP>Tel Routing page and enter the following information:
- Description ("IP->Tel" in this example)
- Calls from (SIP Server in this example)
- Calls to ("Port Group 7" in this example)
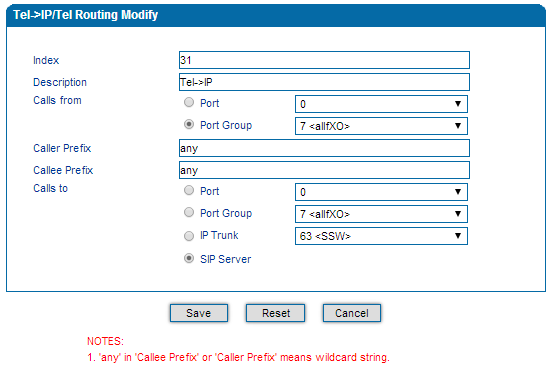
2.5. Configure the Inbound Route
Go to the Call & Routing > Tel>IP Routing page and enter the following information:
- Description ("Tel->IP" in this example)
- Calls from ("Port Group 7" in this example)
- Calls to (SIP Server in this example)
2.6. Configure Advanced Options
Go to the Advanced-> FXS/FXO page and enable the following options:
- Under the section "Incoming Call from PSTN", enable Send Original CID when Call from PSTN

- Under the section "Outgoing Call to PSTN", enable One Stage Dialing

Chapter 3 - Other Settings
Depending on the customer needs, you may want to make additional configuration changes on the FXO Gateway.
Chapter 4 - Network Diagram

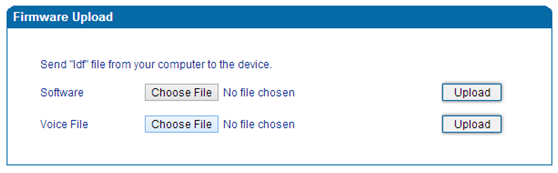
Chapter 5 - Upgrade the Firmware
If you have been advised by E-MetroTel to upgrade the firmware, perform the following steps to upgrade:
- Go to the Maintenance-> Firmware Upload page
- Select the firmware file and click the Upload button, keep waiting till it reboots automatically