InfinityOne - Run the Installation Wizard
After you have finsihed the process described in InfinityOne - Install the infinity_one Package on UCX, you will need to run the InfinityOne Installer Installation Wizard.
To access the Installation Wizard, you will need to open a broswer connection directly with the InfinityOne server. Depending on your network configuration and how you are connected to the network, you can access the InfinityOne Installation Wizard using one of the following methods:
- Enter 'https://' followed by the hostname of assocated with your SSL certificate, then suffix with ':21326 '. (For example: https://ucx.infinityone.app:21326)
- Enter 'https://' followed by either the hostname or IP address of the UCX Server, then suffix with ':21326' (For example: https://192.168.1.200:21326)
- Enter 'https://' followed by either the hostname or IP address of the UCX Server, then suffix append a trailing '/infinityone '. (For example: http://192.168.1.200/infinityone)
The application does not provision any default user when installed for security reasons. Instead, the first time you visit the site in your browser, you will be taken to an installation wizard where, among other things, you will create the administration account.
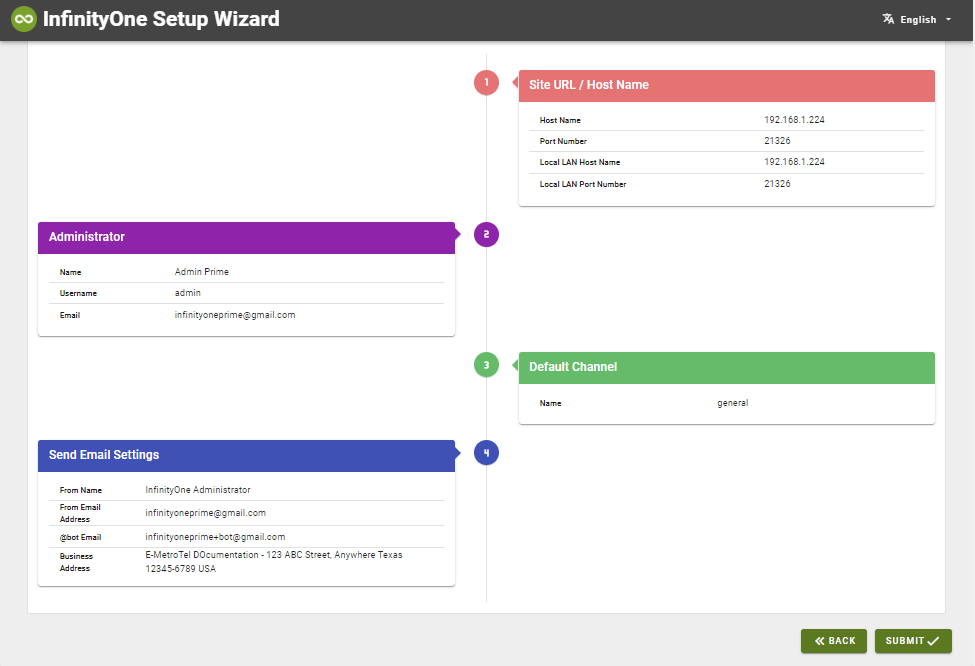
Step 1 - Site URL / Host Name
The first page of the wizard allows you to change the host name / IP address that users will use to access the system.
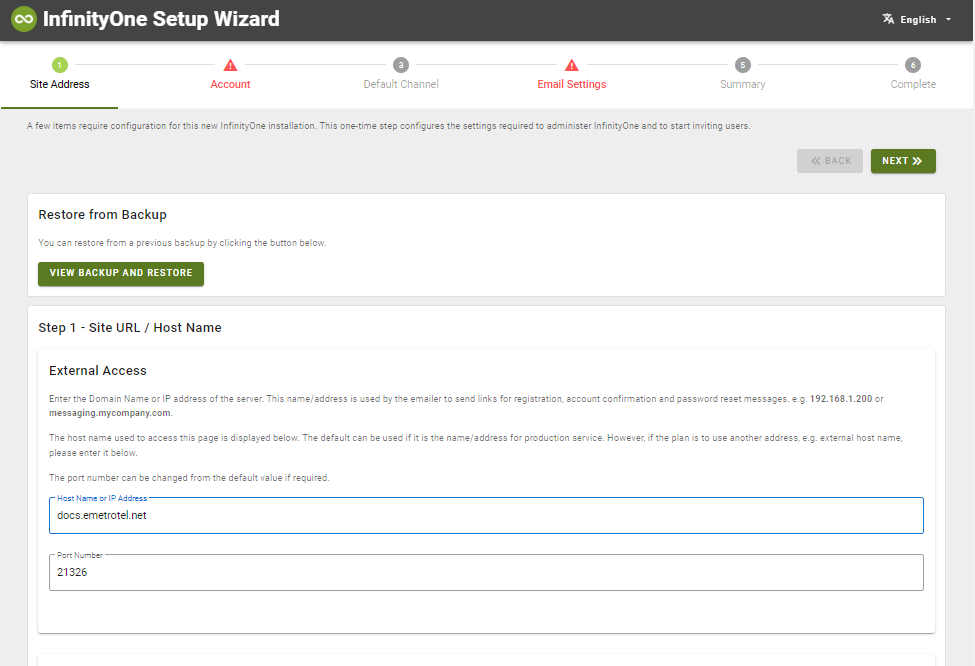
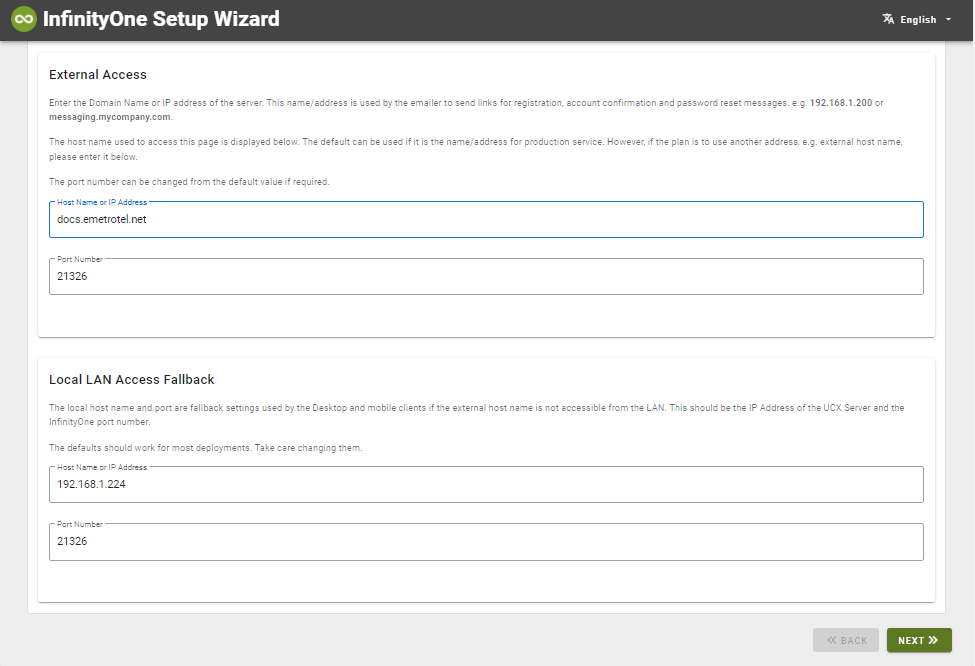
External Access
The External Access section will be used for identifying the host and port information sent to users for registration, account confirmation, and password reset messages. The Host Name or IP Address field will be pre-populated with the public host name or IP address that you used to get to the wizard. However, if you have installed an SSL Certificate so that you can use the InfinityOne Mobility client, then you must use a host name and the Host Name must be the same name as used to generate the certificate (eg. subdomain.emetrotel.net or ucx.infinityone.app).
You may configure a Port Number in the Wizard that will be used in the InfinityOne network address embedded in email invitations for new users. The InfinityOne server continues to use port 21326, but changing this port number allows the network administrator to set up port mapping between the internet and the InfinityOne server.
Local LAN Access Fallback
The Local LAN Access Fallback information allows the communication between the InfinityOne server and user devices in scenarios where the information in the External Access section cannot be resolved by the user devices. For example, many routers do not allow "hairpin connections" i.e. getting a connection request to a url or host name that resolves to the router's own external internet address. In this scenario, the InfinityOne devices would then attempt to connect to the Hostname IP address identified in this section. A hostname can be used if there is an internal DNS server that can resolve to an internal address. If you are using an AWS based cloud deployment, then you must leave this section at the default values.
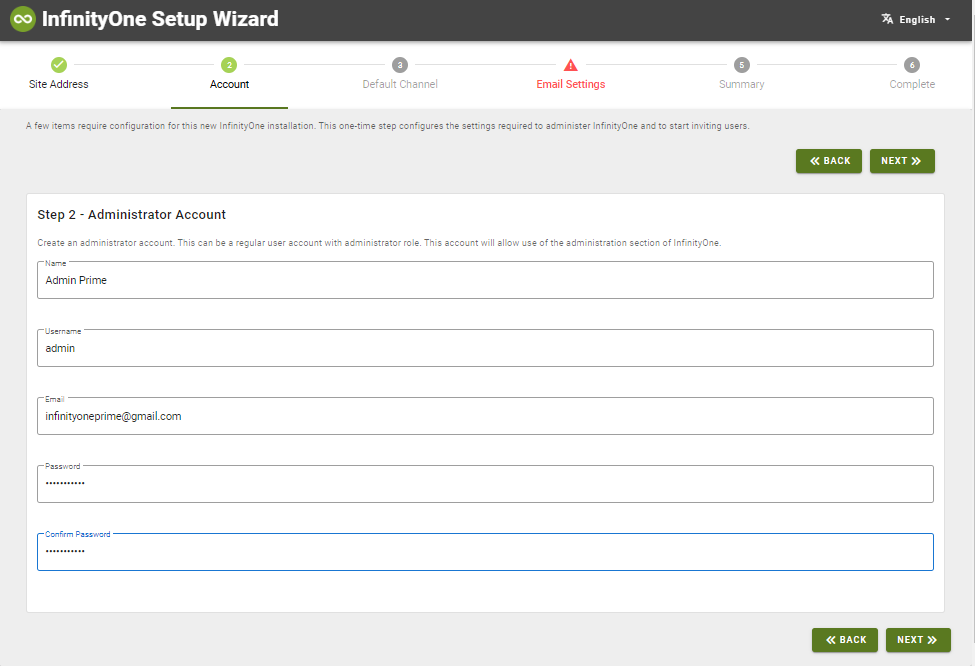
Step 2 - Administrator Account
The administration account you complete here does not require confirmation. So, once you have submitted the wizard, you can log in right away using the username and password configured here.
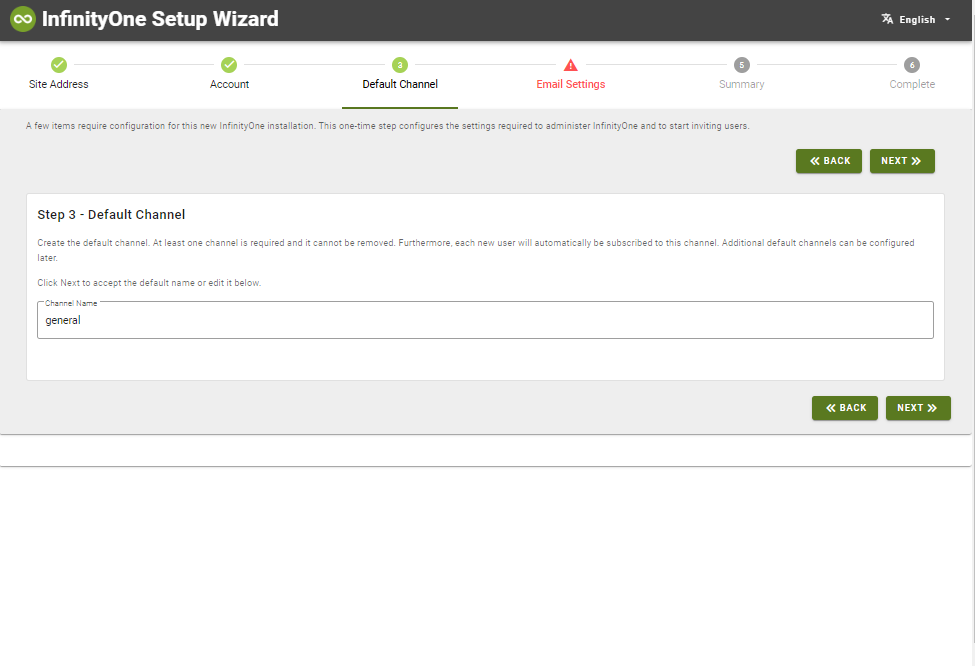
Step 3 - Default Channel
You will also be able to change the name of the first channel (room). The default is “general”; you may keep this name or change it.
Step 4 - Sending Email Settings
InfinityOne uses the email server built into the UCX for sending invitations and password reset notifications. (Refer to Remote SMTP for configuring the SMTP parameters.)
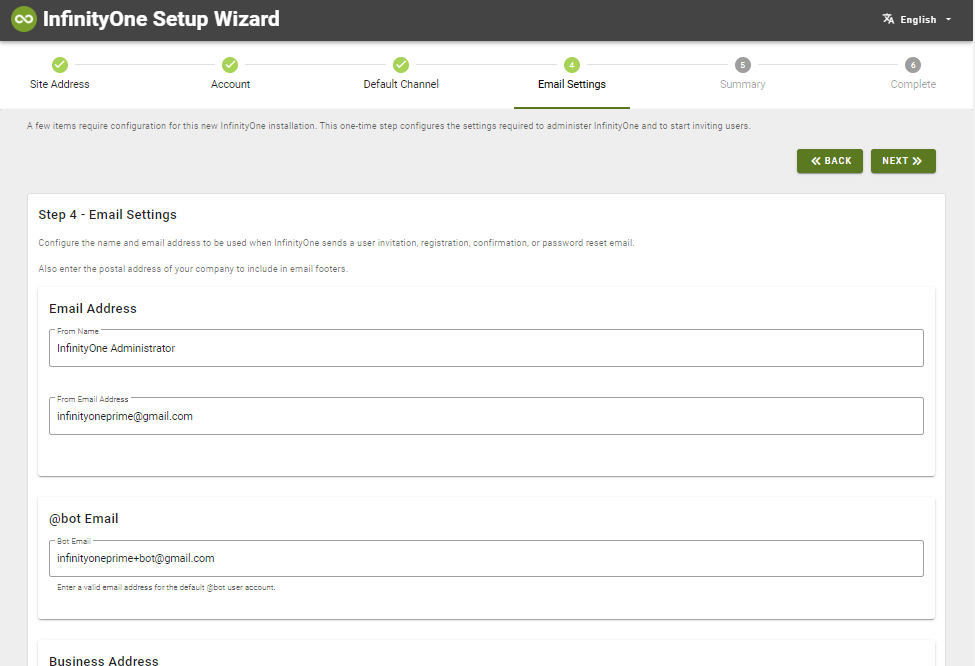
Email Settings
Enter the desired Name and Email Address you wish to to be used as the originator for outgoing emails in the From Name and From Email Address fields.
@bot Email
You can specify the email address used by the "bot" account. The "bot" account is used for sending Queue Report emails.
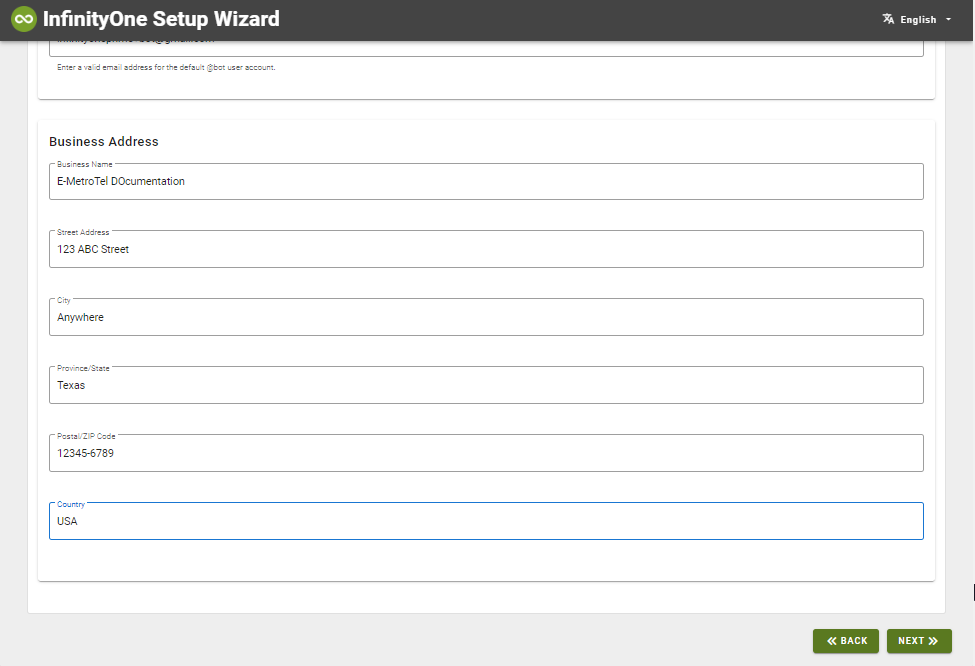
Business Address
This section allows you to fill in details that will be populated in emails from the InfinityOne server to users. Providing this information increases the likelihood of email messages successfully passing through email spam filters (but does not guarantee it). This information can also be entered in the Administration/General/Email Settings section of the InfinityOne administration settings. If your users do not see messages that they are expecting to see from the InfinityOne server, have them check their spam folder and make any required adjustments to the email settings.
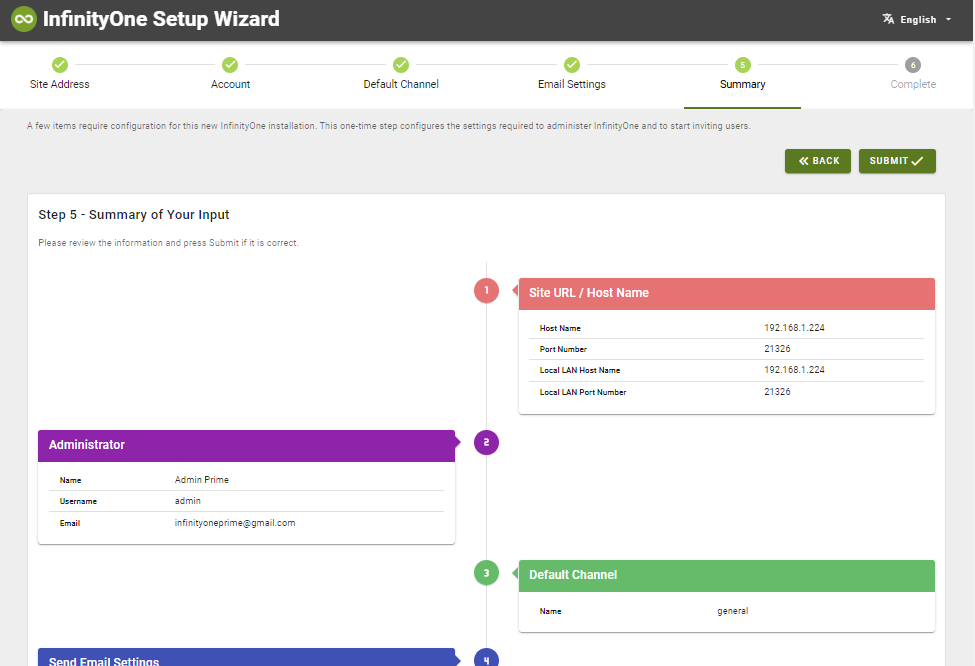
Step 5 - Summary of Your Input
Review the information and click on the SUBMIT button to complete the installation.
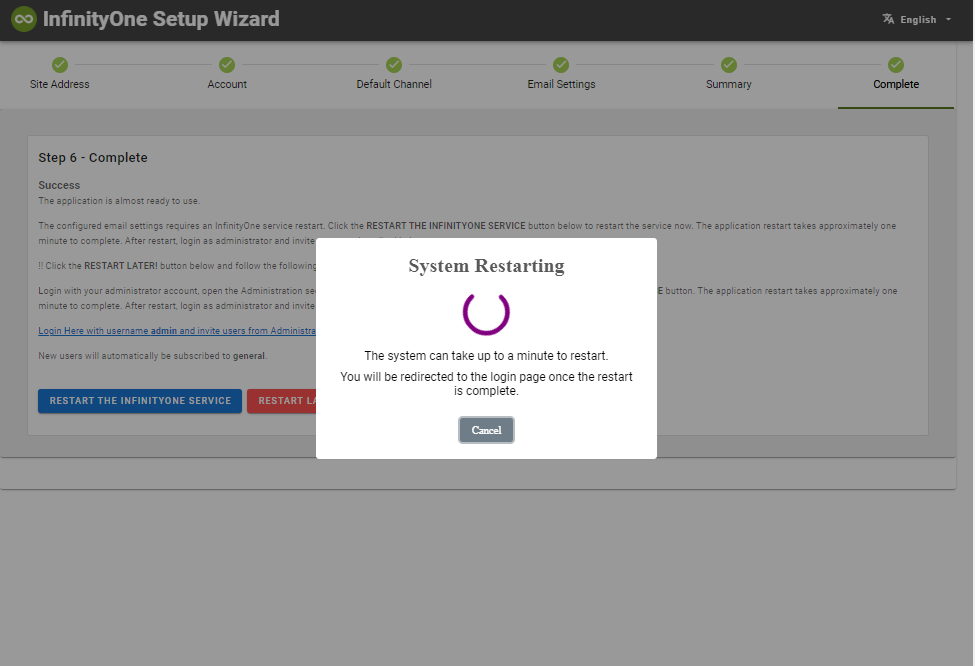
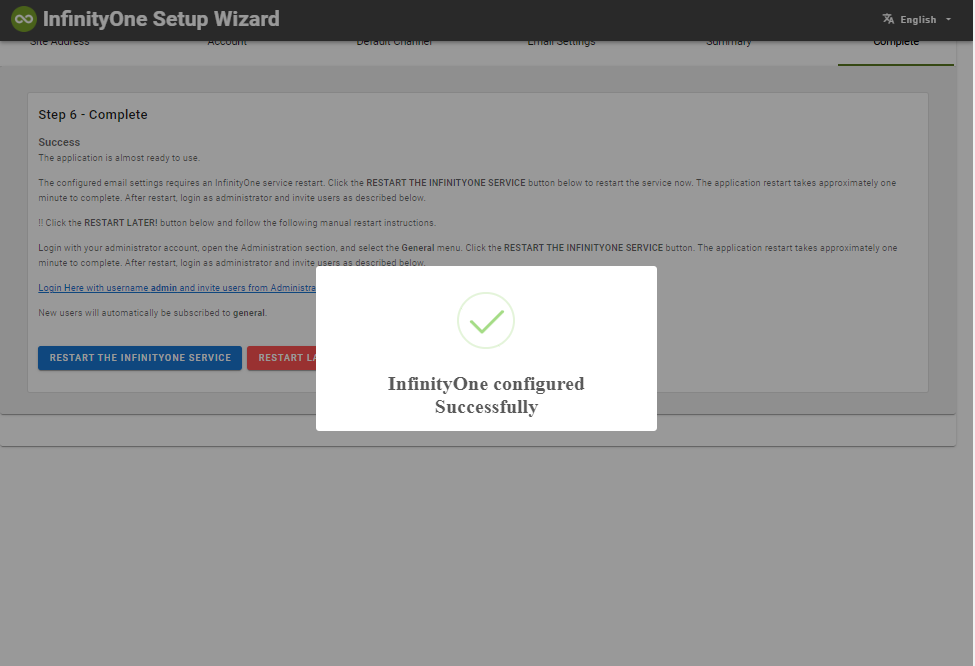
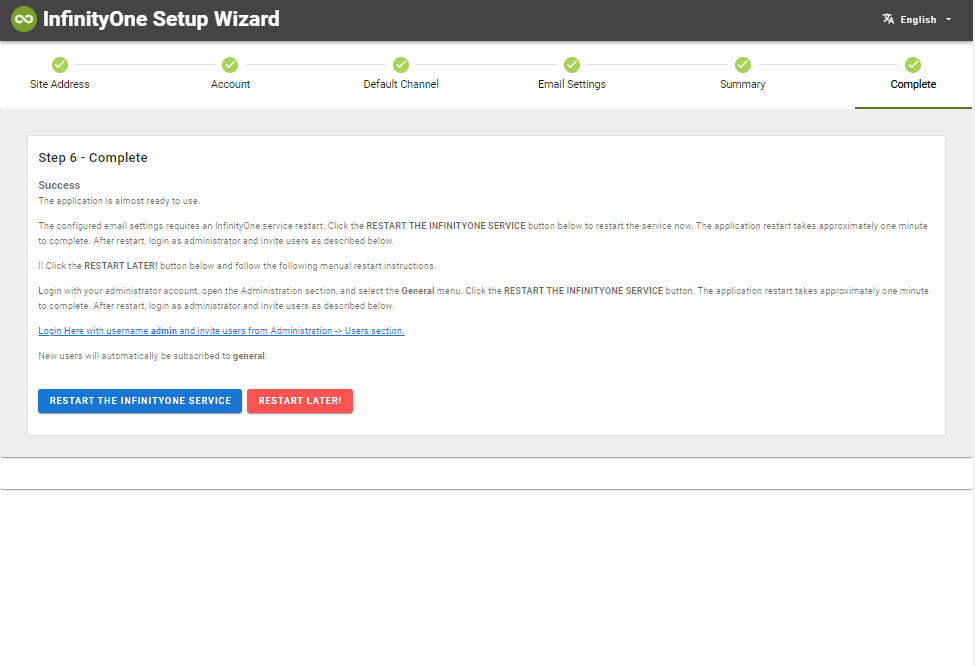
Step 6 - Success and Restart
You can now click on the Login Here link to access the InfinityOne application.
Step 7 - Confirm the Restart
You will need to confirm the restart.