To configure an extension for an XSTIM phone, perform the following steps:
In the drop-down list box, select the device type XSTIM Device and press the Submit button

Under Add Extension, enter the following key fields:

Fields in this section can be left unchanged to use the system defaults.

Here are some useful tips for some of the fields in this section.
| Field | Description |
|---|---|
| Outbound CID |
Overrides the CallerID when dialing out a trunk. This field can be left blank and the caller id of the trunk will be used. The format is: "caller name" <##########>. Check with your service provider on the number of digits required for the caller id number. |
| Asterisk Dial Options | Do not override the system default unless you are very familiar with the dial options |
| Ring Time | Number of seconds to ring before going to voicemail (ignored if no voicemail) |
| Outbound Concurrency Limit | Limits the number of concurrent outbound calls on this extension, useful as a security tool if this extension has been compromised |
| Call Screening | Requires external callers to say their name, the name is then announced to the user and the user can choose to accept or reject the call |
| Emergency CID | Overrides all other CallerID settings when dialing out on a route tagged as Emergency |
If the extension is associated with a direct DID, enter the DID number in the Add Inbound DID field exactly as provided by the service provider.

If the phone has been properly configured to connect to your UCX system, the MAC address should be presented on the phone display. Press the Select button beside the MAC Address field and then select the phone from the drop-down list box that shows all unregistered phones.


If the phone has not been connected yet but you know the MAC address of the phone (the MAC address is included on the label of XSTIM IP phones), enter the address in the text field.
If you plan to use the extension only as a hotdesking extension or if you want to associate the extension with a physical phone later, enter 0 (zero) in the text field. To associate the phone with an extension at a later time when the phone is connected, you can either use the Select button beside the extension's MAC Address field (as described above) or you can use the "Set Based Configuration" feature from the phone itself (see Set Based Configuration for more information).

Press the Submit button to create the XSTIM extension.
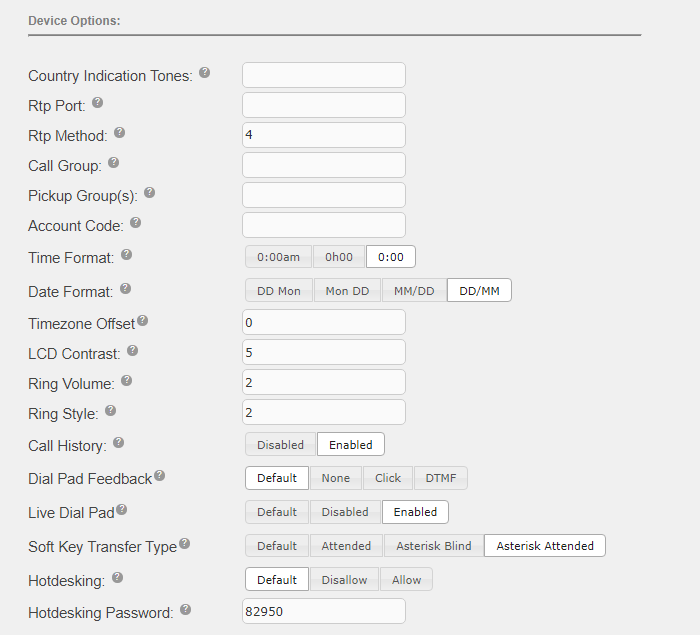
After the extension has been created, you can select the extension again to edit the rest of fields now available under Device Options.


If the fields are left blank, the system wide settings configured under XSTIM Settings will be used.

If the extension is a member of a Call Group or Pickup Group, enter the group number in these fields. See Group Pickup feature description for details.
If the extension is located in a different timezone from the UCX main location, you can use the Timezone Offset to change the time shown on the set display. This can be changed in 30 minute increments (up or down). Note that the offset is based on the UCX time, not UTC. A user can also adjust the Timezone Offset using Feature *510 on their set.
This setting controls the type of user interface invoked for the Transfer softkey presented on each XSTIM device. This overrides the setting configured in the XSTIM Settings page for this extension.
If the extension is to be used as a target for hotdesking, enter the Hotdesking password that will be used to start the hotdesking session. See Hotdesking feature description for details.
See Configuring Devices and Extensions for SRG Operation for details on the survivable modes of operation.

If Dialplan Patterns field is left blank, the system wide defaults configured under XSTIM Settings will be used.
When a number is entered in the Hotline field, the number is automatically dialed when the user goes off-hook or presses a line button or the hands-free button.

This section is visible only when the device type supports Key Expansion Modules. Select from the pull-down list the desired Module Type.

After selecting the module type, another field Number of Modules will be displayed. You can select the desired number from the pull-down list.

Use the pull-down menu in the right-most field to select the feature, the Label and Digits field will be automatically populated, you can change the Label as desired.
If the desired feature is not available in the pull-down menu, select Other and enter your own Label and Digits.
