Step One: Accessing the Gateway
-
Plug a network cable into the wan port of the fxo gateway, plug the power supply into the Grandstream gateway and power it up.
-
Using nmap, wireshark, arp or ipquery, determine the ip address of the gateway obtained from the dhcp server.
-
Open a web browser and use the ip address obtained in step 2 to connect to the fxo gateway
-
Login to the Gateway using the default password admin

Step Two: Configure Networks
-
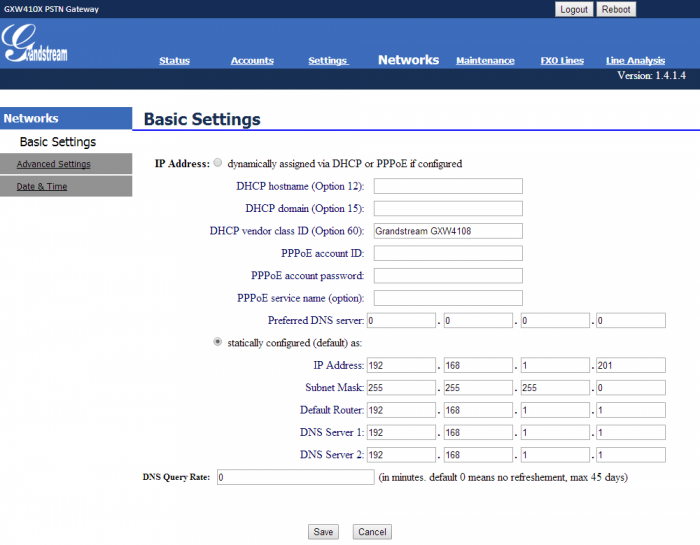
Navigate to the Networks - Basic Settings page.
-
Select statically configured under IP address and set the required IP address (e.g. 192.168.1.201), Subnet mask, Gateway and DNS servers.
-
Press the Save button and reboot the gateway.
-
When the Gateway comes back up, open a web browser and use the new ip address that was set in step 2.
-
Login and navigate to the Networks - Date and Time page
-
Select the correct Time Zone then press the Save button but do not reboot yet.
Step Three: Configure FXO Lines
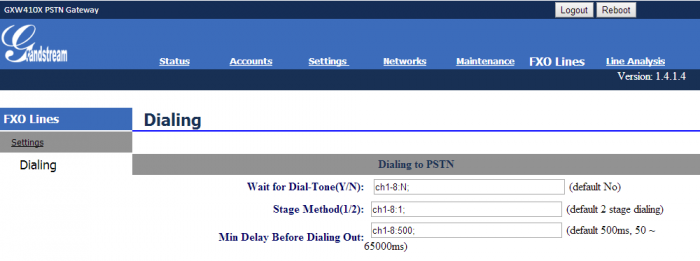
Navigate to the FXO Lines - Dialing page
Under Dialing to PSTN:
-
Set Wait for Dial-Tone to N (no)
-
Set the Stage Method to 1 (1 stage dialing).
-
Press the Save button but do not reboot yet.
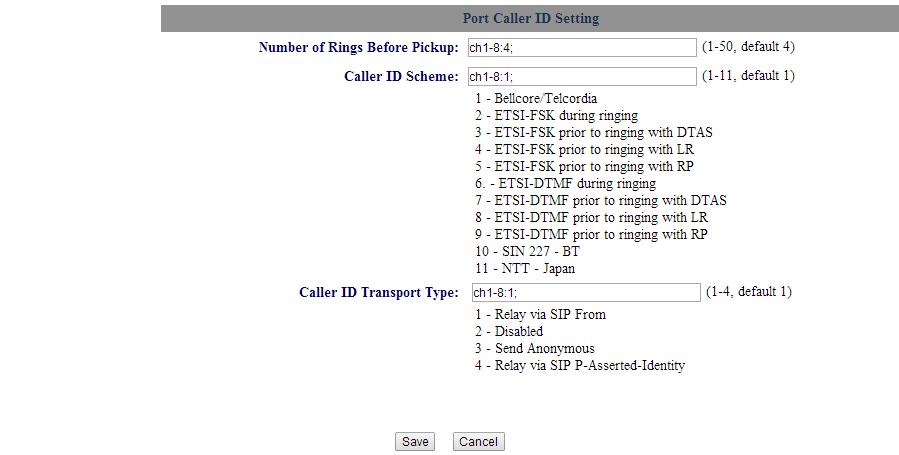
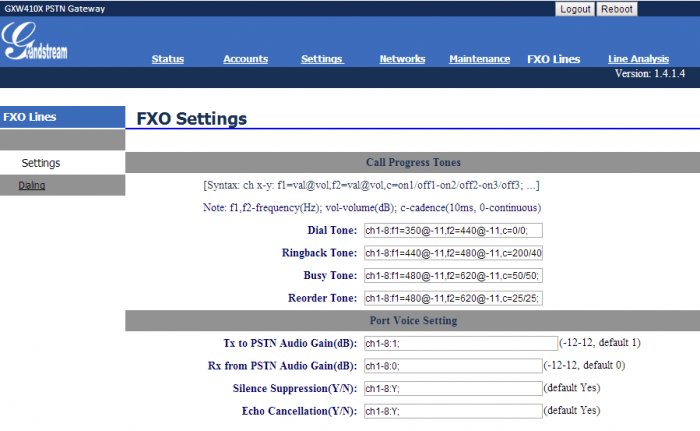
Navigate to the FXO Lines - Settings page
-
In the Port Caller ID Setting section, set the Number of Rings Before Pickup to 2.
-
Press the Save button but do not reboot yet.


Step Four: Configure Settings
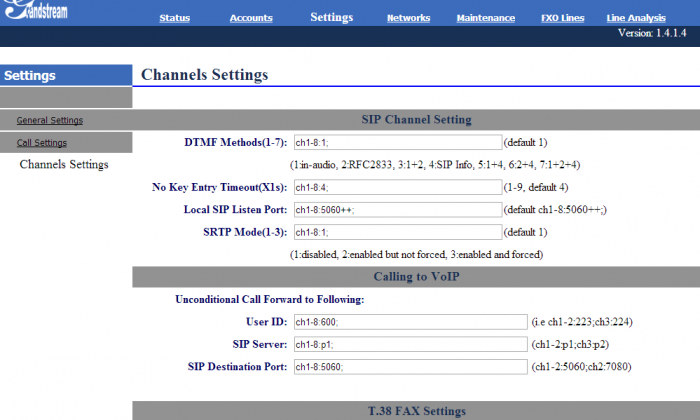
Navigate to the Settings - Channel Settings page.
-
In the Calling to VOIP section, set the User ID to the Ring group or extension set up in the UCx server to terminate inbound calls.
Example of how to to set multiple inbound targets: ch1-3:600;ch4:301 (this sets lines 1,2 and 3 to terminate to 600 and line 4 to terminate to 301.
-
In the SIP Channel Setting section, set DTMF Methods to 2 (RFC2833)
-
Press the Save button at the bottom of the page but do not reboot yet
Step Five: Configure Accounts
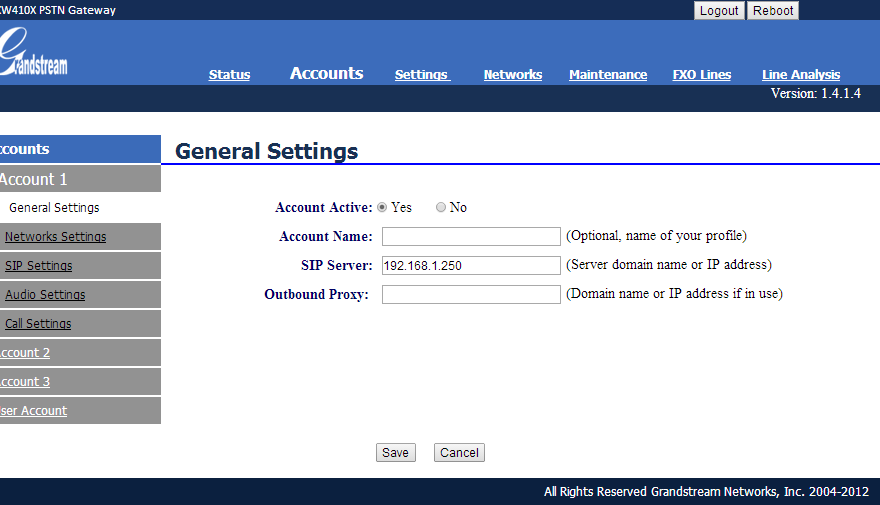
Navigate to the Accounts - Account 1 - General Settings page.
-
Set Yes to make the Account Active.
-
Set the SIP Server field to the IP address of the UCx server
-
Press the Save button but do not reboot yet.

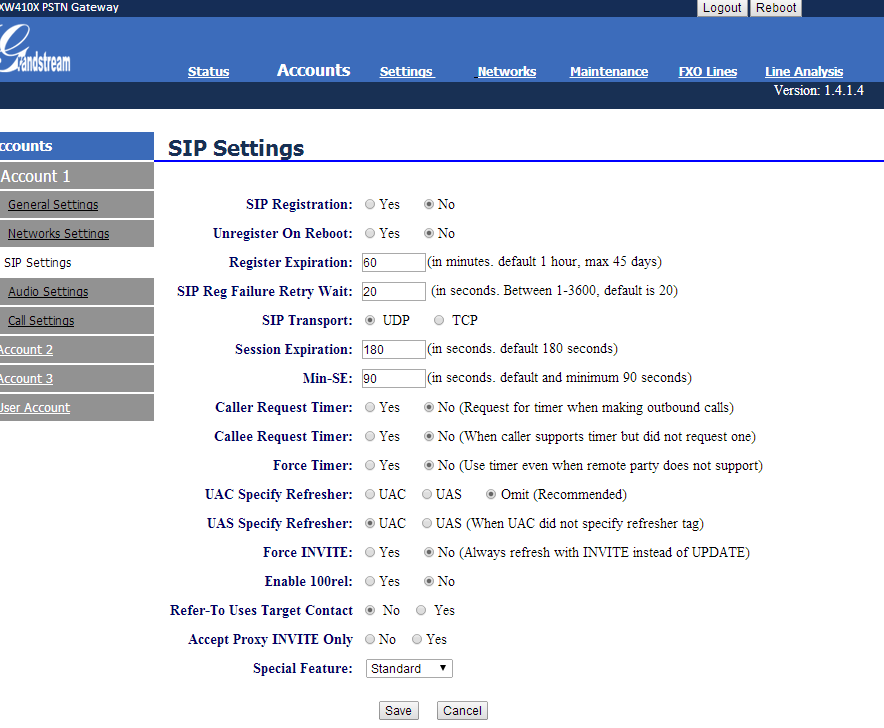
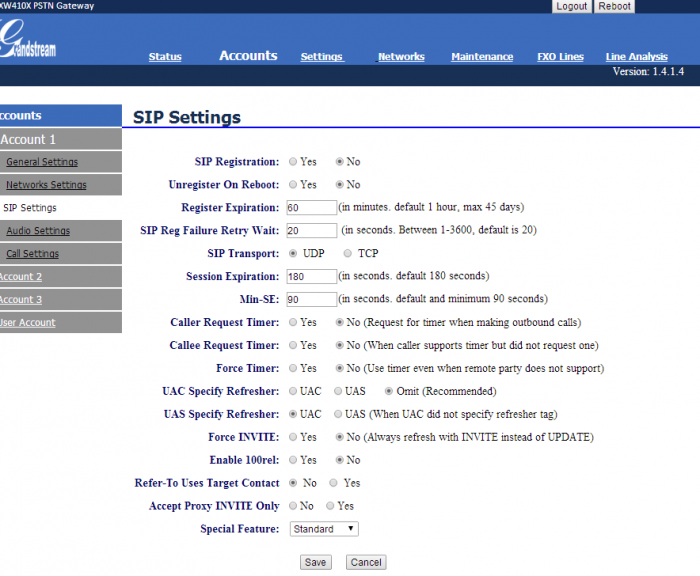
Navigate to the Accounts - Account 1 - SIP Settings page.
-
Set SIP Registration to No.
-
Press the Save button at the bottom of the page.
-
Reboot the Gateway.
Step Six: Configure SIP Trunk
Use the Adding SIP Trunk procedure to add a new SIP trunk.
Step Seven: Configure Inbound Route
Use the Add Inbound Routes procedure to add a new inbound route.
-
Set the DID number to the same number that you set in the Gateway User ID (see Step Four, Configure Settings section)
-
Set the Destination to where you want the call to terminate
-
Press the Submit and then the Apply Config bar.