With UCx Virtual Fax, there is no need to have a traditional fax machine as faxes can be both sent and received electronically using this feature.
You can send fax directly from your PC by installing a third party Fax Client that will utilize the UCx Virtual Fax Server.
The UCx administrator can configure the inbound route to auto-detect a fax connection so you can share a single DID number for both voice and fax communications.
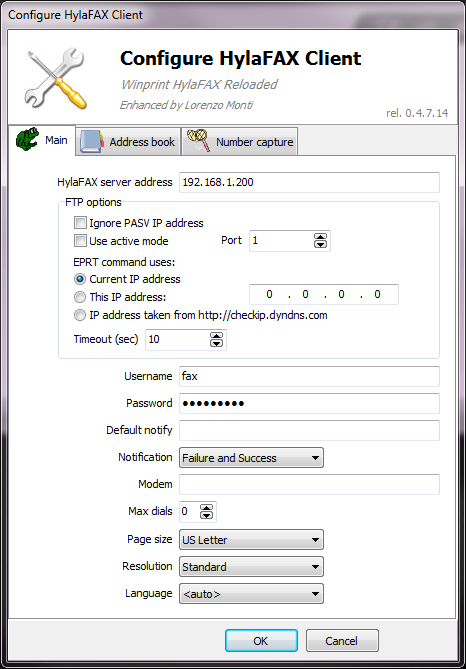
Obtain the following information from your UCx Administrator to set up virtual fax on your PC:
UCx IP Address or Hostname: ______________________________
UCx User account name: ______________________________
UCx User account password: ______________________________
Check with your UCx Administrator if the following has been configured on the UCx server:
After the successful installation of the Fax client, a new device (e.g. HylaFAX) will now appear on your list of printers and faxes.
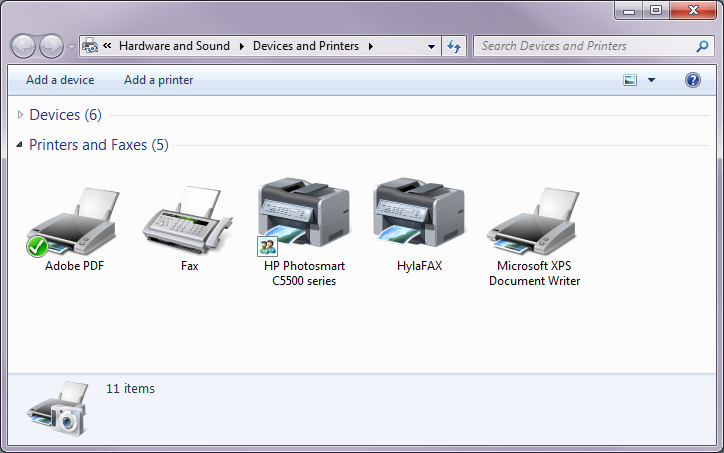
You can now select the Fax client as one of your print destinations.
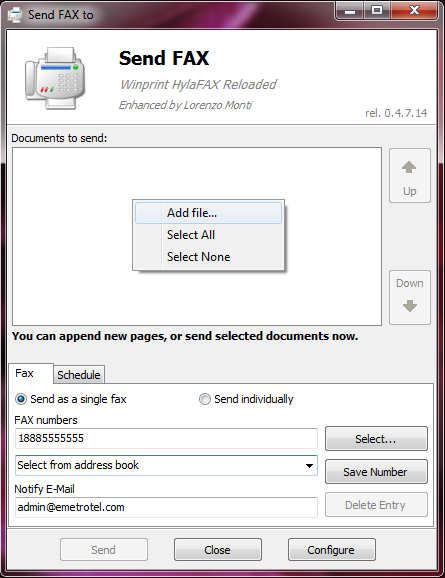
Alternative you can open the Fax client GUI directly and the Send FAX page will be displayed.
Check with your UCx Administrator if the following has been configured on the UCx server:
The DID number for your phone is also your fax number. When a fax is sent to the DID number, it is routed to the fax extension. All faxes are stored on the UCx Server and a copy of the fax is sent by email to your email address.
The following is an example of the email you will receive with the fax included as a PDF file attachment.
