

High Availability - Web-based Configuration Utility Rls 6.0
Introduction
When the High Availability cluster is enabled, always access the Web-based Configuration Utility via the configured Cluster IP address. This ensures access to the utility regardless of which node is active.
After you have activated the High Availability package, several screens on the Web-based Configuration Utility are modified or enhanced to provide information and configuration with respect to both UCX systems, and an additional new tab with multiple pages is added for managing the High Availability cluster.
Modified or Enhanced pages
System - Network
On the Network Parameters page, the IP address of the Active UCx and the Cluster interface are listed.
The following restrictions are applied when in a cluster:
- Configuration of Ethernet 0 cannot be changed while the systems are in a cluster
- Hostname cannot be changed while the systems are in a cluster
The IP address and the hostname of both nodes are used for communication between the nodes, hence they cannot be changed while in a cluster.

System - Backup
On the Backup List page, backup to USB as a destination is not available in a cluster.

System - License
On both the License Details and Enter License pages, a new drop-down list is available to view and update licenses for both the Active and Standby nodes.
It is highly recommended to maintain the same product licenses on both nodes. For example if you add a new feature license on one node, make sure the same feature license is also added for the other node.


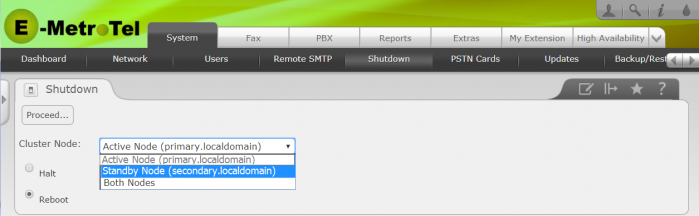
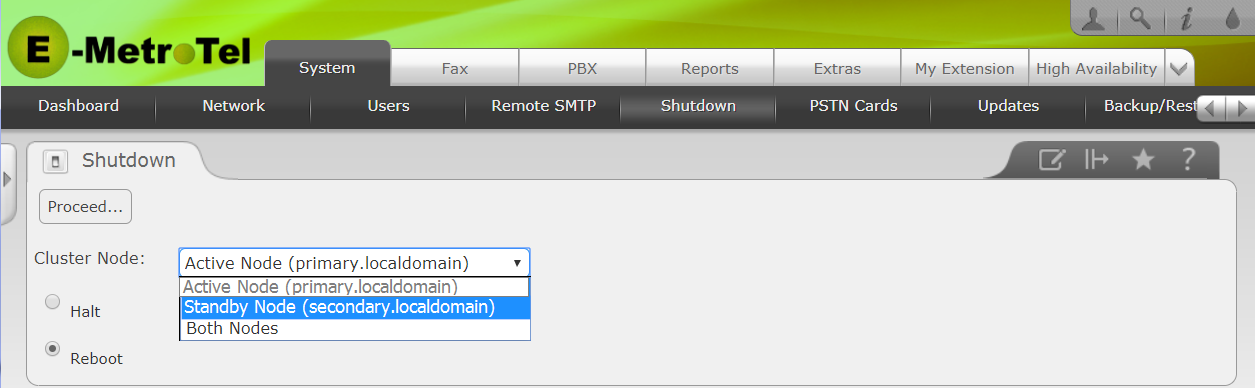
System - Shutdown
On the Shutdown page, a new drop-down list is available to select the desired cluster node(s) to execute the Halt or Reboot action.

System - Updates
All software updates MUST be performed from the Web-based Configuration Utility. You can connect to the system locally or via the VPN to do Software Updates. Software updates are initiated by the Active node and the Standby node will be automatically updated as changes to the Active node are detected.
Local Connection
If you are connecting locally, you can connect using either the cluster IP address or the IP address of the currently active system. By using the cluster IP address you will not be required to know which system is the active node. You will not be able to connect to the Standby Node, as the web services component is disabled when in Standby mode.
VPN Connection
If you are connecting via the VPN, then you will only be able to connect using the IP address of the currently active system. If you attempt to connect to the Standby node you will not be able to establish a Web based Configuration Utility session.
I
If an update requires a reboot in order to take effect, you can proceed as follows:
-
Navigate to System/Shutdown (see above)
-
Select Reboot, then select Standby Node from the drop-down menu
-
Click Proceed
-
Monitor the High Availability Console and watch for the Secondary Node to return to Active Status with the Inter-Node Link shown as Up, then click on Takeover on the Secondary entry.

-
Once the Secondary Node has become active (turned green), then you may proceed to the next step.
-
Navigate to System/Shutdown (see above)
-
Select Reboot, then select Standby Node from the drop-down menu

-
Click Proceed.
-
Both systems will now have been rebooted without major interruption.

System - Packages
Packages cannot be added or removed while in a HA cluster.
If at all possible you need should install or uninstall packages prior to taking the system operational in your live environment; SPLIT the cluster first, then make the package changes on each node separately. See the instructions below for the required steps.

New Pages: High Availability Tab
A new High Availability tab is introduced for managing the cluster, with two new pages.
High Availability Tab - Cluster Setup Page
This is the page used to configure the High Availability cluster.

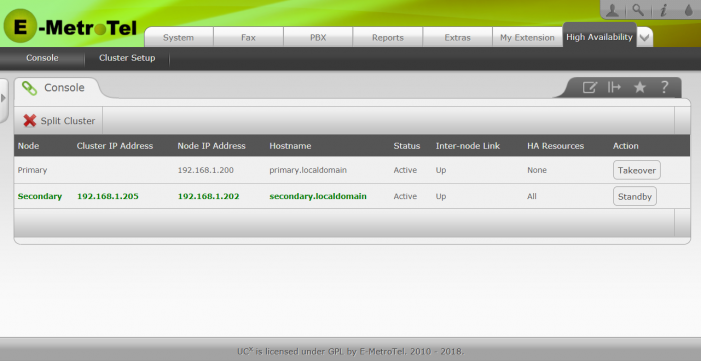
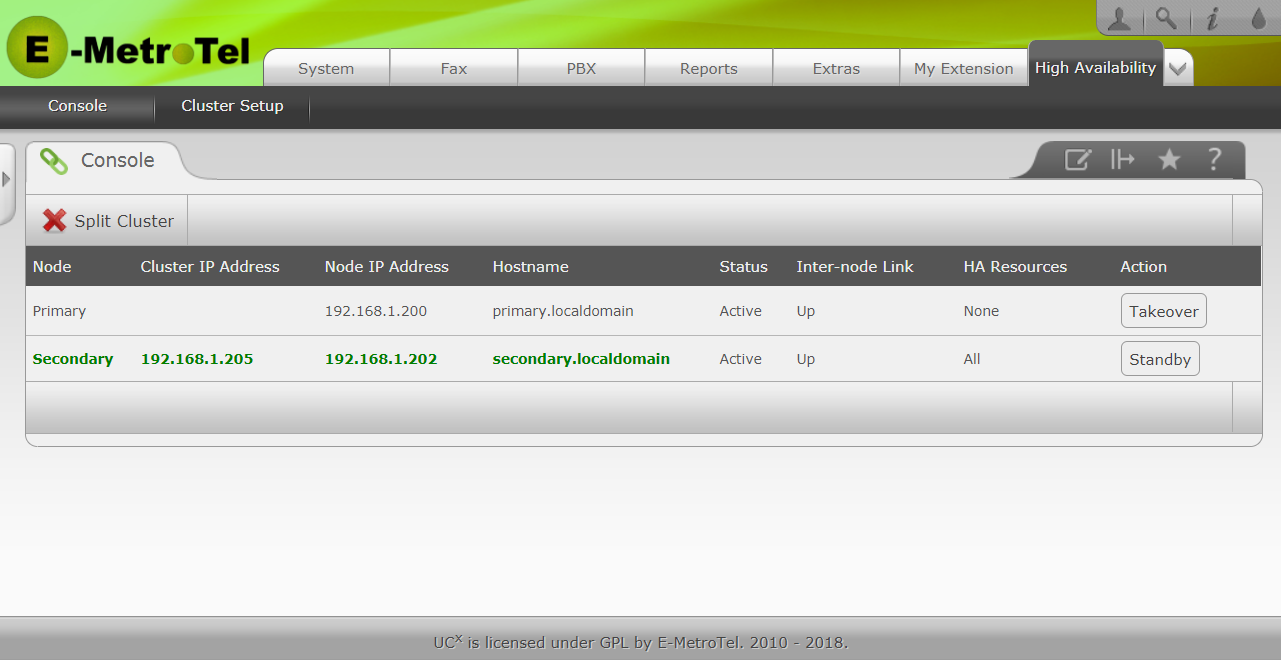
High Availability Tab - Console Page
The Console page shows the current status of the two cluster nodes.

Splitting a Cluster during initial configuration
While testing the initial HARC functionality, it may be desirable to install additional packages to the systems in the cluster. This requires splitting the cluster and updating them to use the same packages, and then reconnecting the cluster using the normal startup HARC procedures.
To split the cluster:
-
Navigate to the Console page on the High Availability tab.
-
Click on the Split Cluster button.
-
Click on the OK button to confirm the split.

-
The two UCx servers should now be accessed via their individual IP addresses.
