

High Availability - Web-based Configuration Utility Rls 7.0
Introduction
When the High Availability cluster is enabled, always access the Web-based Configuration Utility via the configured Cluster IP address. This ensures access to the utility regardless of which system is in the active role.
After you have activated the High Availability package, several screens on the Web-based Configuration Utility are modified or enhanced to provide information and configuration with respect to both UCX systems, and an additional new tab with multiple pages is added for managing the High Availability cluster.
Modified or Enhanced pages
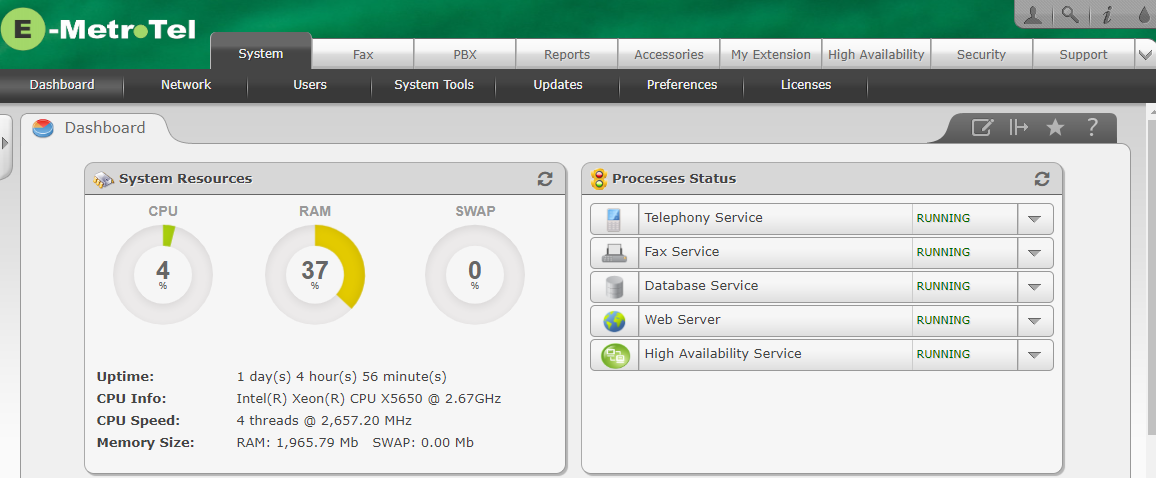
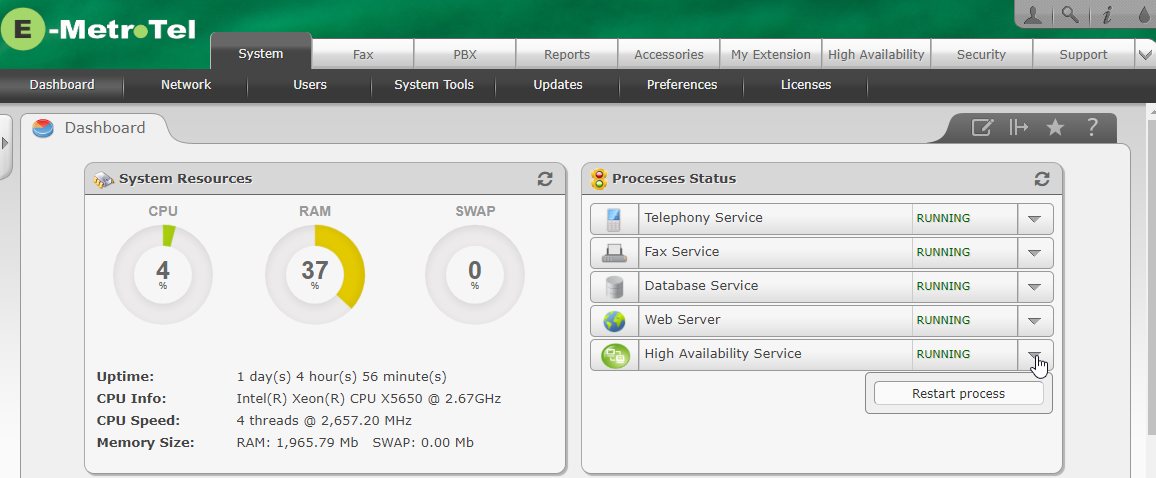
System - Dashboard
-
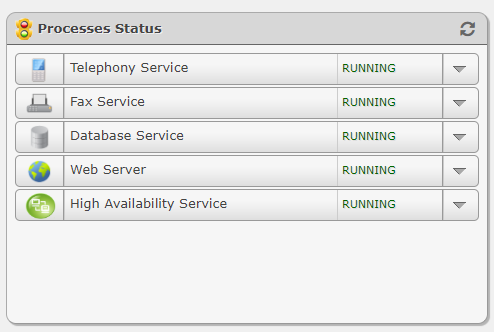
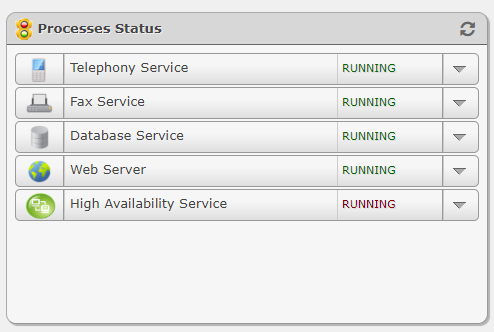
On the System / Dashboard page, the Processes Status applet provides a quick status indication of the current state of the High Availability configuration.
-
It can also be used to restart the High Availability service.
- The Dashboard also provides color-based indication of the Cluster status:
- Green Running - indicates that the heartbeat service is running on both nodes
- Red Running - Indicates that the heartbeat service is running on the current node, but is unable to communicate with the heartbeat service on the node that is in the Standby Role
-
Blue Running - Indicates that the nodes are synchronizing. (NO CLUSTER CHANGES CAN BE MADE DURING THIS ACTIVITY - the controls on the GUI page will be disabled until the nodes have synced up)
Note that hovering the mouse Cursor over the Status text will display the error
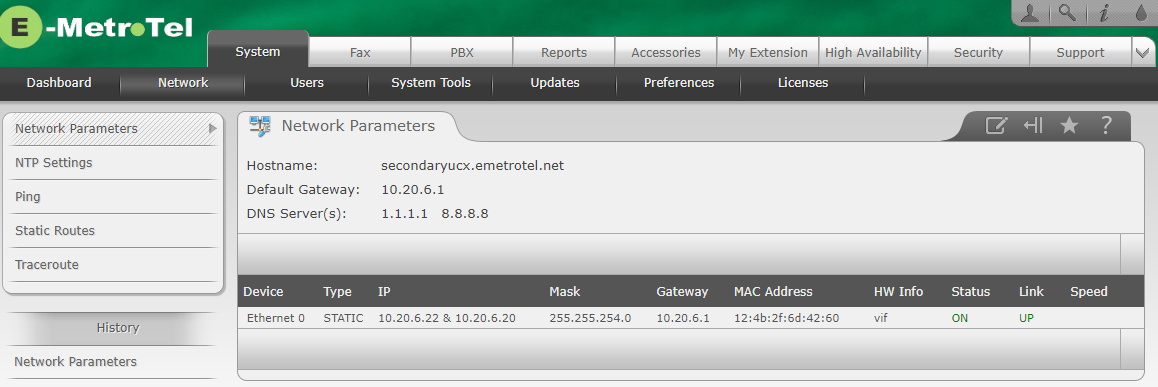
System - Network
On the Network Parameters page, the IP address of the Active UCX and the Cluster interface are listed.
The following restrictions are applied when in a cluster:
- Configuration of Ethernet 0 cannot be changed while the systems are in a cluster
- Hostname cannot be changed while the systems are in a cluster (The Hostname of the node in the Active Role is displayed.)
- DHCP Server is not available in the High Availability mode.
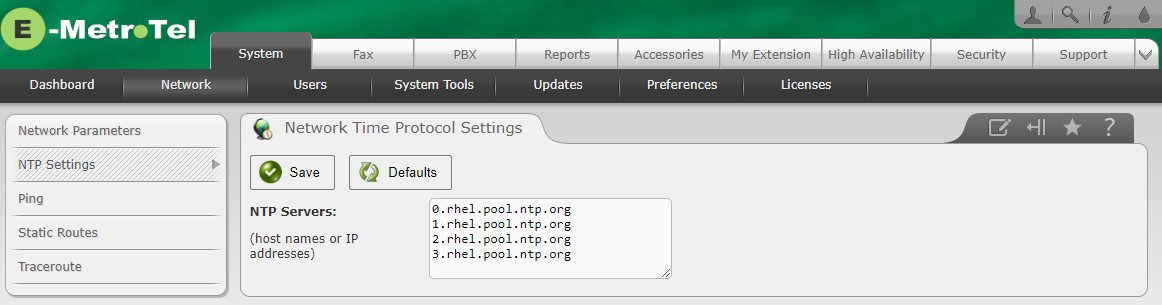
System - Network - NTP Settings
On the Network Time Protocol Settings page, clicking the save button of the active server results in the time and date on both servers being synced to the NTP Server listed on the first line of the NTP server list on the NTP Settings GUI page of the active server.
System - Network - DHCP Server
The DHCP Server page is unavailable in High Availability mode.
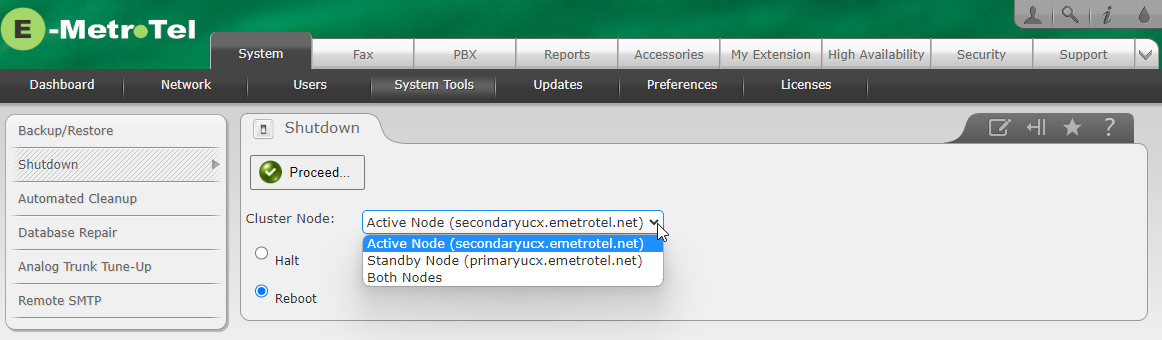
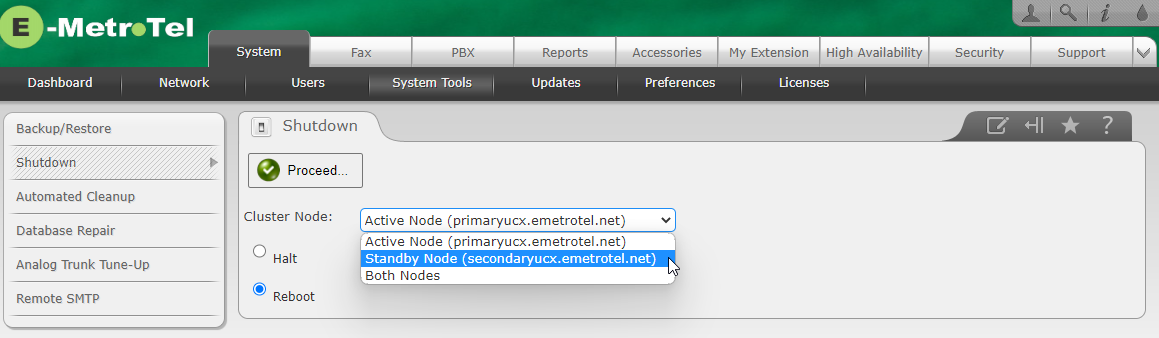
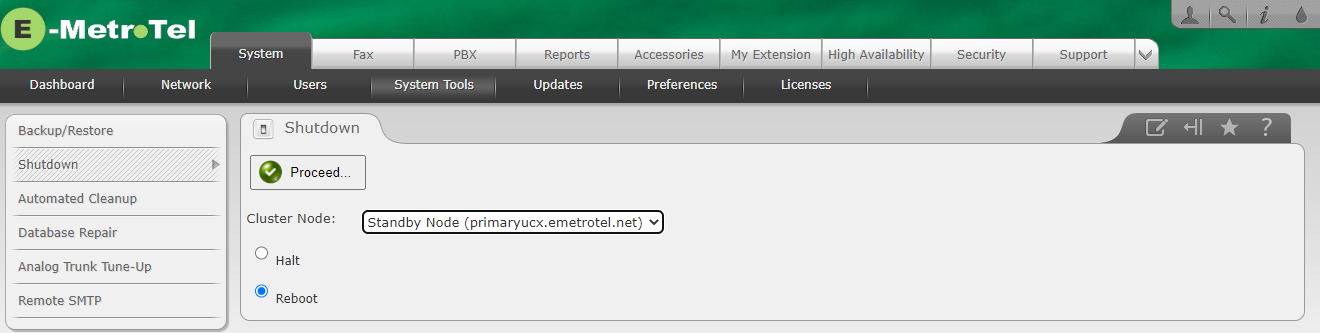
System - System Tools - Shutdown
On the System / System Tools / Shutdown page a drop down control was added to allow you to select whether you want to Halt or Reboot the Active or Standby Nodes. You can also select Both Nodes.
Accessories
On the Accessories page you cannot install new addon packages while in High Availability mode. You must SPLIT the cluster into two standalone systems temporarily, install the packages separately on each server, and then join them back together as a cluster.
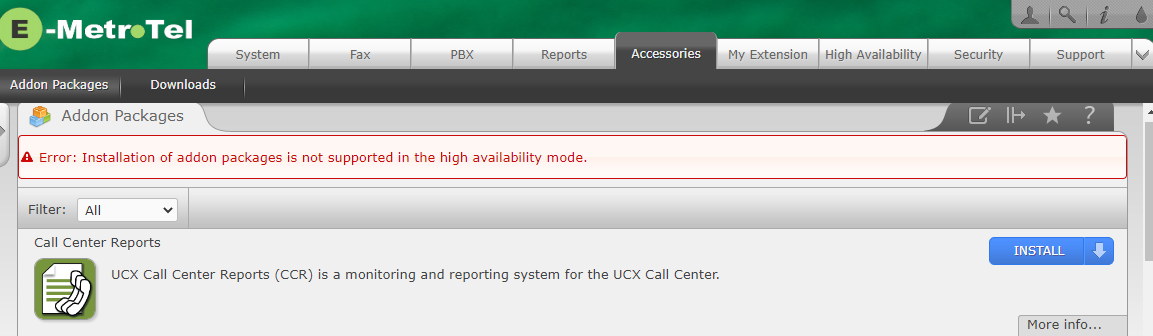
Most accessories can be configured while in a cluster. However, MDSE must be configured and operating properly before you create the cluster.
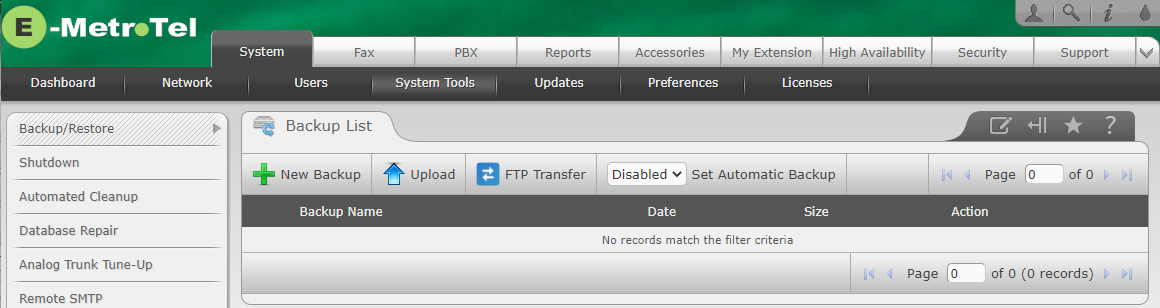
System - System Tools - Backup/Restore
The option to create a backup to a USB Drive has been removed from the System Tools / Backup/Restore page. When a back is created, it is automatically replicated to the other node in the cluster.
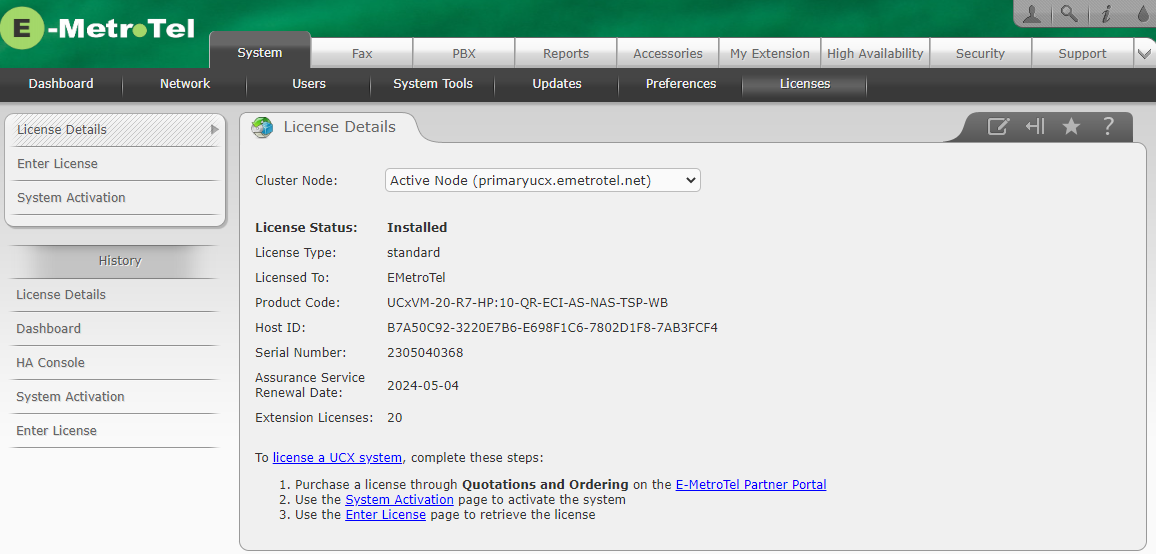
System - Licenses
On the System / Licenses page, a dropdown box was added to allow you to select which node you want when reviewing licenses details including serial numbers and Assurance Services information.
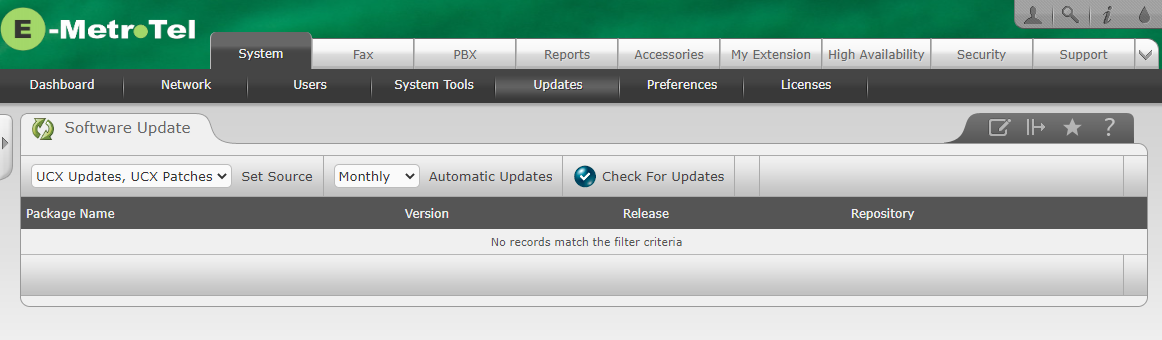
System - Updates
On the System / Updates page you can now choose to automatically update your software. In HA mode both servers are updated.
All software updates MUST be performed from the Web-based Configuration Utility. You can connect to the system locally or via the VPN to do Software Updates. Software updates are initiated by the Active node, and the node in the Standby Role will be automatically updated as changes to the node in the Active Role are detected.
Update via a Local Connection
If you are connecting locally, you can connect using either the cluster IP address or the IP address of the currently active system. By using the cluster IP address you will not be required to know which system is the active node. You will not be able to connect to the node in the Standby Role, as the web services component is disabled when in Standby mode.
Update via a VPN Connection
If you are connecting via the VPN, then you will only be able to connect using the IP address of the currently active system. If you attempt to connect to the node in the Standby Role you will not be able to establish a Web based Configuration Utility session.
If an Update requires a reboot
If an update requires a reboot in order to take effect, you can proceed as follows:
-
Navigate to System / System Tools / Shutdown (see above)
-
Select Reboot, then select Standby Node from the drop-down menu. Note that at this point in time the Standby Node is associated with the secondary server.
- Click Proceed, then click on OK to confirm
-
Monitor the High Availability Console and you will see the the Secondary Node switch to Offline during the reboot.
-
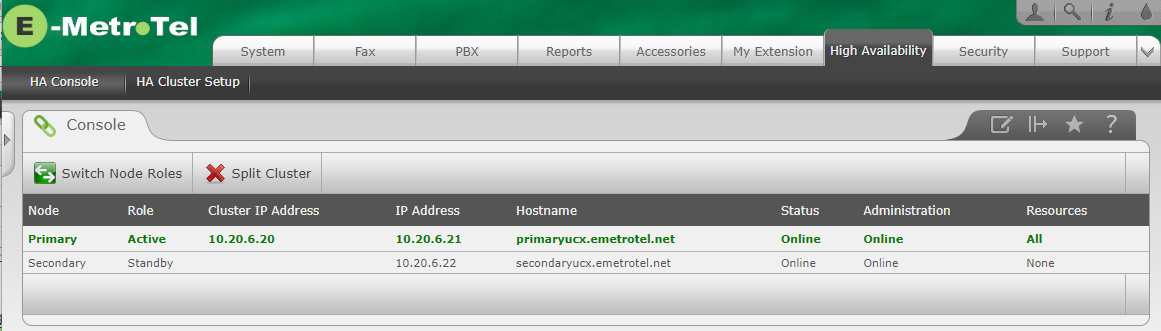
Continue monitoring the High Availability Console and watch for the Secondary Node to return to Online status, at which time the Switch Node Roles and the Split Cluster buttons re-appear. Click the Switch Node Roles button.
-
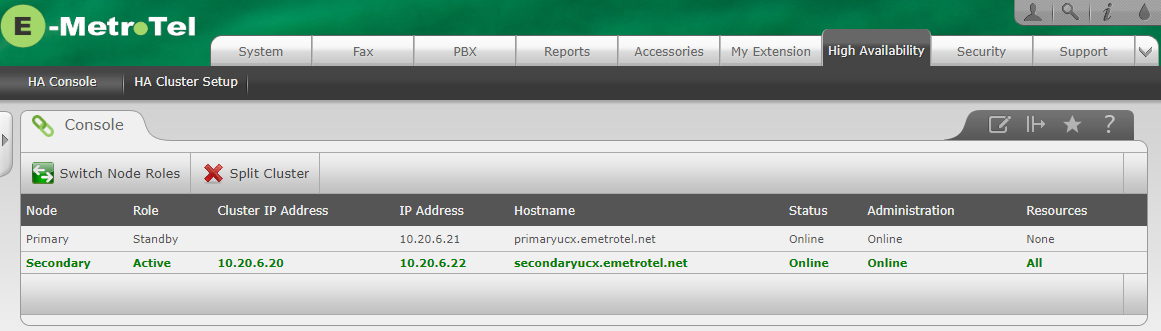
Click the Switch Node Roles button, and wait for the the Secondary system to report as Active
-
Navigate to System/Shutdown (see above)
-
Select Reboot, then select Standby Node again from the drop-down menu - note that this time it will be associated with the primary server.
- Click Proceed, then click on OK to confirm
-
The HA Console will show the secondary server as green indicating it is online with the Active Role, and the primary server as red indicating it is offline during the reboot.
-
Both systems will now have been rebooted without major interruption, with the system operating (in the Active Role) on the secondary node. Switching them back to the original configuration (Primary Node being in the Active Role and the Secondary Node in the Standby Role is not required and would cause further disruption to the customer.
New Pages: High Availability Tab
A new High Availability tab is introduced for managing the cluster, with two new pages.
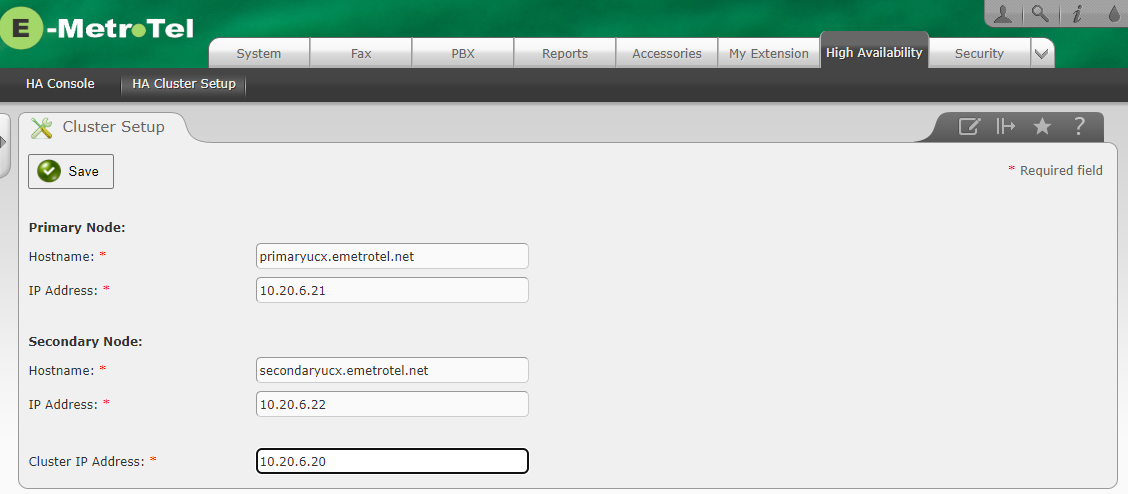
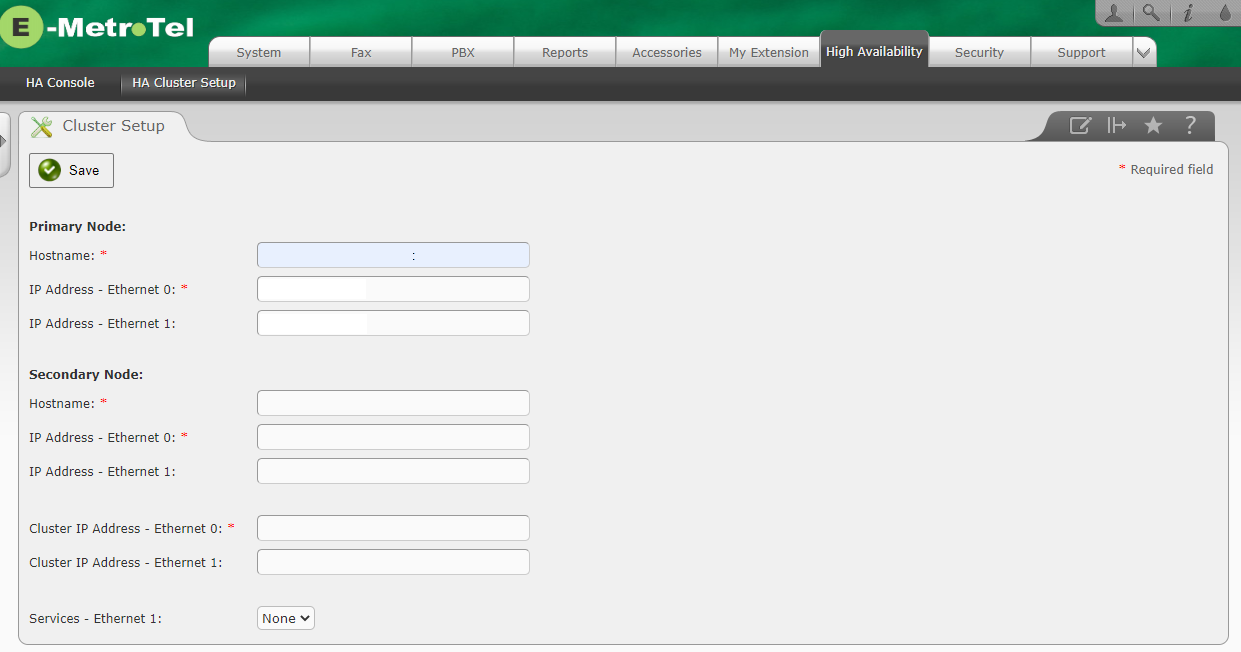
High Availability Tab - HA Cluster Setup Page
This is the page used to configure the High Availability cluster when there is only a single Network Interface:
If the system has more than one Network Interface, then the following page will be displayed:
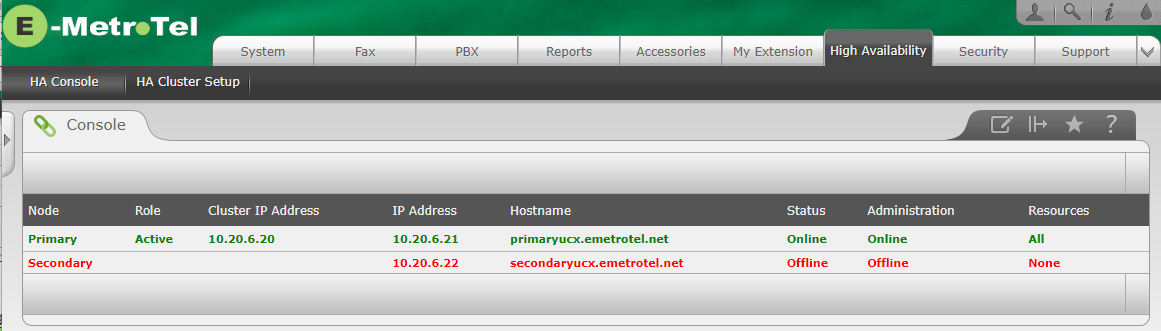
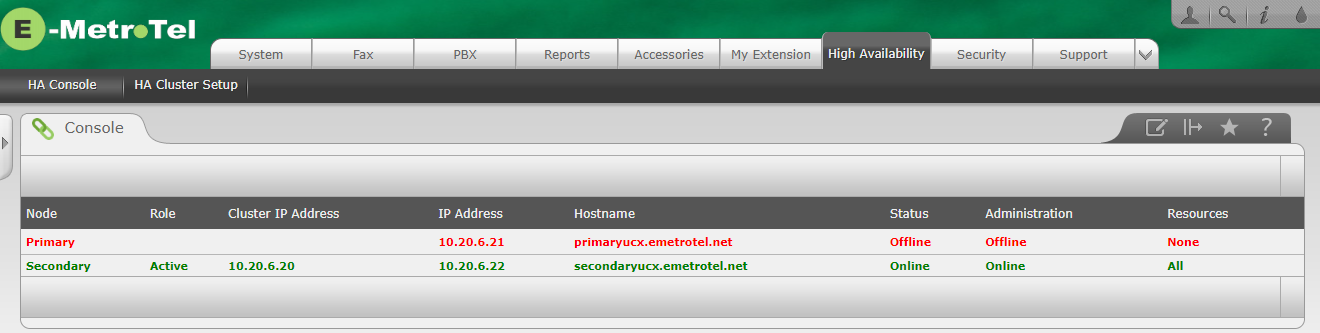
High Availability Tab - Console Page
The Console page shows the current status of the two cluster nodes.
Splitting a Cluster during initial configuration
While testing the initial HARC functionality, it may be desirable to install additional packages to the systems in the cluster. This requires splitting the cluster and updating them to use the same packages, and then reconnecting the cluster using the normal startup HARC procedures.
To split the cluster:
-
Navigate to the Console page on the High Availability tab.
-
Click on the Split Cluster button.
-
Click on the OK button to confirm the split.

-
The two UCX systems should now be accessible via their individual IP addresses. The Cluster IP Address will no longer respond. Reconnecting the systems will require following the set up process described in the Configuration section of High Availability - Installation and Configuration Rls 7.0.