

1.0 The UCX Imager Tool
Section Contents
1.1 UCX Imager Options
1.2 Updating the UCX Imager Software
1.3 Updating the Platform Images
1.4 UCX Imager User Interface Requirements
1.5 Applicable Platforms
1.6 Reuse of UCX Imager tool
1.7 UCX Imager process failures
1.2 Updating the UCX Imager Software
1.3 Updating the Platform Images
1.4 UCX Imager User Interface Requirements
1.5 Applicable Platforms
1.6 Reuse of UCX Imager tool
1.7 UCX Imager process failures
1.0 UCX Imager tool (USB Stick)
The UCX Imager Tool has been developed by E-MetroTel as a multi-purpose tool, with the first primary applications of its capabilities to be to enable UCX Release 6.0 systems to be easily and efficiently reimaged or factory reset to the UCX Release 7.0 software. As such, care was taken in selecting a USB device that meets our anticipated needs for capacity as well as read and write times. This is important for building the initial image on the USB, as well as for optimizing the time it takes to update the the software on the Galaxy hardware platforms.
The UCX Imager Tool is Part Number: SBUSBN-V7, UCX Imager Tool (7.0 SW Upgrade USB). It is orderable as a separate item under the Quotations and Ordering section of the E-MetroTel Partner Portal. In the Quotation and Ordering main page, select the Appliance option, choose New System, open the Hardware sub-section and request a quantity you require. There is no requirement to include any other hardware or software on the same quote. If you have multiple technicians covering specific customers or regions, you may wish to order more than one however the same USB Imager Tool can be used on any number of Galaxy appliance systems.
It is shipped as a USB stick with green lanyard in a plastic bag as shown below:

Note that one copy of this tool may be used to reimage or Factory reset any number of Galaxy systems.
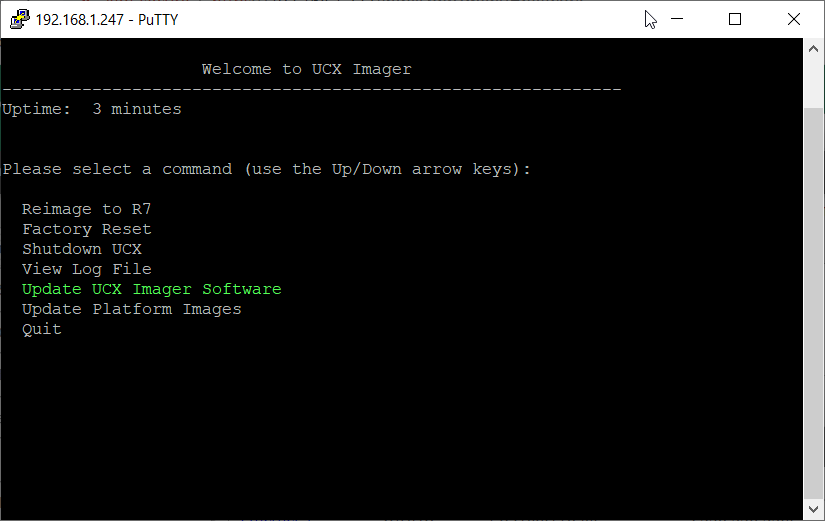
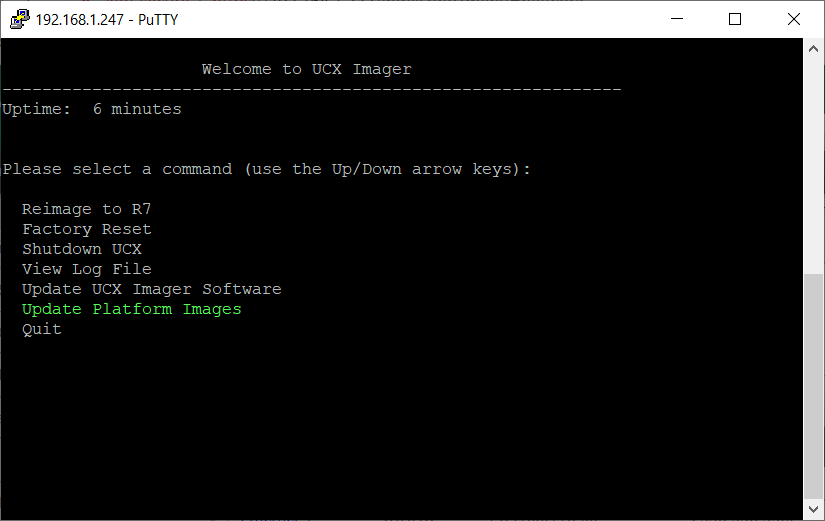
1.1 UCX Imager Options
The UCX Imager has multiple options:
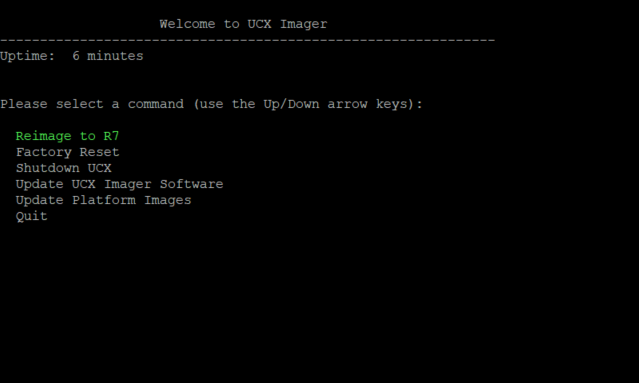
The following is a brief description of each of the options.
-
Perform an Reimage to R7 to existing systems while attempting to retain the following non-telephony related configured data:
- Host ID
- Network configuration for Ethernet 0, Ethernet 1, Ethernet 2 interfaces if they exists
- VPN configuration if it exists (VPN connection will need to be restarted after completion)
- SSL certificate information (regardless of SSL provider)
- DHCP configuration
- IP Block List - configuration
- Firewall configuration
- Activation state
- NTP settings and Time Zone preference
- Hostname
- Analog Trunk tuning parameters (fxo.tune)
-
Perform a Factory Reset of a system
- This process creates a new clean factory image. This will not preserve any data associated with the system it is being applied on. It will reset everything to factory defaults, although it will attempt to retain the system identity, specifically the Host ID and associated licenses.
- You may Shutdown UCX will power down the UCX without making any changes
-
You may Update UCX Imager Software in order to obtain the latest UCX Imager software (Refer to Section 1.2).
- This option is available only when there is internet access.
-
You may Update Platform Images in order to add additional UCX images for other platforms (Refer to Section 1.3).
- This option is available only when there is internet access.
- You may Quit in order to safely exit the UCX Imager tool.
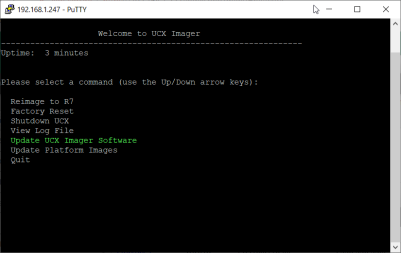
1.2 Updating the UCX Imager Software
To update the UCX Imager Software:
- Use a UCX 6.0 system that is connected to the internet.
- Power down the UCX 6.0 Galaxy system
- Insert the UCX Imager into one of the USB ports
- You can connect to the UCX Imager Tool using the IP Address of Ethernet 0 of the Release 6.0 system or 192.168.1.247. If you are not able to connect to one of these addresses you can also connect a monitor to the available Video port and a USB keyboard to the USB port as noted in Section 4.4 of 4.0 Reimaging using the UCX R7 Imager.
- Re-apply power to the Galaxy system. The system will boot from the UCX Imager
-
If you are connected via the LAN, establish an SSH session to 192.168.1.247 via a tool such as Putty
- At the login as: prompt, enter admin
- At the password prompt, use the standard E-MetroTel default of emetr0tel
-
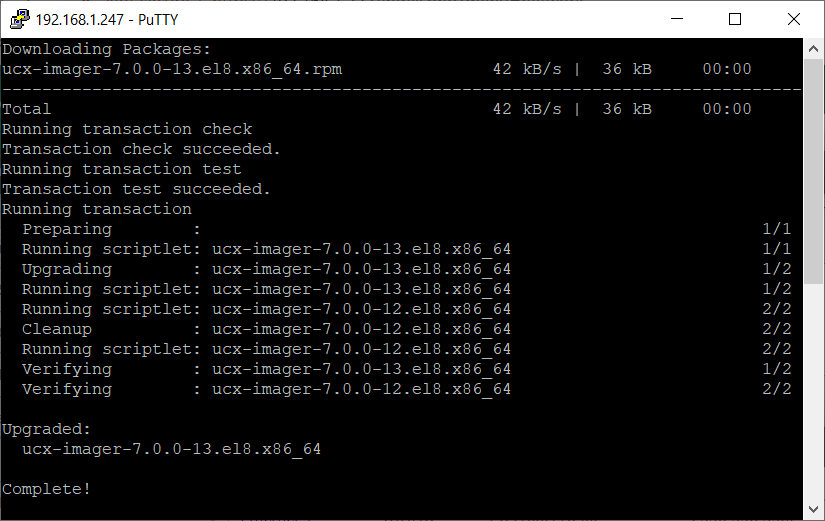
Using the keyboard arrow keys, select (highlight) Update the UCX Imager Software, and press the Enter key
-
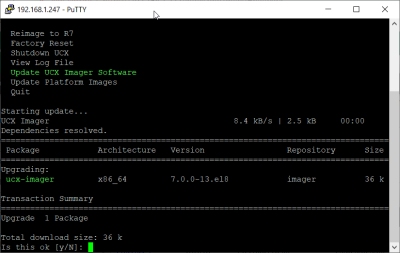
The UCX Imager Tool will check the E-MetroTel repositories. If an update is available, you will be prompted to confirm the download. Answer y
-
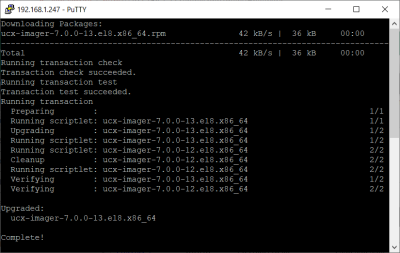
The UCX Imager Tool will download and install the updates. When it is done it will indicate the process is Complete!

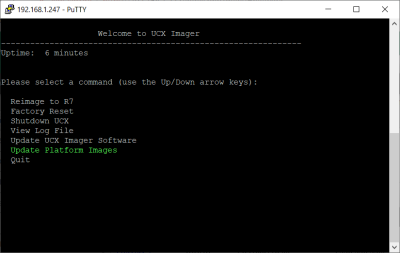
1.3 Updating the Platform Images
To update the Platform Images:
- Repeat steps 1 through 5 from Section 1.2 above.
-
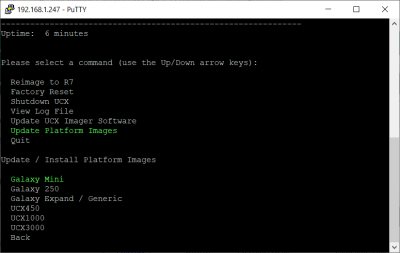
Using the keyboard arrow keys, select (highlight) Update the Platform Images, and press the Enter key
-
The UCX will present a list of available images to load. Using the arrow keys, select one of the images and press the Enter key
-
The UCX Imager Tool will attempt to update the selected image if a newer version is available. When it is done it will indicate the process is Complete!
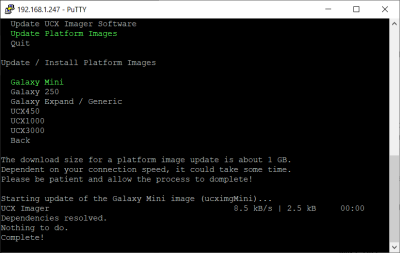
- Repeat the steps to update other images as required.


1.4 UCX Imager User Interface Requirements
The following table summarizes the options available for using the UCX Imager tool depending on the Galaxy hardware:
|
Front Panel RST button RUN LED Audible Beeps* |
Front Panel LCD Display and Menu keys |
SSH Connection
|
USB Keyboard and Monitor
|
|
|---|---|---|---|---|
| Galaxy Mini | Yes | - | Yes | - |
| Galaxy 250 | - | Yes | Yes | Yes (VGA) |
| Galaxy 450/1000/3000/2930/i5 | - | - | Yes | Yes (VGA/HDMI) |
* The system will beep once after startup from the UCX Imager to indicate the system has fully booted, and will beep 4 times when the system has been shut down.
Refer to 4.0 Reimaging using the UCX R7 Imager for full details on using the UCX Imager Tool to reimage systems to UCX Release 7.0.
1.5 Applicable platforms
The E-MetroTel UCX Imager can be used to reimage or factory reset any Galaxy Mini, 250, 450, 1000, or 3000 to UCX 7.0. However, the system to be upgraded must be under active Software Assurance before it can be updated to UCX 7.0 software.
Note: There is no need to request a Release 7 License, the license will be updated during the upgrade process.
1.6 Reuse of UCX Imager tool
The same UCX Imager Tool is used to perform an update or re-image on any platform type and can be used across multiple systems. The procedure for the upgrade is slightly different depending on which Galaxy platform you are updating.
1.7 UCX Imager process failures
If the UCX Imager Tool fails to complete the Reimage to UCX 7 or the Factory Reset process or the Migration of UCX 6.0 data to UCX 7.0 system fails, follow the standard E-MetroTel support process by first opening a ticket and then contacting E-MetroTel support telephone. Do not use the same UCX Imager USB stick on any other system prior to contacting E-MetroTel support as the log files it contains may be of assistance in troubleshooting the failure that will be overwritten if that USB stick is used again.
Note that the UCX Imager Tool will fail to Reimage to UCX 7.0 on a small number of UCX 250 appliance platforms that are equipped with the N2930 processor and are operating on a older (i.e. 2018) BIOS version that most other UCX 250 and Galaxy 250 platforms (which use a 2019 version). However, if the UCX Imager Tool has been updated to the latest Imager Tool software and updated with the latest release of the Galaxy 250 Platform Image the cause of the failure will be noted in the log file as follows:
-- Logs begin at Tue 2023-05-30 21:29:20 CDT. --
Sep 05 18:07:28 imager.ucxcloud.com ucx_reimage[1866]: Reimage to UCX Release 7 - starting the process...
Sep 05 18:07:28 imager.ucxcloud.com ucx_reimage[1866]: UCX 250 detected
Sep 05 18:07:28 imager.ucxcloud.com ucx_reimage[1866]: Determining destination
Sep 05 18:07:28 imager.ucxcloud.com ucx_reimage[1866]: Checking BIOS version...
Sep 05 18:07:28 imager.ucxcloud.com ucx_reimage[1866]: Error - BIOS update required - aborting
Sep 05 18:07:38 imager.ucxcloud.com systemd[1]: ucximager.service: Main process exited, code=exited, status=3/NOTIMPLEMENTED
Sep 05 18:07:38 imager.ucxcloud.com systemd[1]: ucximager.service: Failed with result 'exit-code'.