

Users
The User List page allows you to view/change the list of users who have access to the UCX Web-based Configuration Utility.
To add a new user, perform the following steps:
- Open the UCX Web-based Configuration Utility
- From the System tab, select Users.
-
From the left side column, select Users.
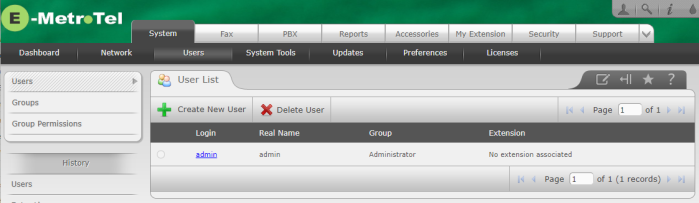
- Press the Create New User button to open the New User page.
- Enter the login ID in the Login field
- Enter the user name in the Name field
- Enter the password and password confirmation in the Password and Retype password fields
- Select the group to which the user will belong using the Group drop-down list box
- Select the extension that belongs to the user using the Extension drop-down list box
-
Press the Save button to create the user account


To modify configuration of an existing user account, perform the following steps:
- Open the UCX Web-based Configuration Utility
- From the System tab, select Users.
- From the left side column, select Users.
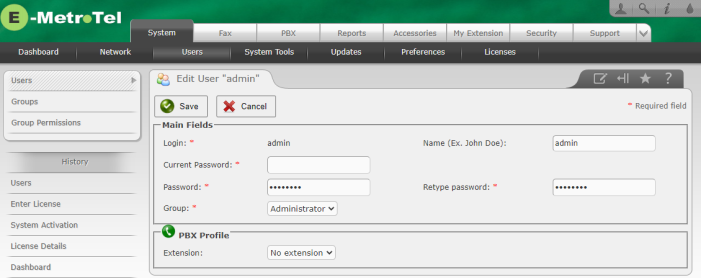
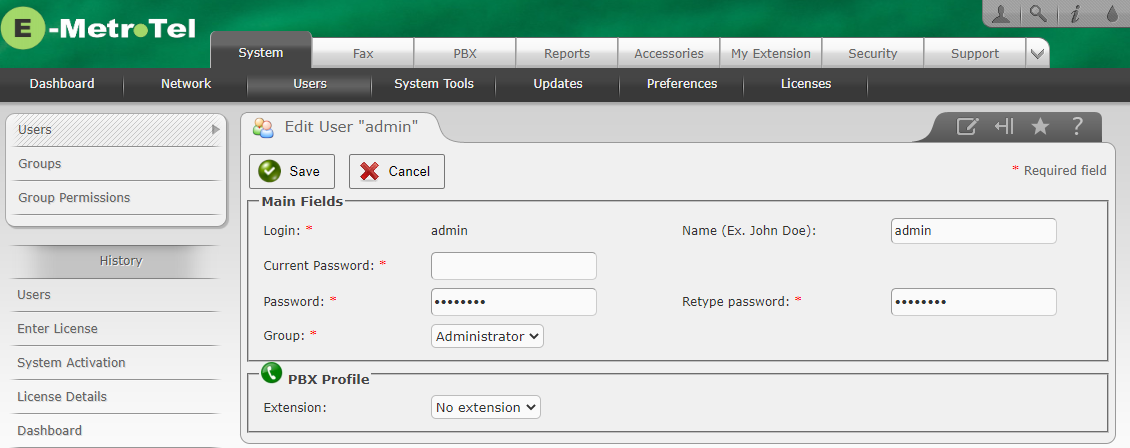
- For the user account you want to change, click on the user ID under the Login column to display the user account details.
-
On Release 5.0:
- Press the Edit button to open the Edit User page
- Update the configuration data for the user account
-
Press the Apply Changes button to update the user account
-
On Release 6.0:
- Update the configuration data for the user account
-
Press the Save button to update the user account

To delete an existing user account, perform the following steps:
- Open the UCX Web-based Configuration Utility
- From the System tab, select Users.
- From the left side column, select Users.
- Select the button checkbox for the user and press the Delete User button. Confirm the request at the prompt.