

External Storage
Feature Description
The UCX External Storage allows Call Recordings to be automatically transferred to an external storage device on regular basis. The External Storage application has the following attributes:
- Configuration is done through the UCX web interface
Pre-Requisites
- UCX server is installed with the latest E-Metrotel software.
- An updated license to include the UCX External Storage software.
- An external network attached storage device with no user authentication required and able to connect as an NFS share.
Update License
Go to Licenses page for details on how to:
- Obtain a new license for the External Storage
- Retrieve the updated license.
Install Software Package
First you will need to have the latest UCX software. Go to Software Update page in the Administration Guide for details on updating your software.
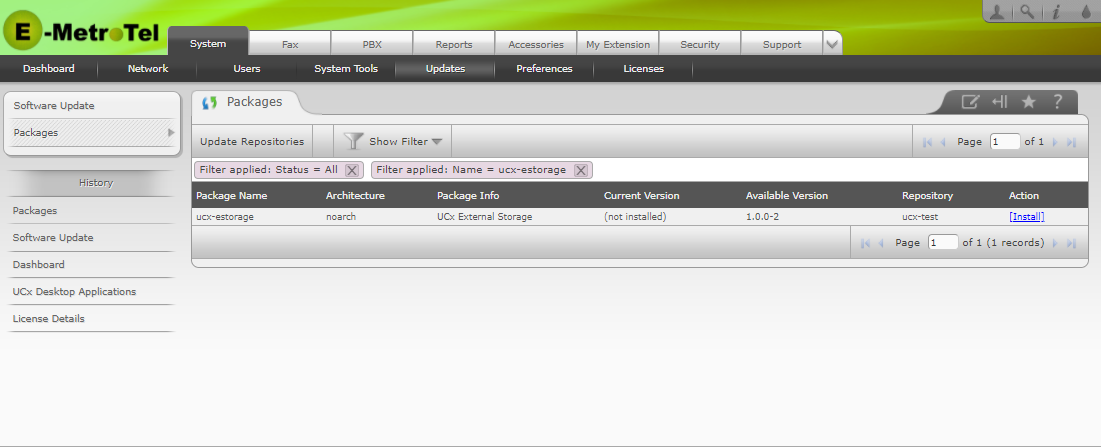
Next you need to install the ucx-estorage package. Go to Packages page in the Administration Guide for details on installing packages.
From the Packages panel:
- Select the Show Filter tab and enter ucx-estorage for the Name, enter All for the Status
- Click the Install link under the Status column to install the package
Configure External Storage
To access the External Storage configuration page, perform the following steps:
- Open the UCX Web-based Configuration Utility
- From the System tab, select Accessories
- From the left side column, select External Storage
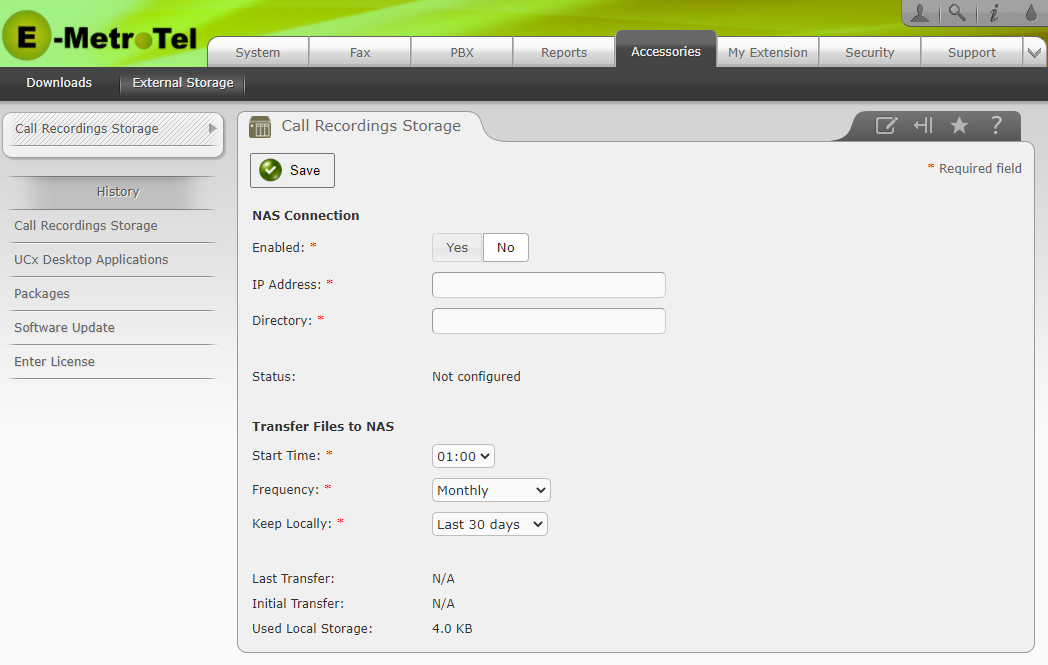
The following settings are required:
NAS Connection:
Enabled: Select Yes
IP Address: Enter the IP address of the NAS server
Directory: identify the path of the target directory on the NAS server
IP Address: Enter the IP address of the NAS server
Directory: identify the path of the target directory on the NAS server
This section also provides:
Status will indicate a Connected if the NAS directory has been found
Storage space will indicate the amount of storage identified on the file server if the connection to the NAS was established successfully.
Transfer Files to NAS:
Start Time: enter the hour of day (using 24 hour clock) that you wish to start the file transfer to the NAS
Frequency: Enter the frequency that you wish to initiate the file transfer to the NAS (Daily/Weekly/Monthly/Quarterly/Semi-Annually/Annually or Disabled)
Keep Locally: Enter the period of time for which you wish to retain the recording files on the local UCX server (Last 1, 7, 15, 30, 60, 90, 182, or 365 days)
This section also provides:
Last Transfer will indicate N/A (before any transfers have been attempted)
Initial Transfer will indicate when the first transfer will occur
Used Local Storage will indicate the current amount of local storage space on the UCX for the recordings files
When complete, click the Save button.
The following example below shows a system configured to connect to a NAS at 192.168.1.117, and then transfers the recordings to the /export/nfs_share directory. Recordings are started at 1:00 PM (14:00) on a daily basis, and the recordings are stored locally on the UCX for 30 days.
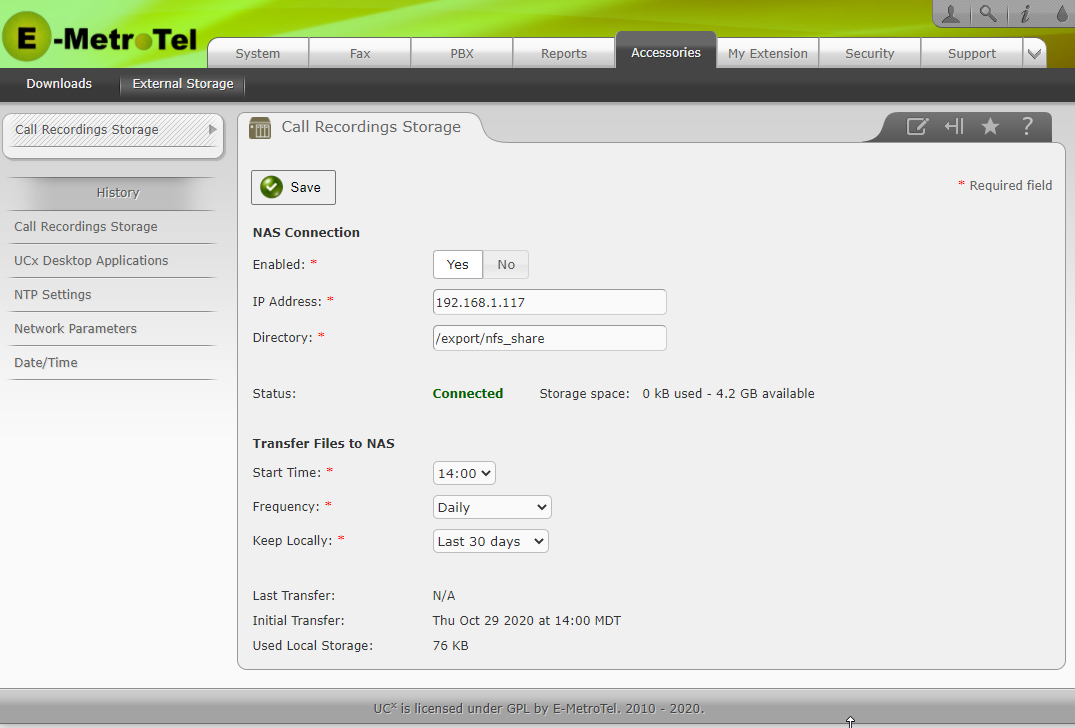
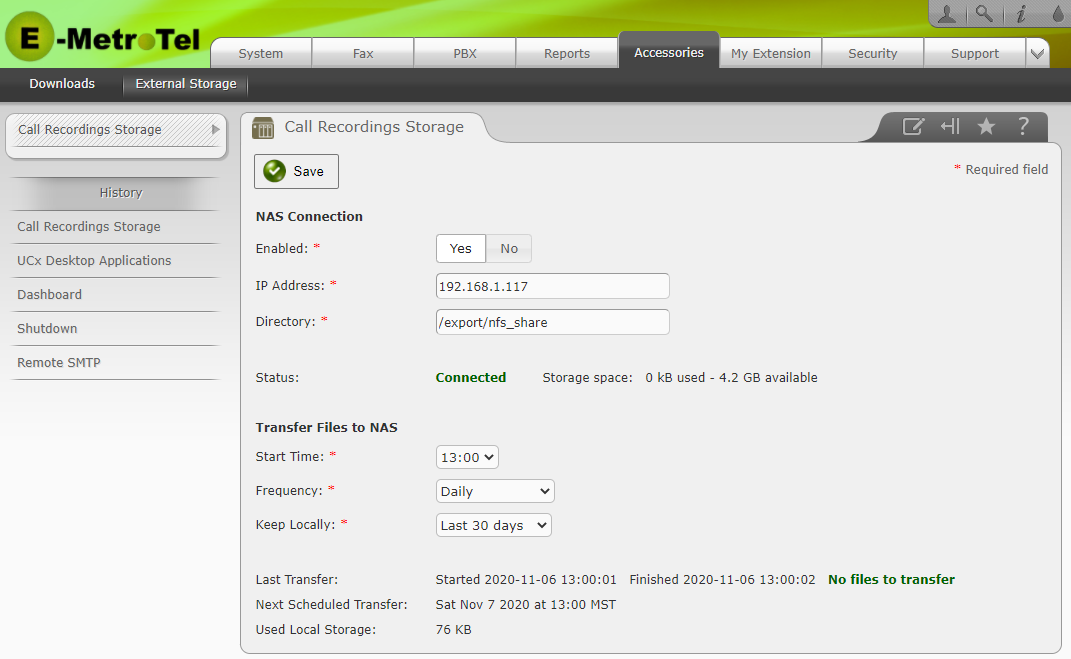
Once the UCX system has successfully transferred files based on the configured schedule, the Last Transfer information will be updated, and the Next Scheduled Transfer time will be shown.
User and Group Settings on NAS
If the NAS administrator wishes to create the Asterisk User and Group credentials on the NAS system, the User ID and Group ID must match the IDs used on the UCX software. On the UCX, the ID of the asterisk user is always 100 and the ID of the asterisk group is always 101.
Therefore, to create matching user/group on the NAS, the admin should:
- Create a new group asterisk with the group ID 101
- Create a new user asterisk with the user ID 100
- Set the permissions of the share they want to use to use the asterisk user and group
Disable External Storage
To disable the regular transfer of Call Recordings to the NAS device:
From the External CDR Interface page:
- In the Enabled line of options, select No
- Press the Save button