

Galaxy Mini FXO Gateway
Galaxy Mini FXO Gateway Example
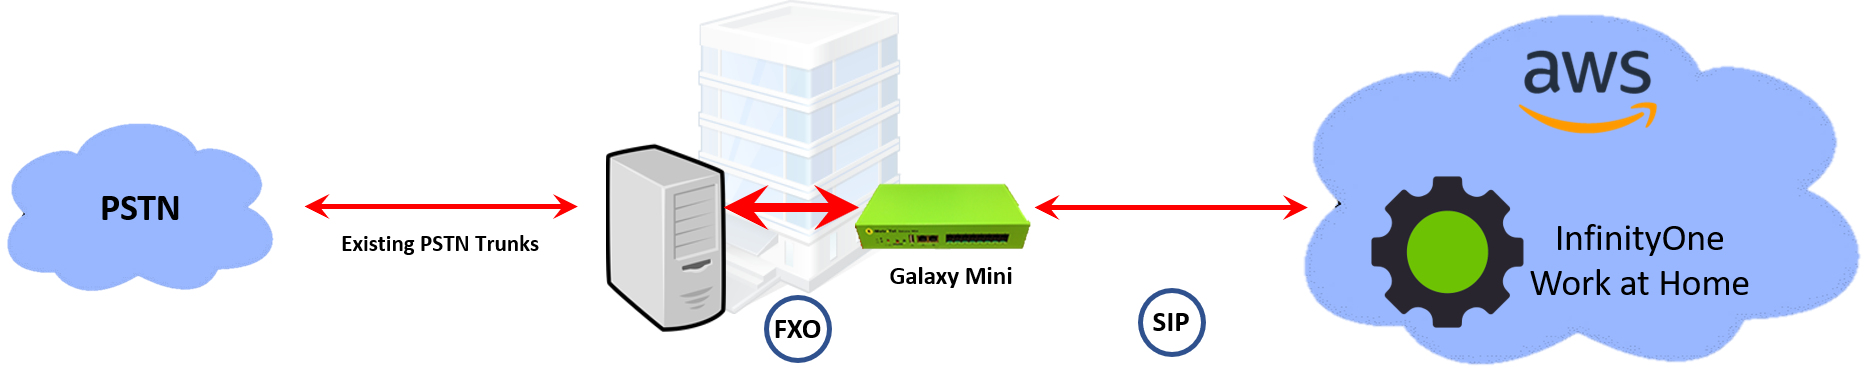
Some existing systems will have limited options in terms of available interfaces that can be used to connect to the InfinityOne Work at Home solution. Some systems may not have the capability of SIP trunks, and may only have analog interfaces available. Note that the Galaxy Mini can support up to 8 FXO interfaces and that the InfinityOne work at home solution ican be configured to enable all incoming lines to ring at all extensions or individual incoming lines to ring at a subset of extensions.
In the following example the Galaxy Mini is used as a gateway beween analog station interfaces on the existing system and the SIP trunks that connect to the InfinityOne Work at Home solution in the Amazon cloud. It assumes there are four analog trunks between the PSTN and the existing system, and multiple extensions use those four trunks as a line pool for outgoing calls and all four lines ring on all sets (i.e. a square system).
Step One: Connect the Analog Trunks
There are two options for how this can be done.If there are as many analog station interfaces available on the existing system as there are analog trunks, then one of these could be connected to the Galaxy Mini FXO ports in order to leave the existing incoming trunk wiring in place. The calls from the trunks could either be distributed to all the extensions or each indidvidual extension could be configured to ring for a particular trunk. The latter case would allow the InfinityOne Work at Home solution to be configured to provide a subset of users access to individual lines if desired.

On your existing system,
- Configure Line 1 to ring on Extension 1, Line 2 to Extension 2, etc.
- Make sure each extension has no dialing restrictions, as these will be controlled on the InfinityOne Work at Home solution .
Step Two: Configure the Galaxy Mini to pass the incoming FXO interfaces to the SIP Trunks

On the Galaxy Mini:
- Configure your PSTN Trunk Interface as follows:
-
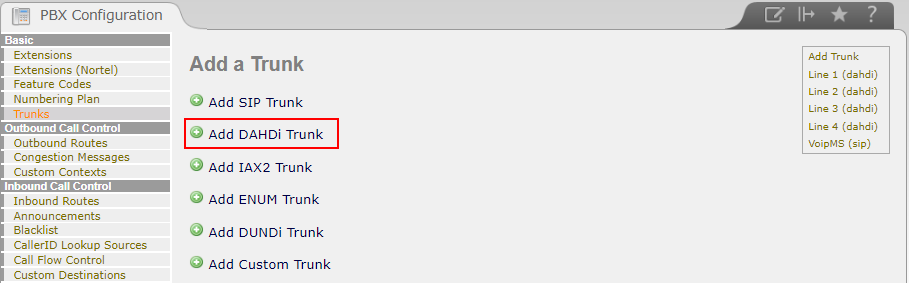
In PBX-->Trunks , select Add DAHDI Trunk

-
Assign a Trunk Name, and select a Dahdi Card channel
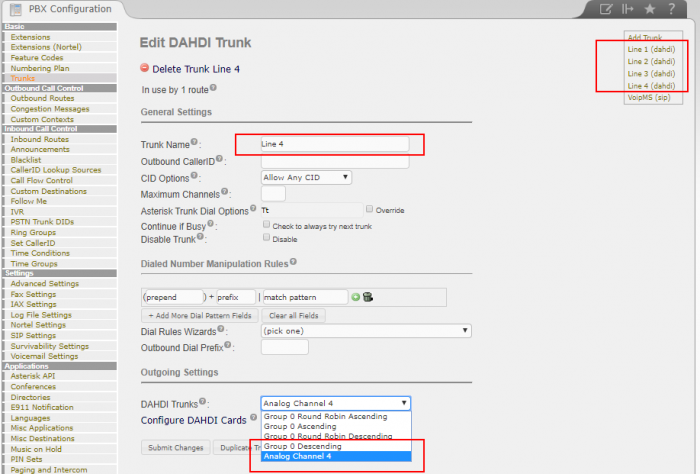
- Repeat this for each of the lines connecting from the existing system to the Galaxy Mini system
-
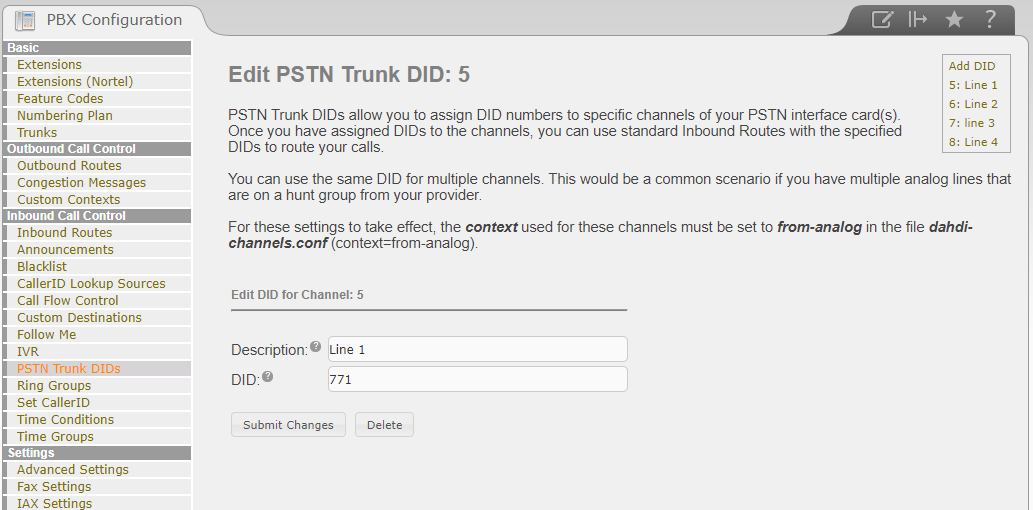
You may associate each of the Analog Trunks just created with DID numbers using the PSTN Trunk DID settings:
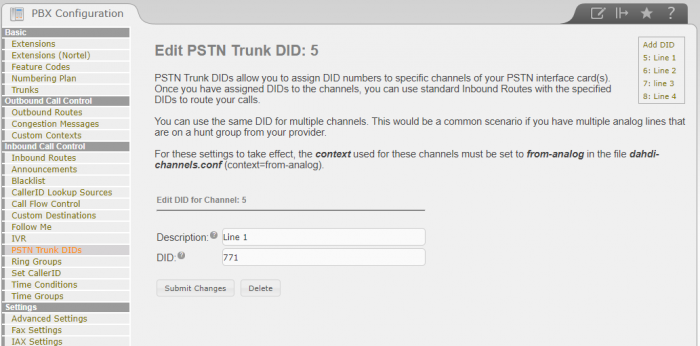
- Repeat for each of the Dahdi Trunks.

Step Two: Configure SIP Trunks between the Galaxy Mini and the InfinityOne Work at Home solution

- This configuration will be identical to the steps described in Step One of SIP Trunk Integration.
Step Three: Create Routes for each of the PSTN Trunk DIDs to the SIP Trunks

-
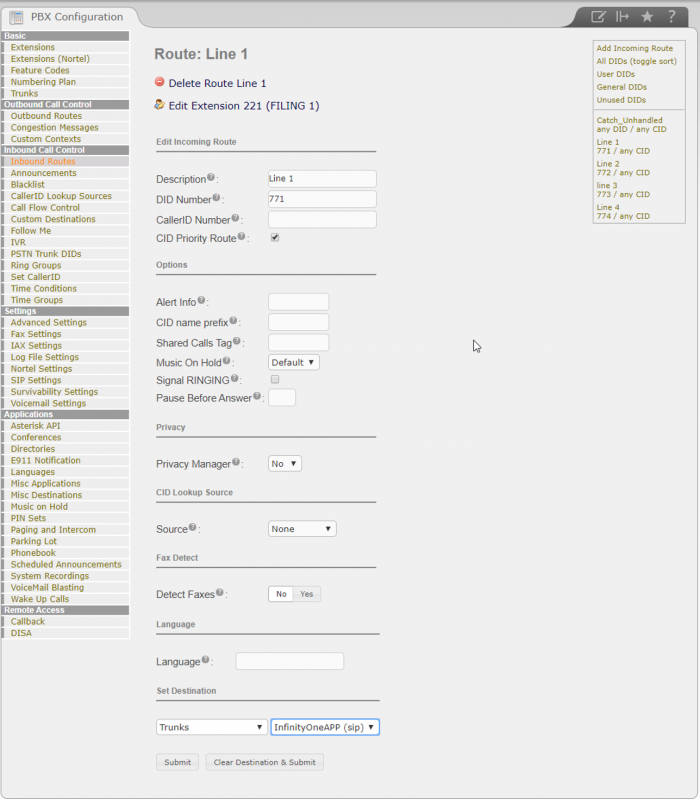
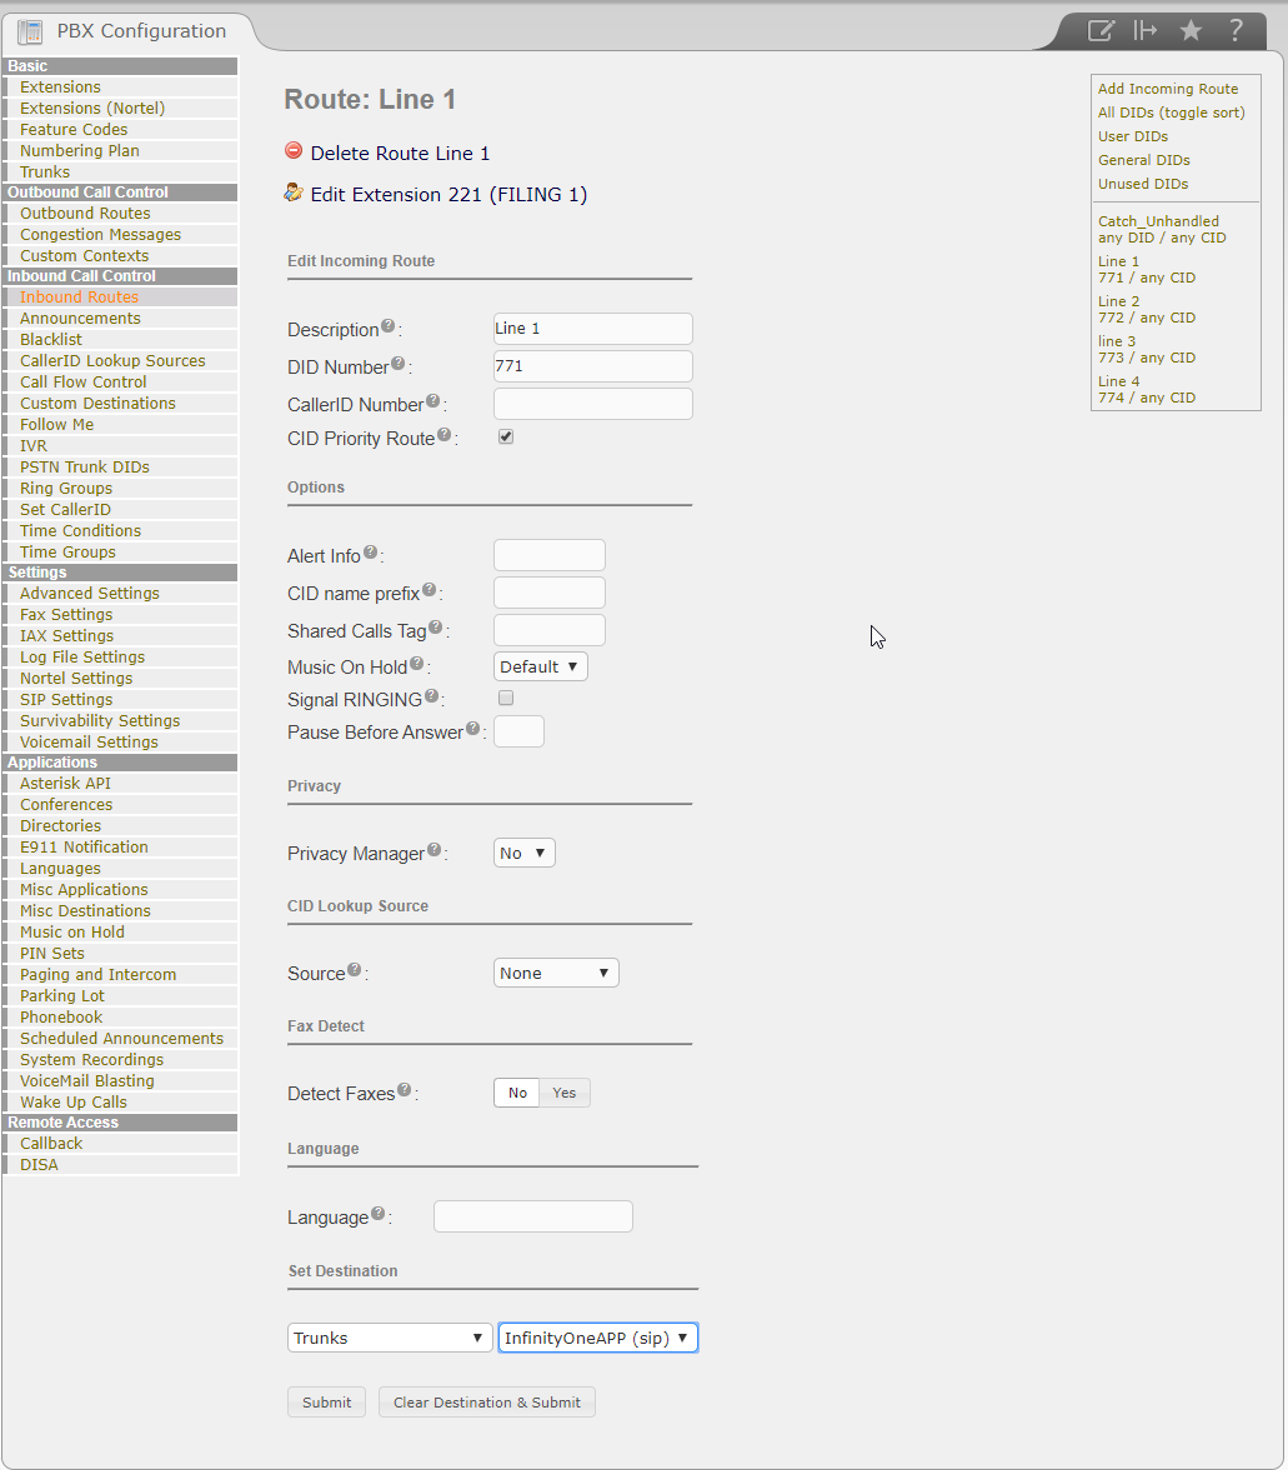
For each of the PSTN Trunk DIDs created in the Step One, create an Inbound Route with Set Destination ointing to the SIP Trunk created in Step Two.
Step Four: Create a Routes to Pass InfinityOne Work at Home solution calls to the PSTN via the Galaxy Mini FXO Gateway

- Configure "outbound trunks" for the FXO ports
- If you have a combination of FXO and FXS ports, you will need to configure the FXO ports to be within their own group, if you only have FXO ports you may progress to step 6.
-
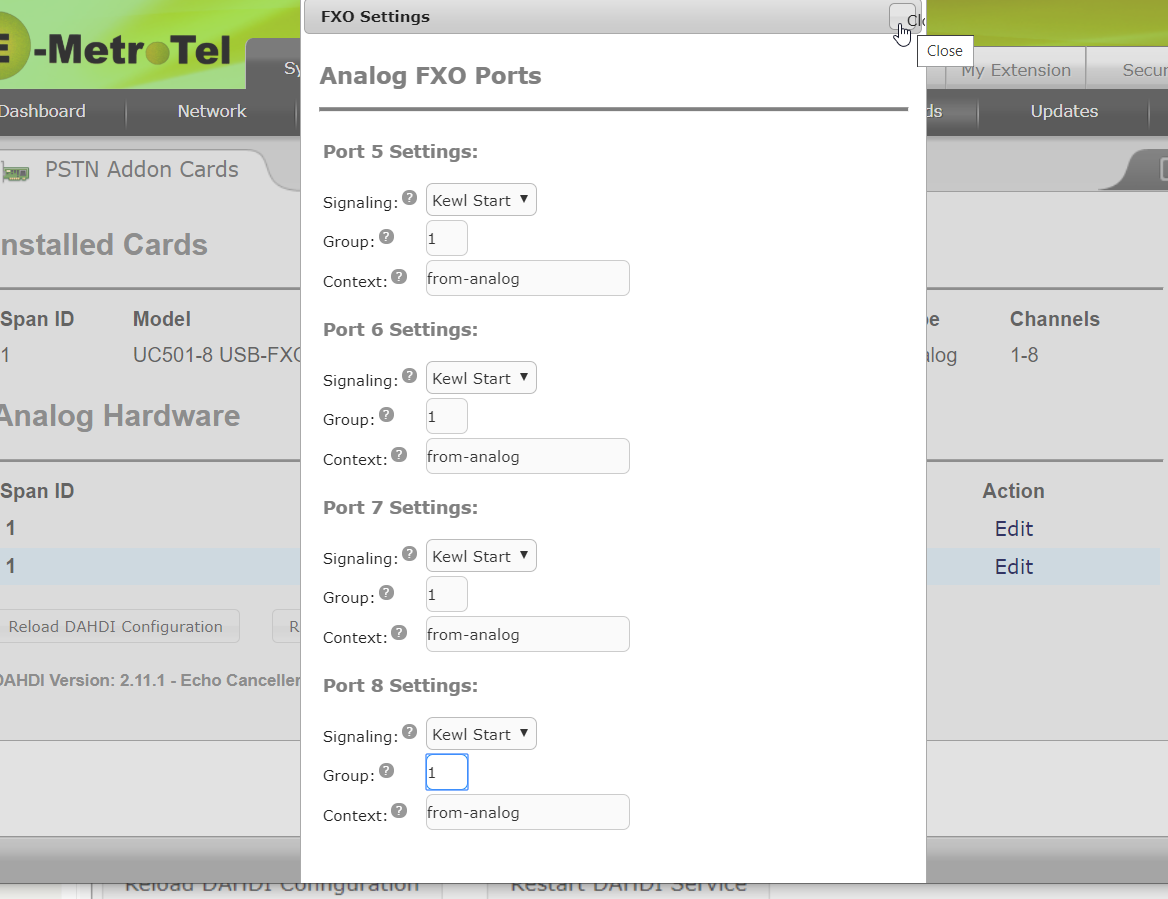
Go to System-->PSTN Cards
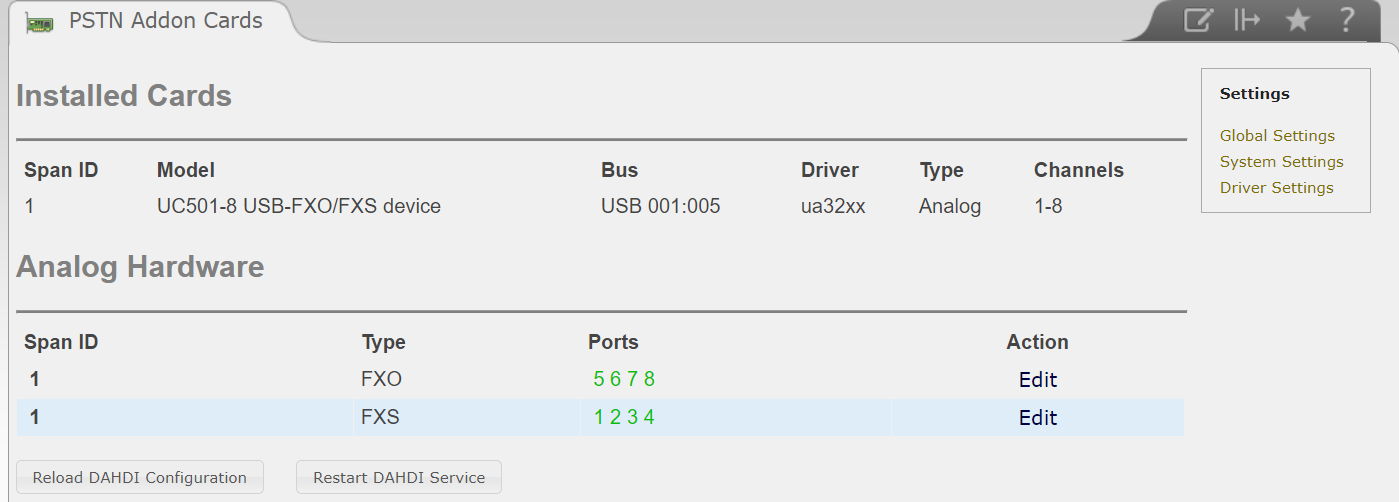
- Click Edit corresponding to the FXO port.
-
For each of the four ports, change the Group value to 1, then click Close
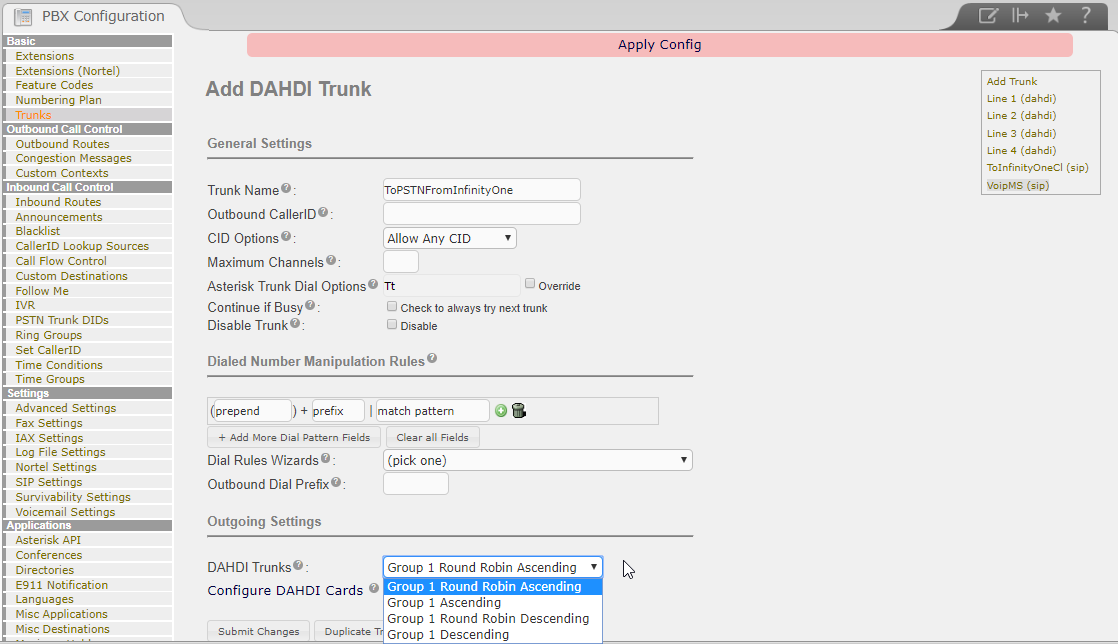
-
On the Galaxy Mini, navigate to PBX-->Trunks, and select Add Dahdi Trunk. Enter a descriptive trunk name and select Group 1 Round Robin Ascending
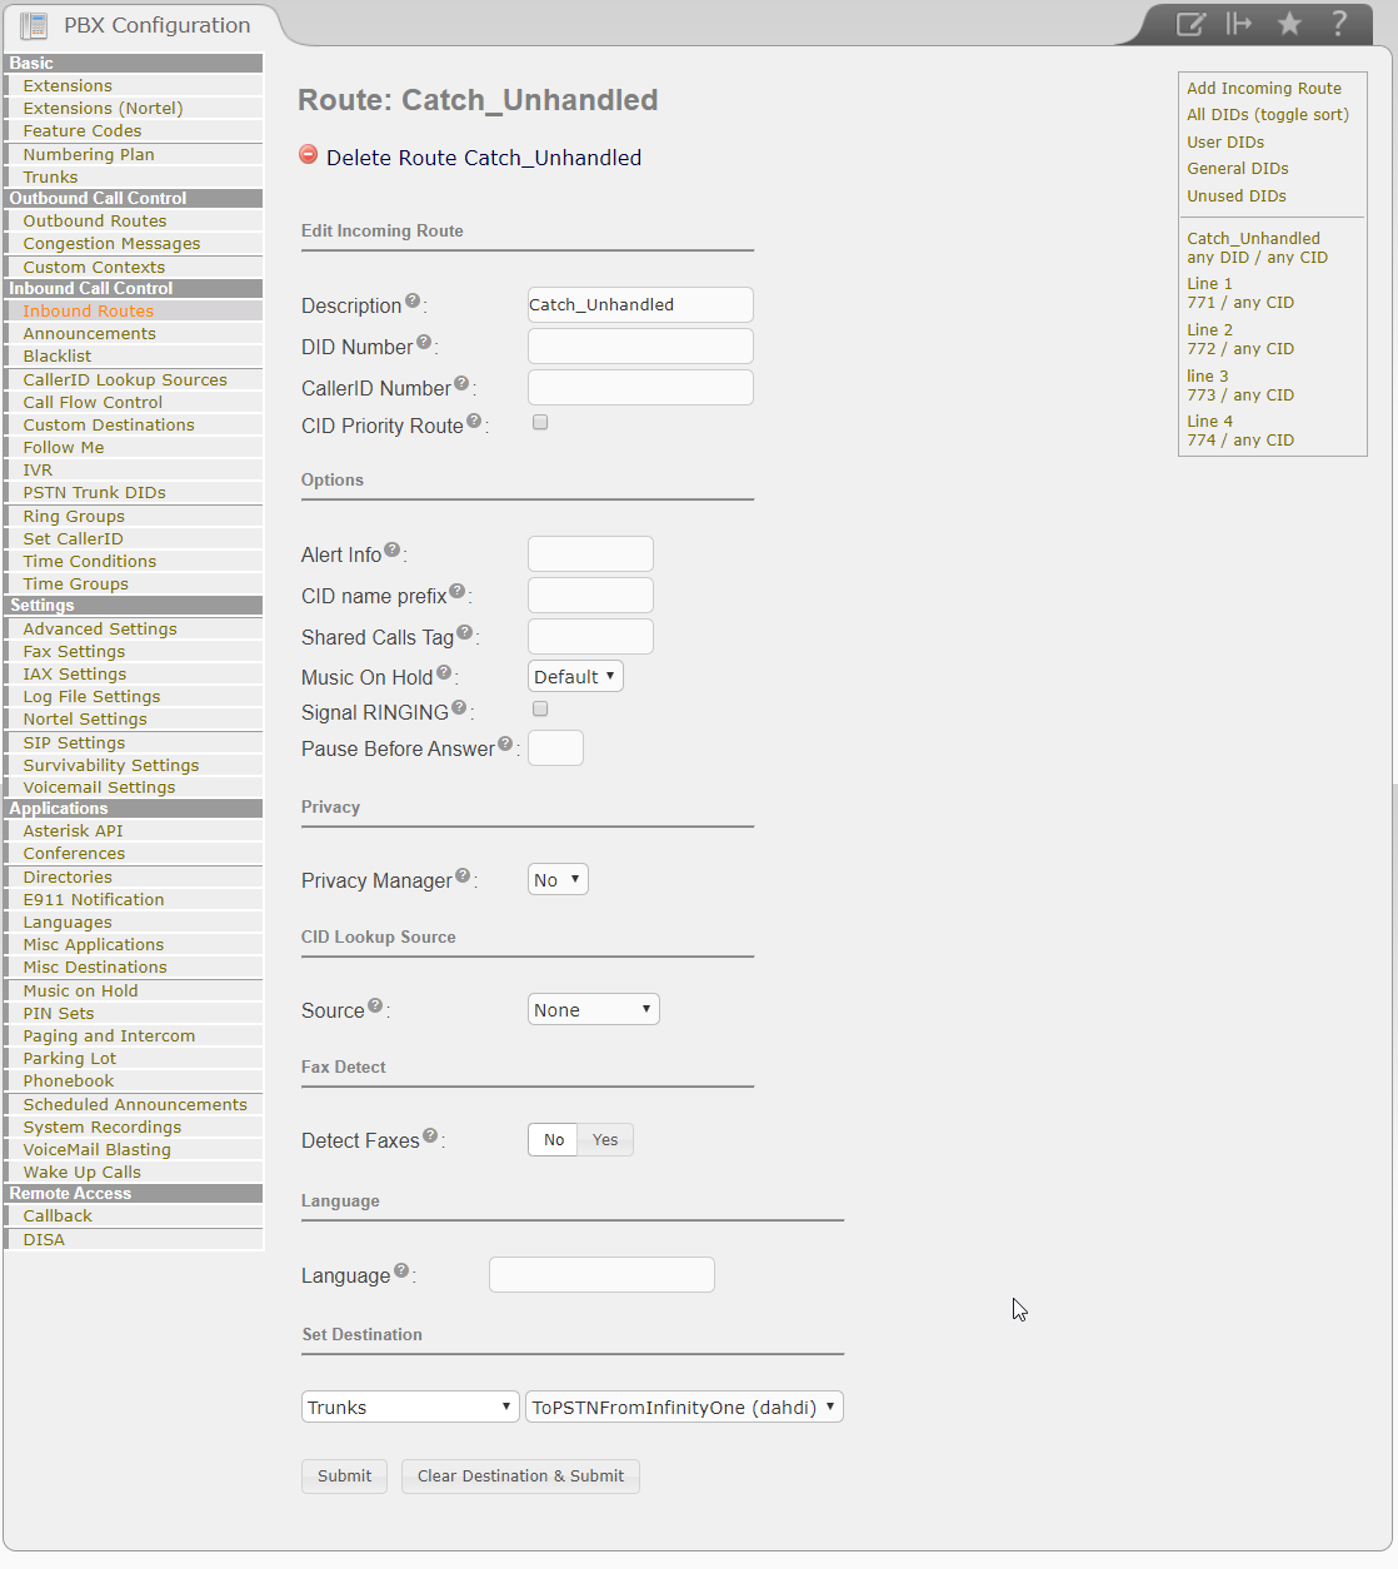
- On the Galaxy Mini, navigate to PBX -> PBX Configuration -> Inbound Routes.
- Create or edit the Catch_All route.
-
Scroll down to the Set Destination section, select Trunks, and then select the PSTN trunk you just created (e.g. ToPSTNfromInfinityOne).
Step Five: Configure Inbound Routes on InfinityOne Work at Home solution

- Navigate to PBX -> PBX Configuration -> Inbound Routes.
- Enter a descriptive name for the route in the Description field.
- Enter the DID number or pattern in the DID Number field.
- Scroll down to the Set Destination section, select the desired destination. Note this may be a Time Condition, IVR, Ring Group, etc.
- Press the Submit button to save the inbound route.
If you have specific handling requirements for different DIDs, you would need to have a route for each one. In this example there are 2 DIDs that terminate directly on the Admin and Boss extensions, and one that terminates on an IVR to provide an announcement of changes to business operation (hours, response times, etc.)
Step Six: Configure Outbound Route to Existing System

- Navigate to PBX -> PBX Configuration -> Outbound Routes.
- Enter a descriptive name in the Route Name field.
- In the Dial Patterns section, enter one or more dial patterns that will use this route to send calls to the existing system.
- In the Trunk Sequence section, select the SIP trunk built in Step Two from the InfinityOne Work at Home solution to the existing system.
- Press the Submit button followed by the Apply Config bar.