

TAPI Application
Overview
The UCX TAPI Service Provider is a "driver" that can be installed on a Microsoft Windows PC which enables the Microsoft TAPI to communicate with the UCX Server and initiate outbound calls and hang up calls using Microsoft Outlook, Microsoft Dialer or any TAPI compatible applications. This Service Provider also supports receiving inbound calls with basic caller information on incoming calls so that some TAPI aware applications can use this information to do screen-popup, displaying caller information on the screen.
The UCX TAPI Service provider in the current release supports:
- Ability to make Outgoing calls, from Microsoft Outlook or any other TAPI aware applications.
- Ability to receive incoming calls with call controls enabled (Answer, Hold, Unhold, Hang-up)
- Ability to monitor call states (Connected, On Hold)
- Ability to receive basic caller information on incoming calls so TAPI aware applications can do screen popup with the caller information.
- UNISTIM Phone support
Please note that any TAPI aware applications (e.g. Microsoft Outlook or Microsoft Dialer) can be used to make outgoing calls. In order to receive incoming calls, any TAPI aware applications that offer incoming call controls can be used. The Microsoft Outlook does not have any built-in support for screen-popping and this functionality can be achieved with Windows programs such as IdentaPop Pro TAPI Outlook Screen Pops or Resource Software International Limited Visual Rapport desktop software. The TAPI Call Monitor can also be used for handling call controls on the incoming call scenario. The TAPI Call Monitor displays the incoming calls and upon selecting the call, the call control buttons gets enabled (e.g. Answer, Hold, Drop etc.).
Prerequisites
-
The UCX TAPI driver is dependent on the Microsoft Visual C++ 2010 Redistributable package. If your computer does not have this package already installed, please follow this link to download and install the package:
https://docs.microsoft.com/en-us/cpp/windows/latest-supported-vc-redist?view=msvc-170
-
The UCX TAPI driver software must be installed using Administrator Privileges on the target computer. See the following Microsoft article for details.
http://technet.microsoft.com/en-us/library/cc781090(v=ws.10).aspx
Application Installer Download
To download the UCX TAPI Service Provider installer, perform the following steps:
- Open the UCX Web-based Configuration Utility
- From the Extras tab, select Downloads
- From the left side column, select UCX Desktop Applications (or E-MetroTel Applications on R4.0)
- Use the Download Link to download the installer file onto your computer. Select the installer that matches the target operating system where the installer is going to be installed, 32 or 64 bit.
- The application can be installed by double clicking on the installer file.
Installation
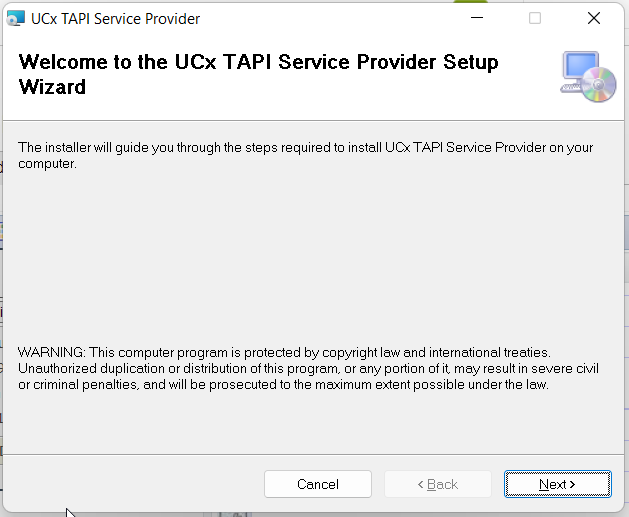
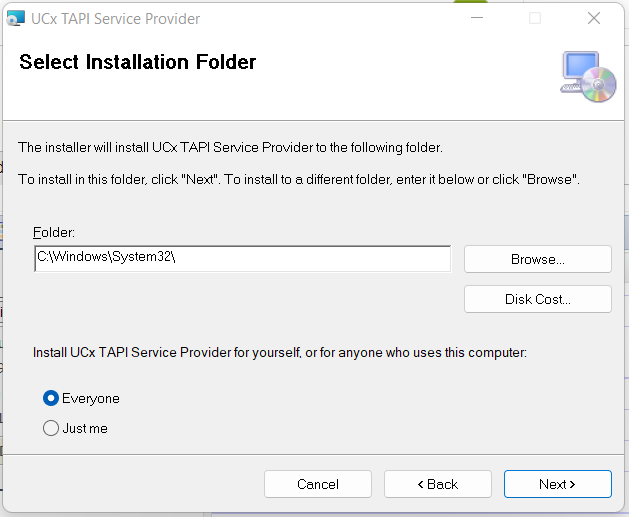
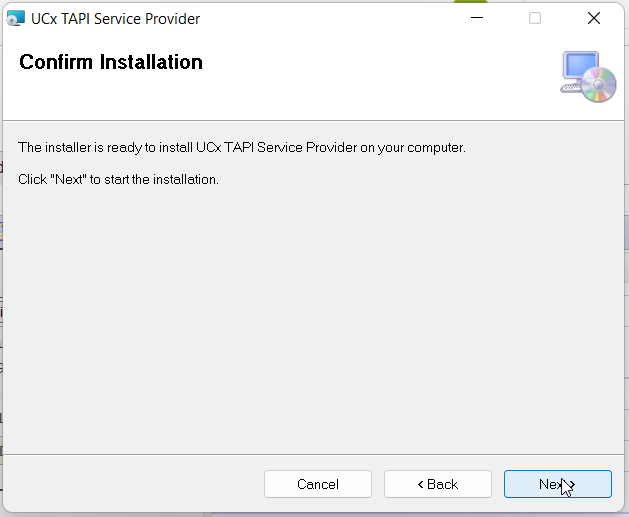
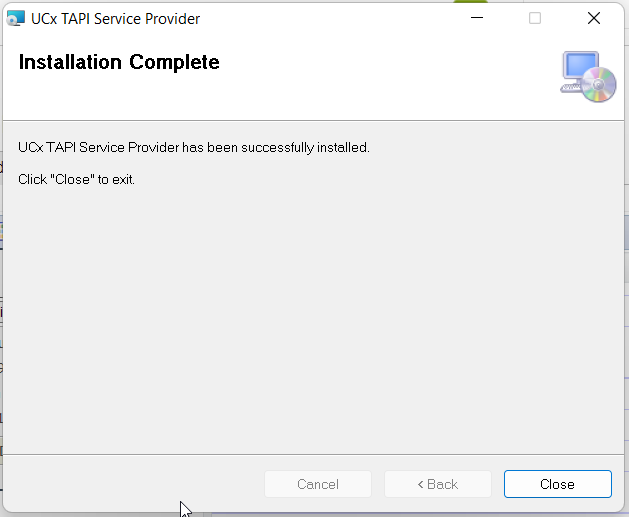
A sample of the UCX TAPI Service Provider installer window progreson a Windows 11 system is shown below. Follow instructions from the setup wizard to complete the installation.
Configuration
After the installation wizard has completed successfully, the UCX TAPI Service Provider needs to be added manually to the Microsoft TAPI service provider list.
Add Service Provider to Microsoft TAPI list
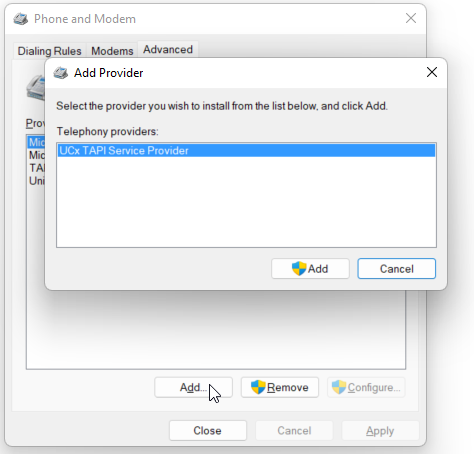
Follow these steps to add the UCX TAPI Service Provider on a 64 bit OS:
- Open the Control Panel and select the Phone and Modem component
- Select the Advanced tab
- On the Advanced tab, select the Add button
- Upon successful install, UCX TAPI Service Provider should show up in the list of providers
- Select UCX TAPI Service Provider from the list of Telephony Providers, and select the Add button.
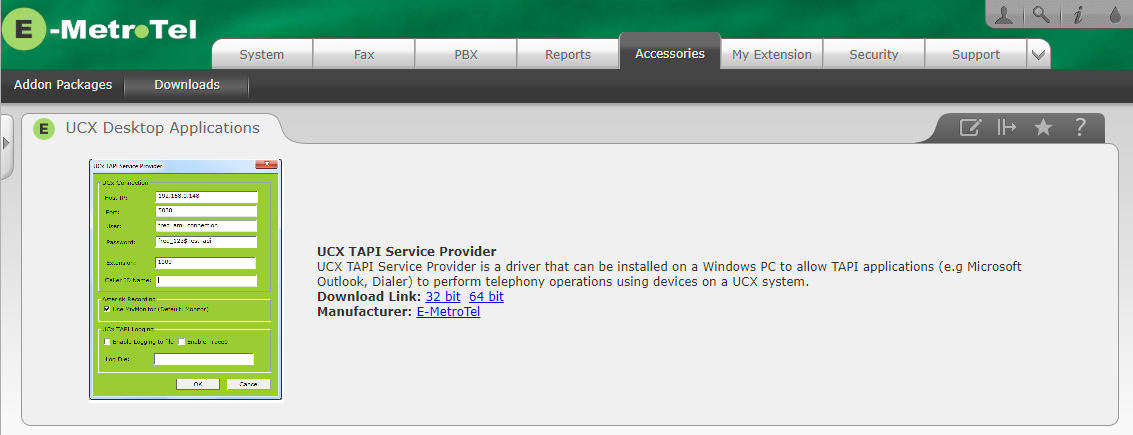
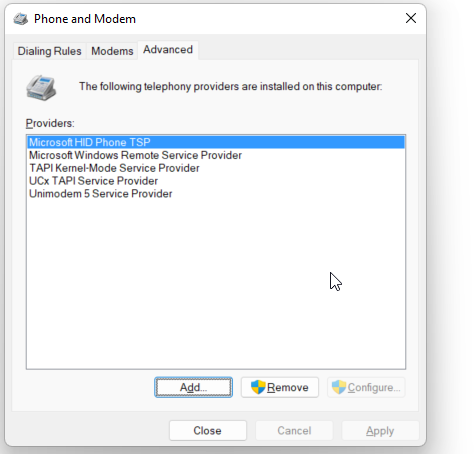
- Select UCX TAPI Service Provider in the list of installed providers, and click the Configure button. The screen shot below shows the configuration page.

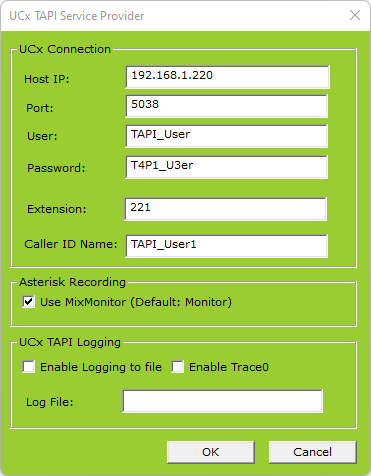
UCX TAPI Service Provider Configuration
Once you have installed the UCX TAPI Provider, select it from the list and click Configure.

Fill in the required fields and click OK to save the configuration.
| Field | Value |
|---|---|
| Host IP | Enter the IP address for the UCX |
| Port | Leave the port as 5038 |
| User |
Enter the same name to be used in the Asterisk API Manager name (e.g. "TAPI_User") |
| Password | Enter the same password to be used in the Asterisk API Manager secret (e.g. "T4P1_U3er" |
| Extension | Enter the UCX extension (e.g. 1000) that is going to be managed by the TAPI service (e.g. the extension of the user's desktop phone) |
| Caller ID Name | This field is optional |
| Asterisk Recording |
Check this box if you want to use MixMonitor instead of Monitor application for your call recording (For more information on MixMonitor, view this link: http://www.voip-info.org/wiki/view/MixMonitor) |
| UCX TAPI Logging | |
|
Check this box to enable logging to file |
|
Leave this box unchecked. Used only by E-MetroTel support for debugging purposes. Note that log file will fill up very quickly if checked. |
UCX Server Configuration
The Asterisk Manager interface configuration is necessary as this is the interface where the UCX TAPI Service provider attempts to connect to the UCX server and make calls.
To create the Asterisk Manager interface, perform the following steps:
- Open the UCX Web-based Configuration Utility
- From the PBX tab, select PBX Configuration
- From the left side column, select Asterisk API
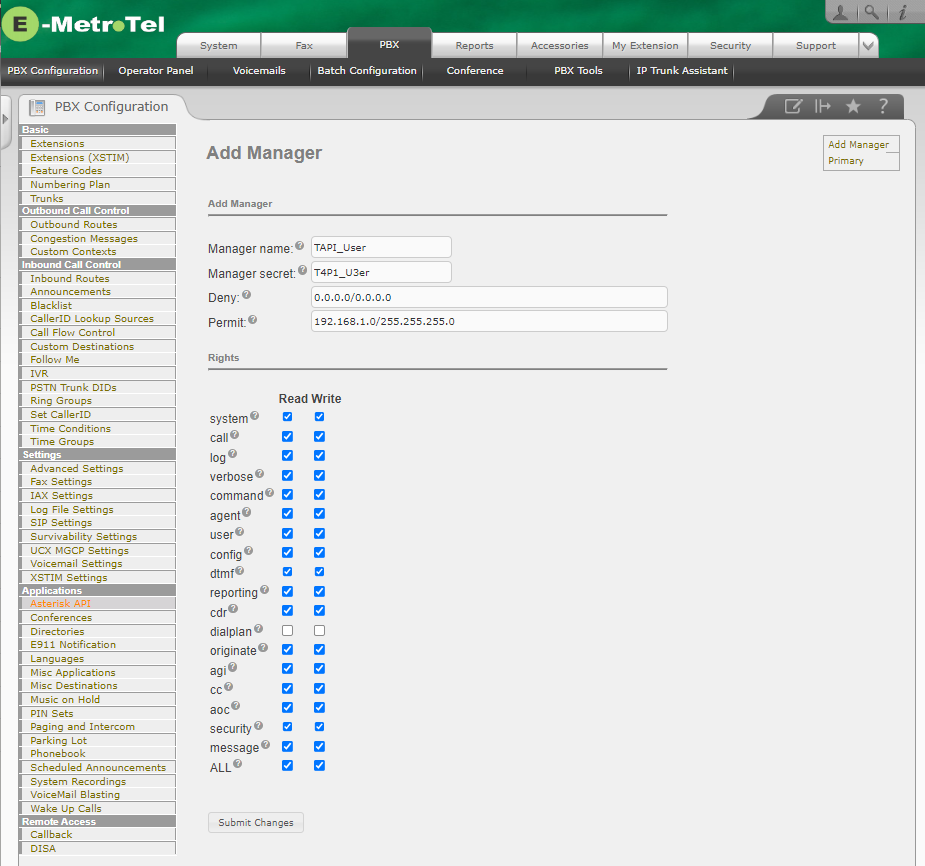
- Enter the user name as it is entered in the TAPI Service Provider above for the Manager name (e.g. "TAPI_User")
- Enter the password as it is entered in the TAPI Service Provider above for the Manager secret (e.g. "T4P1_U3er")
-
The default values for the Deny fields are "0.0.0.0/0.0.0.0" and "127.0.0.1/255.255.255.0", The default value for the Permit field is "192.168.1.0/255.255.255.0" allowing all users on the this subnet to communicate with the TAPI protocol. To add addditional networks to the Permit field, use the "&" character as a separator between multiple subnet/mask entries.
- Select both Read and Write check boxes for all the fields except for "dialplan". (You can click the ALL box at the bottom of each list and then unselect each "dialplan" entry.)
- Press the Submit Changes button
TAPI Firewall Setup
The UCX comes with a built-in Firewall that is disabled by default. If the firewall is activated TAPI will not work correctly. A port and rule needs to be defined in the Firewall for TAPI. Refer to the Firewall page for more information.
Port 5038 must have a definition added for TAPI in the UCX Firewall. See Define Ports for more details on Firewall ports.

A rule must then be created for the TAPI port definition. See Firewall Rules for more details on Firewall rules.

Any changes to the Firewall must then be saved to take affect
